• Home
  • About Me
    • A Simply Raw Life
    • Donuts, Dresses, and Dirt
    • Oh Joy
    • david lebovitz
    • My Life at Playtime
    • Design Mom
    • Curbly
    • AltDesign
    • Peggy Wong
    • A Golden Afternoon
    • Eat, Drink + Be Merry
    • Dylan and Jeni Photography
    • Route 66
    • Cuba A Bittersweet Tale - Part I
    • Cuba A Bittersweet Tale - Part II
    • Cuba A Bittersweet Tale - Part III
    • Cuba A Bittersweet Tale - Part IV
    • Cuba A Bittersweet Tale - Part V
    • Cuba A Bittersweet Tale VI
    • Cuba A Bittersweet Tale - Part VII
    • Cuba A Bittersweet Tale - Part VIII

itsweet & savory itsweet & savory

  • Home
  • About Me
  • Favorites Places
    • A Simply Raw Life
    • Donuts, Dresses, and Dirt
    • Oh Joy
    • david lebovitz
    • My Life at Playtime
    • Design Mom
    • Curbly
    • AltDesign
    • Peggy Wong
    • A Golden Afternoon
    • Eat, Drink + Be Merry
    • Dylan and Jeni Photography
  • Travel Stories
    • Route 66
    • Cuba A Bittersweet Tale - Part I
    • Cuba A Bittersweet Tale - Part II
    • Cuba A Bittersweet Tale - Part III
    • Cuba A Bittersweet Tale - Part IV
    • Cuba A Bittersweet Tale - Part V
    • Cuba A Bittersweet Tale VI
    • Cuba A Bittersweet Tale - Part VII
    • Cuba A Bittersweet Tale - Part VIII
NoKneadBread.jpg

Baking Bread

NoKneadBread.jpg

Have you tried baking bread and it was just always a brick? That’s been my past experience. Like everyone else stuck at home since March I tried my hand at baking bread. I started with something easy. A recipe from PBS of all places. On a sidetrack I’m OBSESSED with PBS. I use this app the most on my Apple TV. How did I NOT know there were recipes too?

It’s called no Knead Bread and it’s the easiest thing ever. You can make this as long as your yeast isn’t expired or you even have yeast. Apparent yeast was another COVID phenomenom of items hoarded or a result of a low supply chain, it was right up there with toilet paper and flour missing from the shelves.

PBS No Knead Bread

I did try my hand many times at making sourdough bread. It’s the starter, it’s just to much for my mind to remember to feed everyday and then every week. Perhaps if I got a pet maybe i’d be more scheduled and remember this. The one time I did make great starter my bread turned out flat and dense. So I at the moment I’ve once again given up on that. One day I’ll get it right, just not today.

Fresh from the oven, cooled slightly so when you slice it crunches and slathered with butter, it really doesn’t get any better than that. You can do it, it’s about to turn colder, we hope for you in Cali really soon. Temperatures on the East Coast are still a bit warm, but it’s changing, and I can’t wait to bake through my second Winter in New York

BreadandButter
Related Posts Plugin for WordPress, Blogger...

Posted in Baking, Bake, Food, Make and tagged with bread, pbs, no knead, baking.

September 8, 2020 by Tanya Ponce.
  • September 8, 2020
  • Tanya Ponce
  • bread
  • pbs
  • no knead
  • baking
  • Baking
  • Bake
  • Food
  • Make
  • Post a comment
Comment
itss_glutenfreealmondcake.jpg

Gluten Free Almond Cake

itss_glutenfreealmondcake.jpg

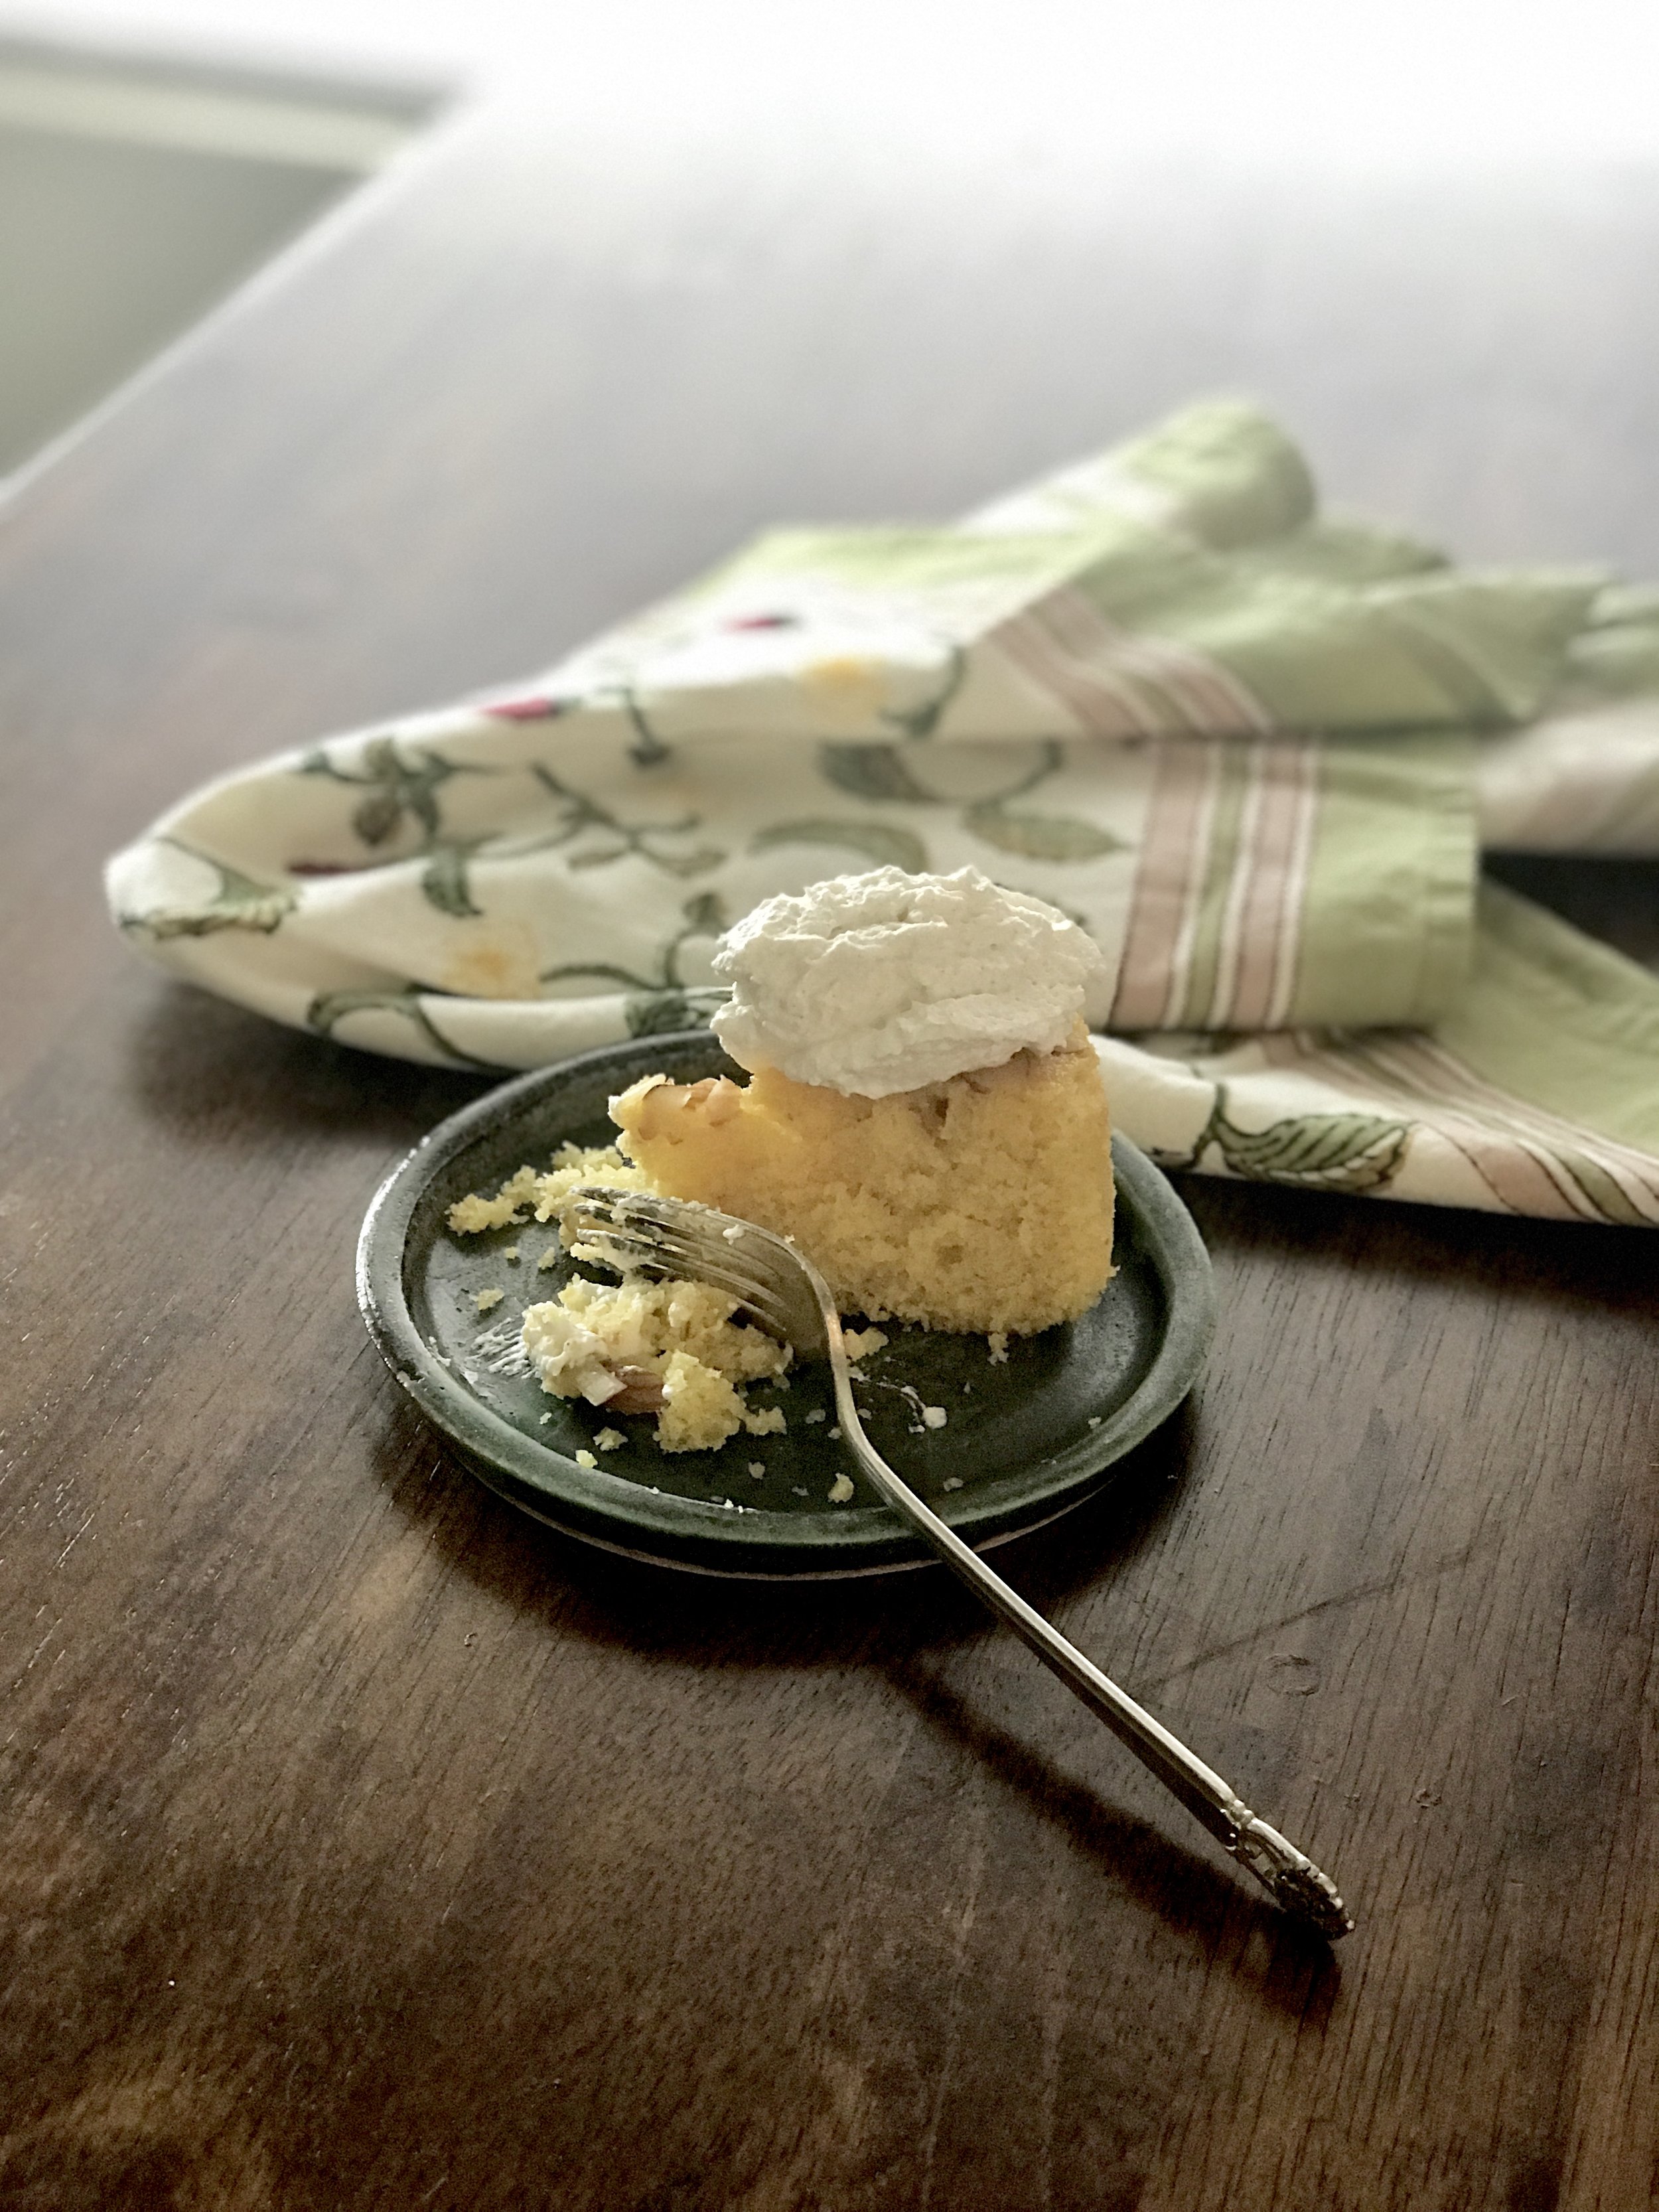
When I post anything on Instagram that has "Gluten free" in the description I usually get quite a few asks on the recipe, this gluten free almond cake was no exception. While I am not a professional recipe tester, I have found an awesome gluten free mix that I can't brag enough about. It's actually from the Huckleberry Cookbook by author Zoe Nathan. I make this in advance and just substitute it for when a recipe calls for regular or cake flour. 

Gluten free flour mix from Huckleberry Cookbook

2 ¾  cups brown rice flour

1 ¾  cups oat flour

1 ¾  cups potato starch

½  cup cornmeal

Almond Cake Ingredients (adapted from Everyday Italian by Giada De Laurentiis)

1/2 cup fine yellow cornmeal

1/2 cup gluten free flour mix from Huckleberry Cookbook

1 tsp baking powder

1 stick (4 ounces or 1/2 cup) unsalted butter, softened

1/4 cup almond paste, cut into half-inch pieces

1 1/4 cups confectioners' (powdered sugar) sugar, plus more for dusting

1/2 tsp pure vanilla extract

2 eggs

4 egg yolks

1/4 cup sour cream

Raw almond slices

itss_raw almondcakebatter.JPG

Directions

Preheat oven to 350 degrees F.

Grease an 8-inch round cake pan with vegetable spray or butter and flour the cake pan.

In a medium bowl, whisk together the cornmeal, gluten-free flour and baking powder and set aside.

Using a stand mixer with a paddle attachment, I have a KitchenAid, or you can use a hand-mixer, beat the butter and almond paste on high speed until smooth, takes up to 5 minutes. Reduce speed to low and slowly add powdered sugar also called confectioners sugar. Mix until thoroughly combined till it's light and fluffy. Increase speed to high and add the vanilla extract, whole eggs and egg yolks. Add the eggs 1 at a time. Mix until well combined. Reduce speed to medium and add the sour cream and dry ingredients and mix until just incorporated.

Pour the batter into the prepared cake pan and smooth the surface with a spatula. I added sliced almonds on top to give the take even more texture. Bake in the lower third of the oven for 35 minutes, or until the cake is golden and pulls away from the sides of the pan. Transfer pan to a wire rack and let cool. Remove from pan and dust with confectioners' sugar if you'd like. Looks fine without it too.

I polled my Instagram followers on what topping to put on the cake and well Cardamom Whipped Cream won. I basically whipped up some heavy whipping cream and added some cardamom, a sprinkle of sugar and a dash of vanilla extract until i liked the tasted. It was the perfect compliment to this cake.

Enjoy.

Related Posts Plugin for WordPress, Blogger...

Posted in Bake, Baking, Food, Sweets and tagged with cake, gluten-free, almond cake, gluten-free almond cake, gluten free, huckleberry.

March 6, 2018 by Tanya Ponce.
  • March 6, 2018
  • Tanya Ponce
  • cake
  • gluten-free
  • almond cake
  • gluten-free almond cake
  • gluten free
  • huckleberry
  • Bake
  • Baking
  • Food
  • Sweets
  • Post a comment
Comment
Peach Almond Cream Tart_tanyaponce

Peach Almond Cream Tart

Peach Almond Cream Tart_tanyaponce

Peaches are in season and once again a friend dropped off a bounty of peaches and plums. I saw a post on Instagram of individual peach tarts and decide right then I was going to make a peach tart. It looked like they may have added a cream to the tart. As live in an almond orchard valley in Central California, you would think almonds would be cheap here, but I've yet to find that. So I decide i was going to figure out how to make almond cream. After a little research I decide to mash up a few recipes to make this delicious Peach Almond Cream recipe. Enjoy this summer delight.

1. Pastry Tart Crust

2 cups all-purpose flour

1/2 teaspoon kosher salt

1 tablespoon sugar

12 tablespoons (1 1/2 sticks) cold butter (small cubes for easier mixing)

2. Almond Cream

7 ounces almond paste (usually sold on the baking aisle of major grocery stores. In the US it comes in tubes or small 8 oz boxes)

1/4 cup unsalted butter, softened

2 large eggs, at room temperature

1 tablespoon sugar

2 tablespoons flour

1/8 teaspoons salt

2 teaspoons Amaretto

3. Peaches and Sugar

2-4 medium peaches, peeled and thinly sliced

1 tablespoon Turbinado sugar

Handful sliced almonds

1. Pastry: I use my Cuisinart food processor for this, its the fastest easiest way to make this happen. You could use a pastry cutter and then do a little kneading, into a ball, just be careful to not over knead. For the pastry, place the flour, salt and sugar in the food processor fitted with the steel blade. Pulse to mix the dry ingredients a few seconds and then add the butter (I cube my butter into small pieces with a knife before putting it the processor), and pulse 10 - 12 times. While the motor is running pour in 1/2 cup of ice water down the feed tube. You will see the pastry quickly comes together into a ball. Dump this onto a floured surface and make sure you knead this into a ball, mine just about always is already in a ball, I just pat it together and wrap in plastic and refrigerate for an hour.

When ready to use take out of the refrigerator for a few minutes before rolling it out. I roll out the tart out just big enough to fit on my cookie sheet. I use either parchment paper or silicone sheet to line my cookie sheet. Fold over the edges to make a nice crust or leave flat.

2. Almond Cream: Place almond paste and butter in a food processor and blend. Add eggs and process until smooth. Add sugar, flour, salt, and Amaretto; process until combined. Pour the almond cream on your rolled out pastry dough. Smooth it a nice even layer over the entire tart (Not the folded over crust if you choose that route)

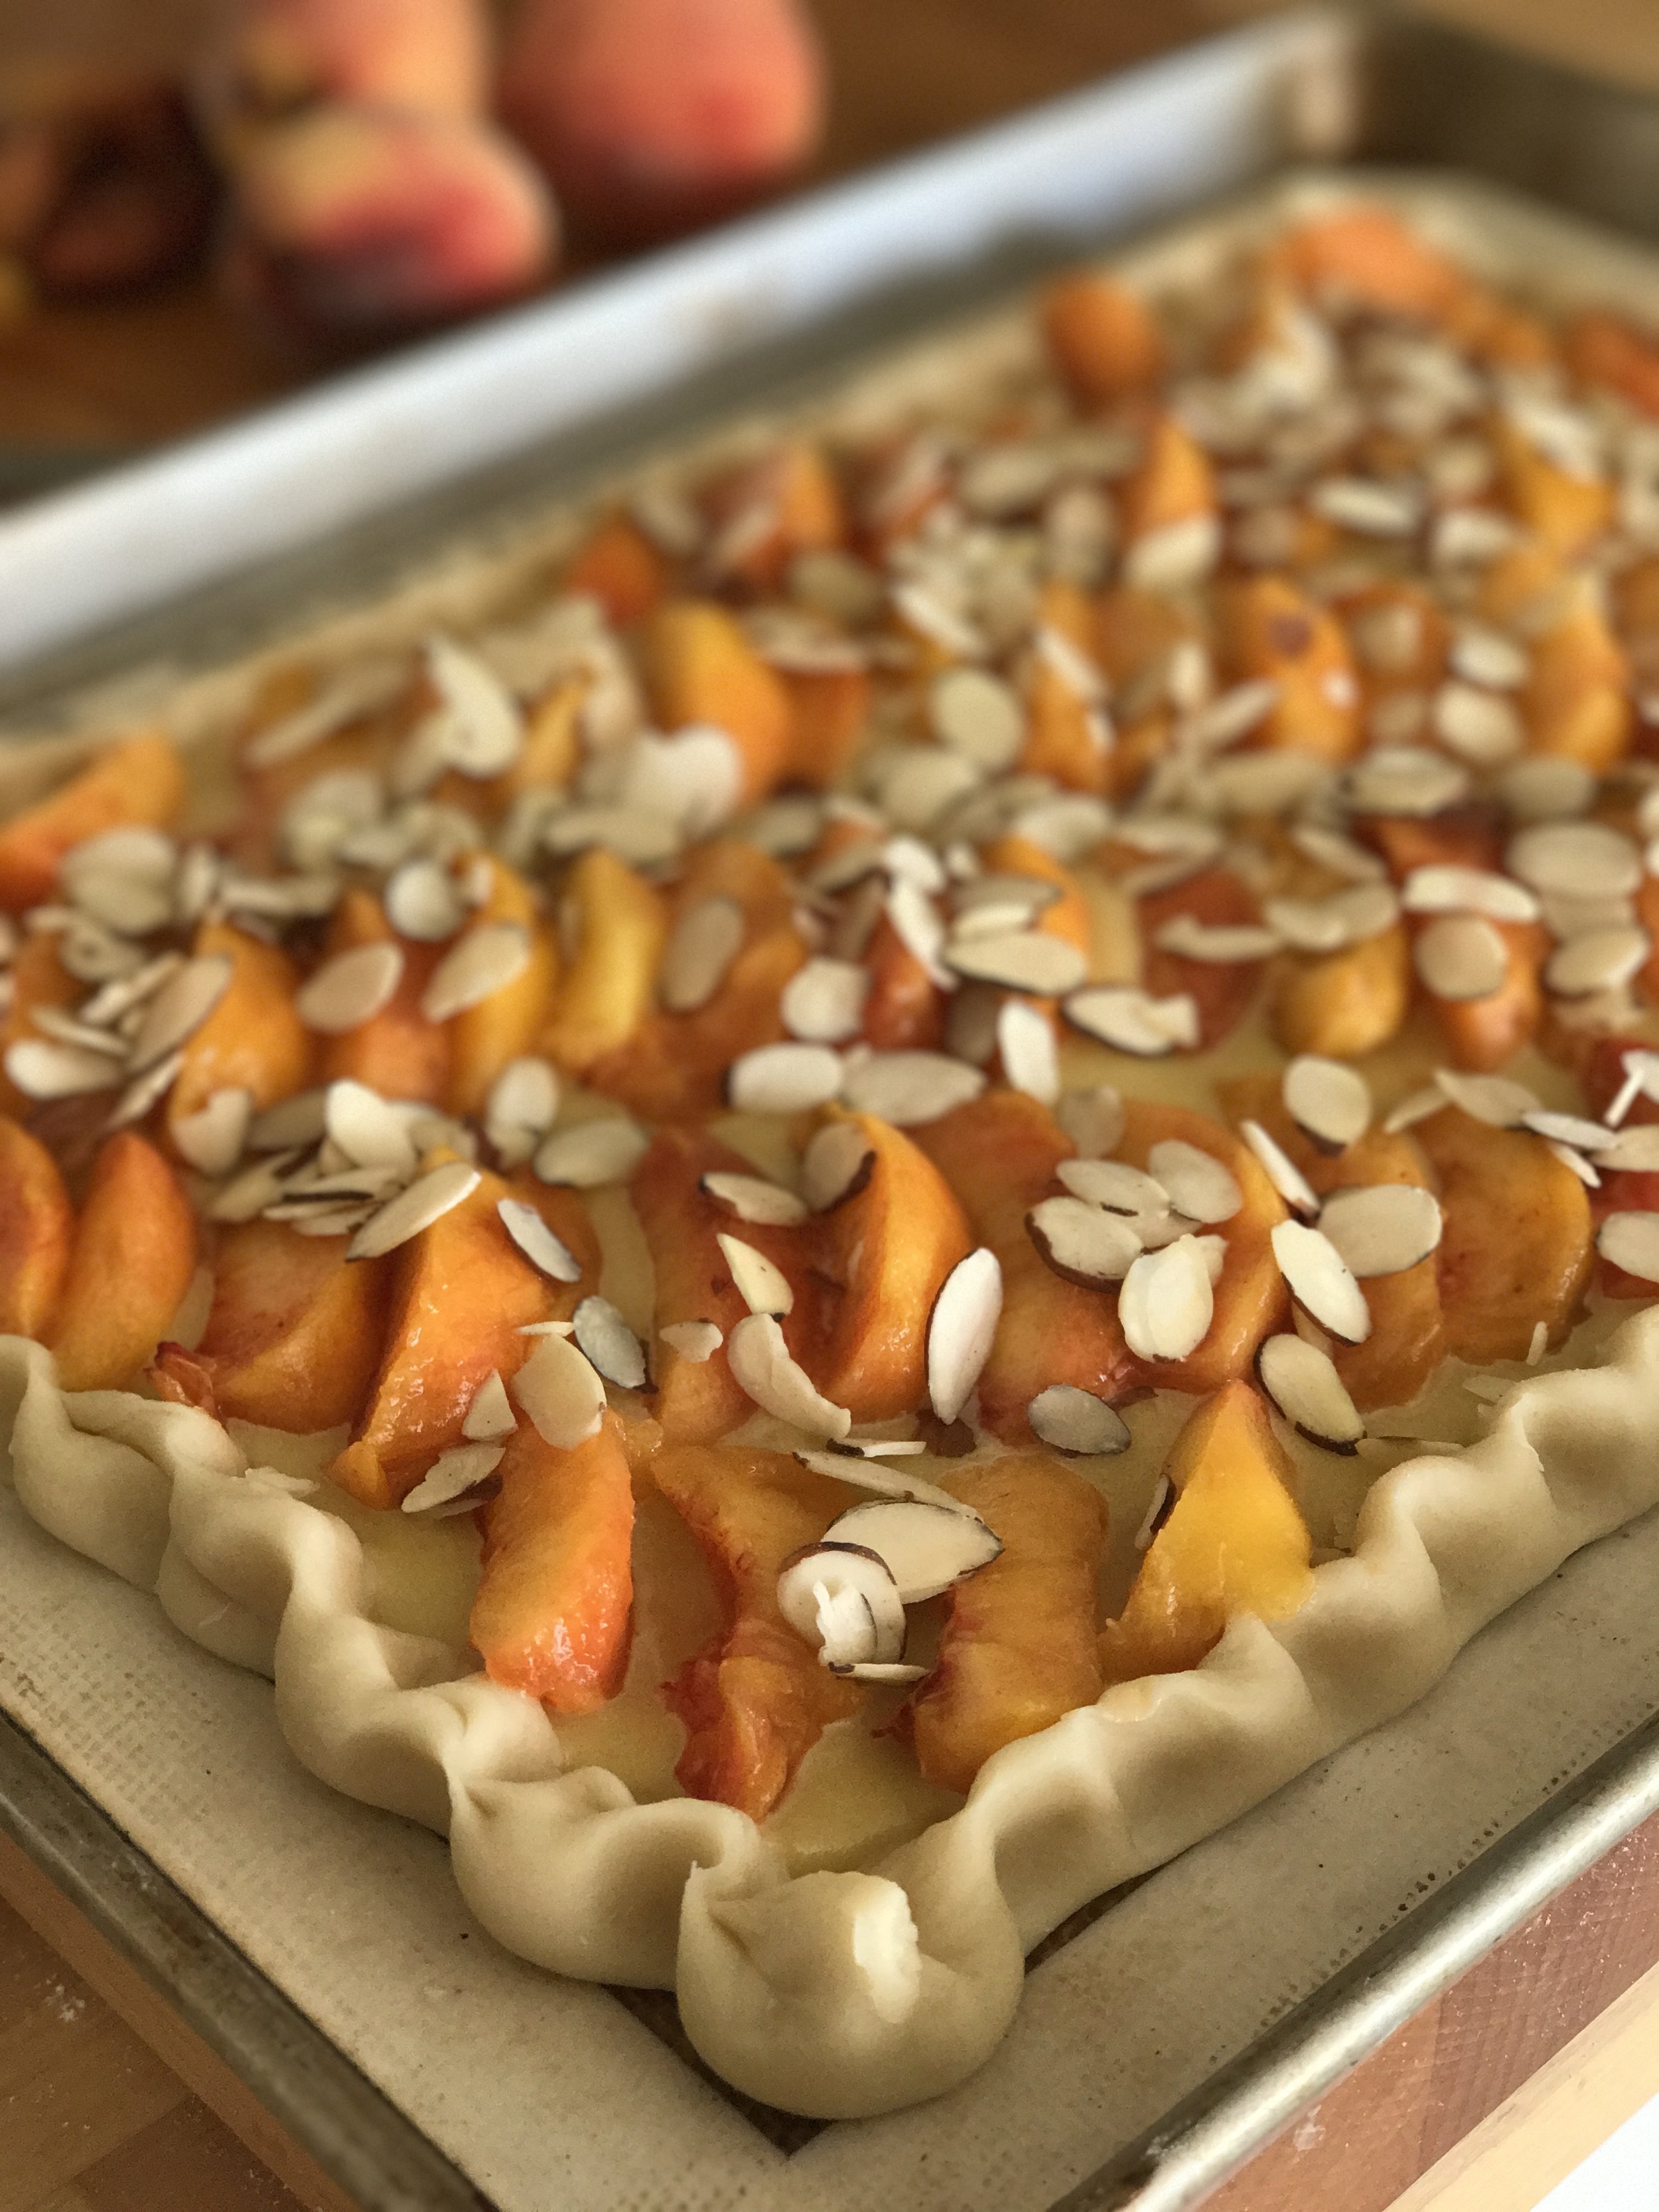
3. Add sliced peaches in a few rows. Be creative on how you want them to lay out. I like them in long rows. Sprinkle with the Turbinado sugar and almond slices and put in the oven.

Raw Peach Almond Cream Tart_tanyaponce

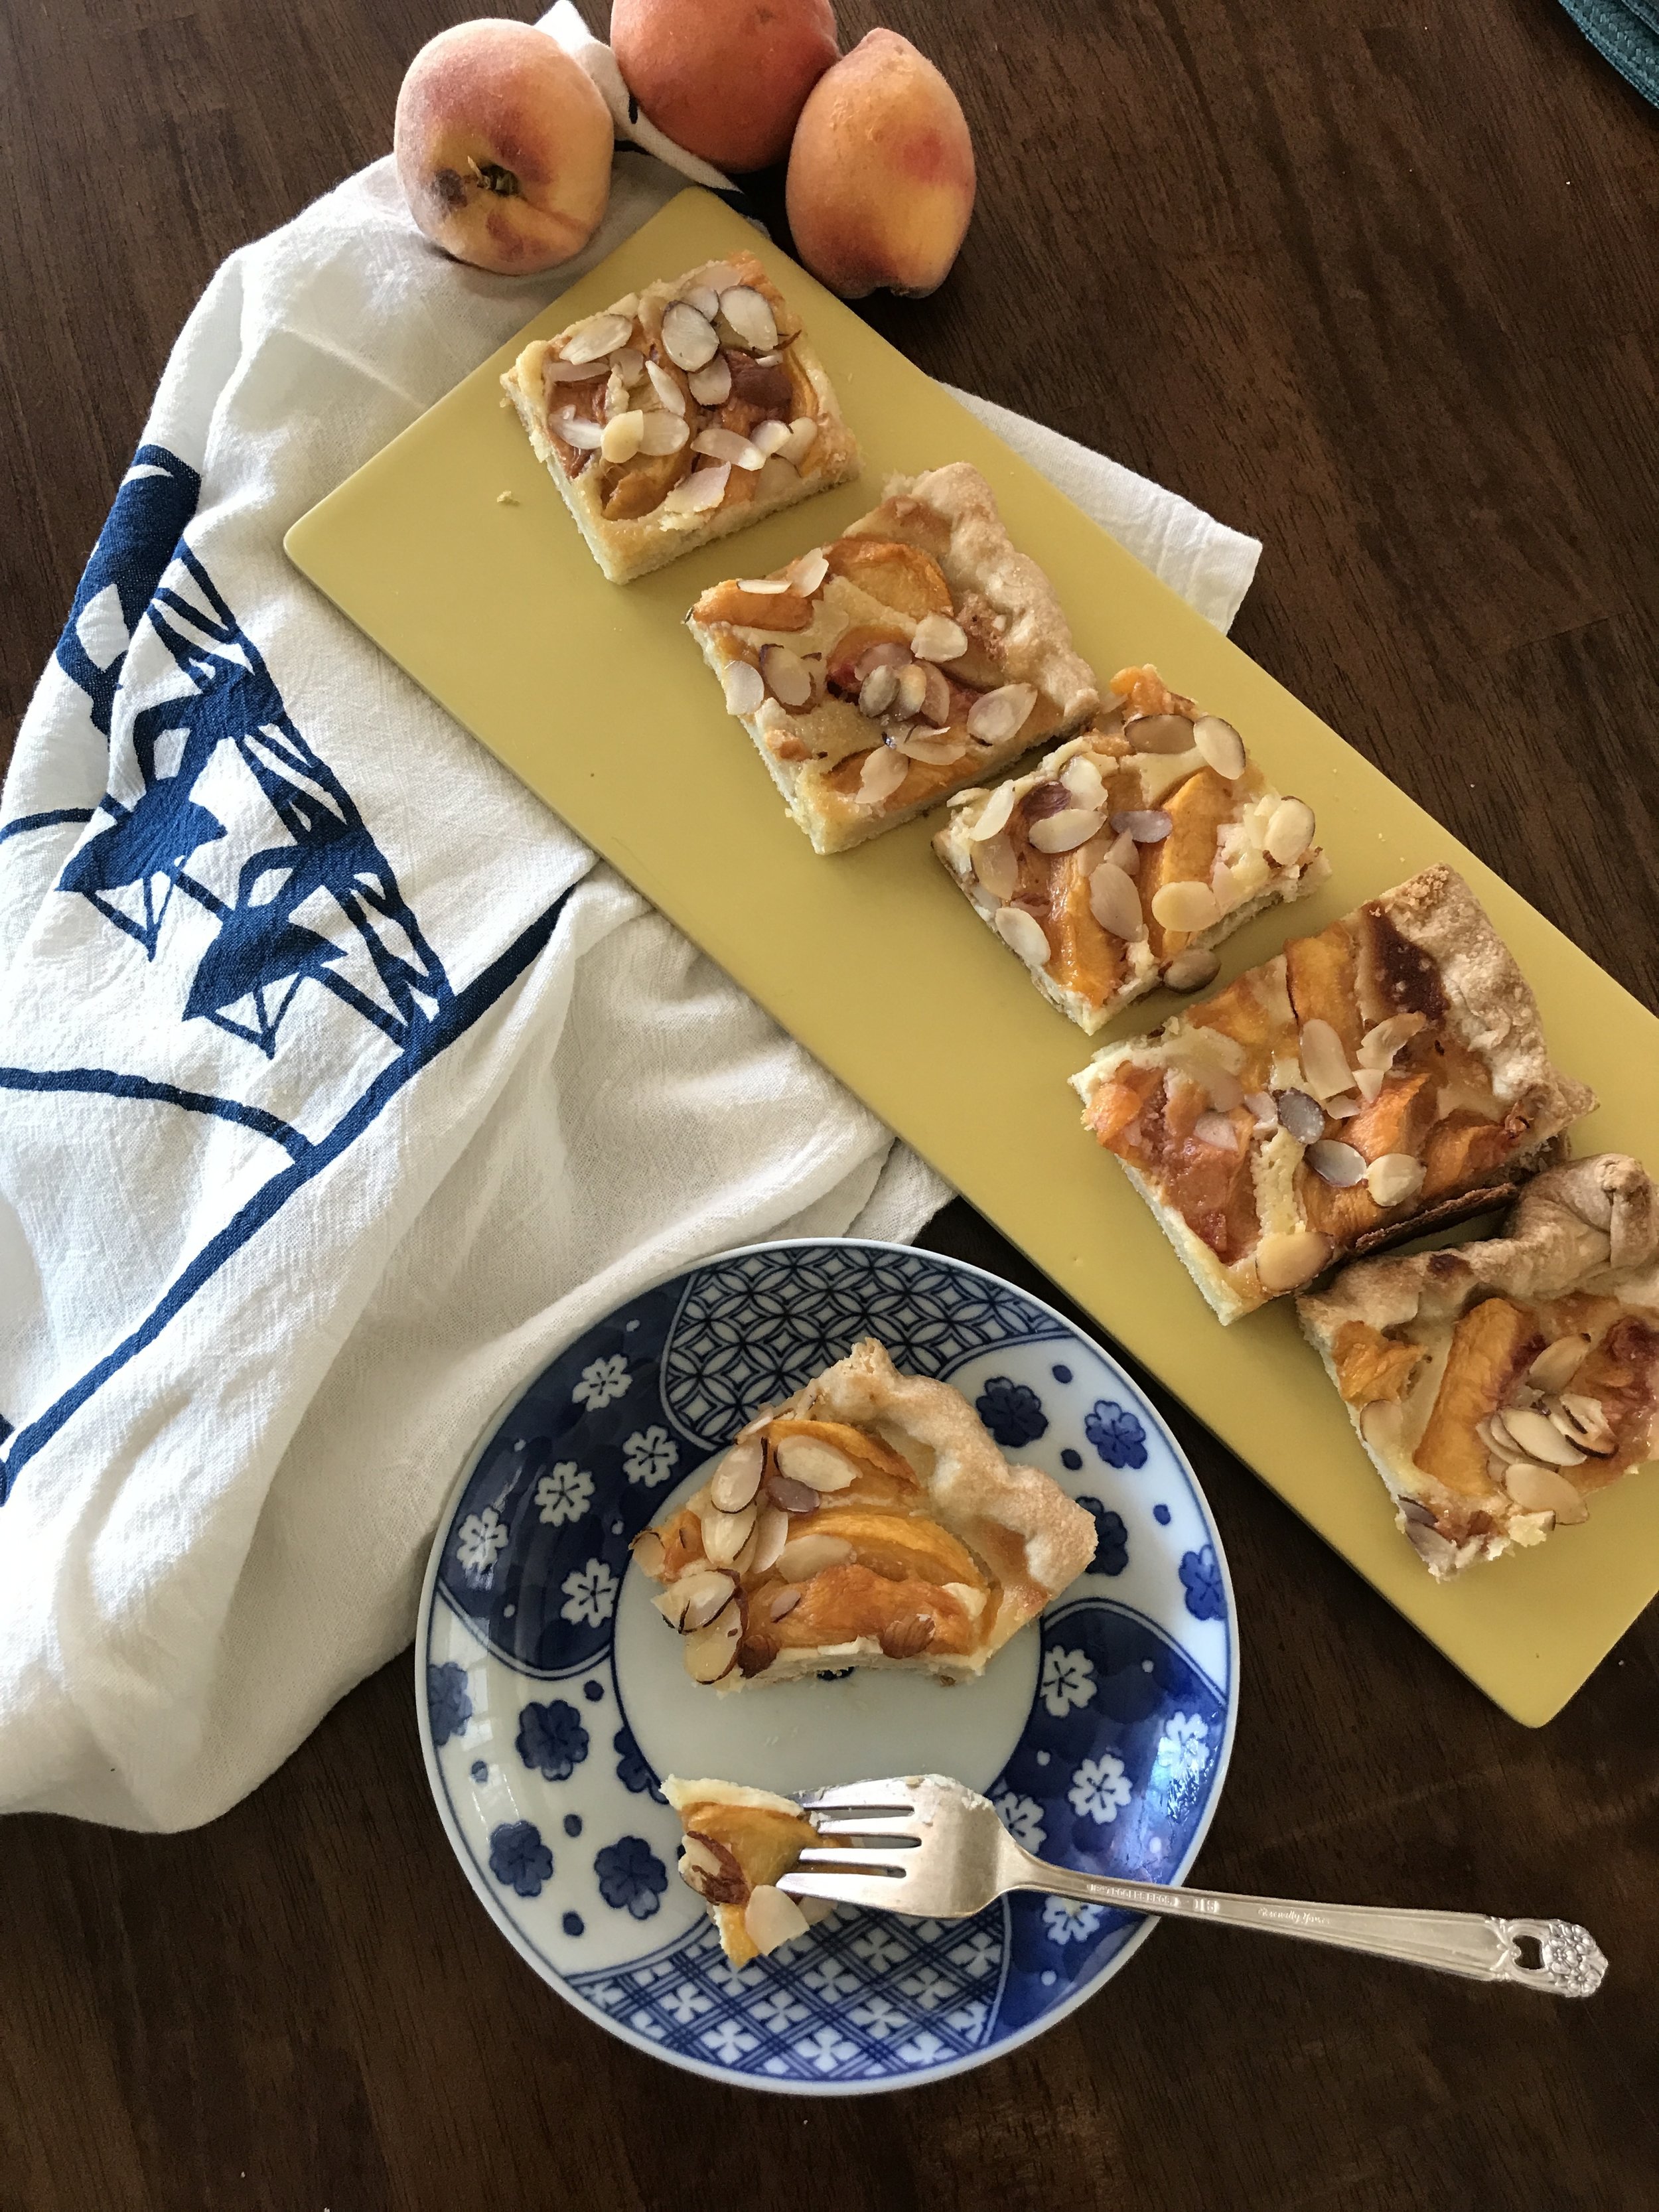
Bake for 45 minutes to an hour in a 400 degree oven. Cool, slice and EAT.

Peach Almond Cream Tart_tanyaponce
Related Posts Plugin for WordPress, Blogger...

Posted in Bake, Baking, Food, Sweets and tagged with Bake, almond, almond cream, peach, peaches, peach almond cream tart, tart.

June 28, 2017 by Tanya Ponce.
  • June 28, 2017
  • Tanya Ponce
  • Bake
  • almond
  • almond cream
  • peach
  • peaches
  • peach almond cream tart
  • tart
  • Bake
  • Baking
  • Food
  • Sweets
  • Post a comment
Comment

Mindless Monday

This is starting to become a thing. Every Monday morning I roll out of bed and shuffle to my light filled office (at home east side of house). and take a conference call or catch up on 35 emails. Then I unglue myself from my chair. Why is that so hard when really who wants to work on Mondays? AND then I go to the kitchen and make coffee, do the dishes and then turn around and inevitably something I have baked over the weekend is right there to go with my coffee. So sugar, though not really a good thing for me, is my friend on Monday's morning. If it helps me conquer this day, then why not. Enjoy your Monday.

Related Posts Plugin for WordPress, Blogger...

Posted in Bake, Life, Coffee and tagged with Mindless Monday.

September 12, 2016 by Tanya Ponce.
  • September 12, 2016
  • Tanya Ponce
  • Mindless Monday
  • Bake
  • Life
  • Coffee
  • Post a comment
Comment

Double Chocolate Hazelnut Biscotti

What to make for dessert when you are having an Italian appetizer party? Biscotti of course. I wanted something simple and not messy that people could walk around with. Although, admittedly biscotti does generate a lot of crumbs, but oh well. I had made biscotti forever ago, but it was a basic recipe, white flour with almonds. This time I wanted chocolate and lots of it. Its funny when I thought about making the biscotti I thought of my friends Dad who also happens to be my neighbor. We've had plenty of meals with their family and I've always seen him dip his biscotti in Prosecco or wine of any kind. So I made sure we had that Prosecco on hand for the party since he and his wife were attending. He did not disappoint. 

Here's how I made them.

Ingredients

2 cups all-purpose flour

1/2 cup unsweetened cocoa powder, I used Valhrona

1 tsp baking soda

1 tsp salt

3/4 stick (6 tablespoons) unsalted butter, softened

1 cup granulated sugar

2 large eggs

1/4 tsp almond extract

1 cup roasted hazelnuts, chopped (I buy raw ones and roast them in a cast iron skillet. After they cool i rub as much of the skin off as I can, but you can leave it on if you'd like)

3/4 cup dark chocolate chips

Preheat oven to 350°F. Butter a cookie sheet.

In a bowl whisk together flour, cocoa powder, baking soda, and salt. In another bowl with an electric mixer beat together butter and sugar and almond extract until light and fluffy. Add eggs and beat until combined. Stir in flour mixture to form a stiff dough. Stir in chopped hazelnuts and dark chocolate chips.

On prepared baking sheet, you might want to flour your hands, form dough into two slightly flattened logs, each 12 inches long and 2 inches wide. I find that longer thinner logs is the way to go, that way when you get to the slicing part you have smaller biscotti cookies, but that's entirely up to you.  Bake logs about 35 minutes, or until slightly firm to the touch. Cool biscotti on baking sheet 5 minutes.

On a cutting board cut biscotti diagonally into 3/4-inch slices. Arrange biscotti on baking sheet and bake until crisp, about 10 minutes. Cool biscotti on a rack. You can keep them in an airtight container for 1 week and frozen, 1 month. I like my biscotti crunching and hard so I baked them slightly longer, no more than a total of 20 minutes.

Final task was packaging and sending them on their way. I'm loving these new gift tags from Tiny Prints, which I personalized, actually I'm kind of addicted to them. My friends loved the little packages of goodies and a few friends will get them in the mail with the recipe on my new note pad (seen above) which incidentally looks perfect with the biscotti.

Related Posts Plugin for WordPress, Blogger...

Posted in Bake, Baking, Food, Make, Sweets and tagged with double chocolate hazelnut biscotti, chocolate, chocolate biscotti, chocolate hazelnut biscotti.

May 4, 2014 by Tanya Ponce.
  • May 4, 2014
  • Tanya Ponce
  • double chocolate hazelnut biscotti
  • chocolate
  • chocolate biscotti
  • chocolate hazelnut biscotti
  • Bake
  • Baking
  • Food
  • Make
  • Sweets
  • 4 Comments
4 Comments
BrandyChocolateTruffleswCoconut.jpg

Brandy Infused Chocolate Truffles With Coconut

BrandyChocolateTruffleswCoconut.jpg

That has to be the longest title ever, but there is so much to say about these brandy infused chocolate truffles that I rolled into shredded coconut, OH MY! This recipe is adapted from Alton Browns recipe on Food Network. I made these for my friend Deborah's photo styling project, here, but of course was able to sample a few myself before delivery. Here's the recipe and my notes.

Ingredients

10 ounces bittersweet chocolate, finely chopped

3 tbsp unsalted butter

1/2 cup heavy cream

1 tbsp light corn syrup

1/4 cup of brandy

1/2 cup cocoa powder (Valrohna cocoa powders is what I use to roll the chocolate truffles in)

Shredded Coconut (Trader Joe's brand is what I had on hand to roll the truffles in, but you can use any brand)

BrandyChocolateTruffleswCoconut4.jpg

Directions

Place finely chopped chocolate and butter in a glass mixing blow and mircrowave for 30 seconds. Remove, stir and repeat the process one more time. Set aside.

Heat the cream and corn syrup in a small saucepan over medium heat until simmering. Remove from heat and pour the mixture over the chocolate, let it stand for no more than 2 minutes. Stir gently with a rubber spatula until smooth and creamy. Here's the boozy part, pour the 1/4 cup of brand into the mixture and stir. You can pour the mixture into a square glass backing dish or leave it in the glass bowl and refrigerate for 1 hour.

For rolling out the truffles I'd suggest using a small ice cream scoop. I used and melon baller and it was hard to get the chocolate out of the baller (is that a word, well it is now), so I switched to a small teaspoon and used my warm hands to roll the truffle balls. Next time small ice cream scoop like this one from Target.

BrandyChocolateTruffleswCoconut2.jpg

Once formed you can roll them in the cocoa powder if you want them covered only in that, but I opted for rolling them in shredded coconut. Let me tell you the texture and brandy taste is exciting and surprising. Enjoy!

Related Posts Plugin for WordPress, Blogger...

Posted in Baking, Bake, Food, Sweets and tagged with brandy infused chocolate truffles with coconut, shredded coconut, brandy infused chocolate truffles, truffles, chocolate truffles, chocolate, brandy chocolate.

March 5, 2014 by Tanya Ponce.
  • March 5, 2014
  • Tanya Ponce
  • brandy infused chocolate truffles with coconut
  • shredded coconut
  • brandy infused chocolate truffles
  • truffles
  • chocolate truffles
  • chocolate
  • brandy chocolate
  • Baking
  • Bake
  • Food
  • Sweets
  • Post a comment
Comment
VerticalChPBBars.jpg

Chocolate Peanut Butter Bars

VerticalChPBBars.jpg

So a while back I made these Chocolate Peanut Butter bars for a book swapping party here. Since then I've made them a few more times and am now getting to a place where I'm perfecting the recipe. Plus I had a good excuse this week as I was commissioned to create these for a photo style shoot my friend Deb was doing with VivaVantage paper towels.

Seriously Chocolate AND Peanut Butter, I think this probably goes down as my favorite flavor combo. It's like making sure you have two things that match, makes me think of this quote from the movie Friday when Chris Tucker is looking for something to eat, "No sugar? Y'all ain't never got two things that match. Either y'all got Kool-aid, no sugar. Peanut butter, no jelly. Ham, no burger." And now we can add "peanut butter no chocolate." Accept we have BOTH. Here's the recipe with a few of my notes on what I have found that works best and a note on what I 'll do the next time around. And don't be afraid that it's 3 layers, it's really not that hard to make.

ChocPeanutButterBars_Ingredients.jpg

Chocolate Peanut Butter Bars

Ingredients Bottom Layer

1/2 cup unsalted butter

1/4 cup sugar

5 tbsp unsweetened cocoa (I use Valhrona)

1 egg, beaten

1 1/4 cups graham cracker crumbs

3/4 cup coarsely crush pretzels (I find the thinner salted versions work better than the thick ones - I only had the thick ones for the shoot above, but that's my lesson learned)

Directions

If you have a double boiler use that to melt the butter, sugar and cocoa.  I use a metal bowl over a lightly simmering pot of water (water should not touch the bowl).

While bowl is still over the water, add the beaten egg a little at a time until the mixtures thickens.

Remove bowl from the heat and add the graham cracker crumbs and crushed pretzels. After they are well mixed press the crumbs into a flattened layer an 8x8 cake pan. I use square non-stick baking pan and line it with two pieces of parchment paper crisscross, this makes it easier to get the bars out of the pan for cutting the squares.  Set this aside while you start the middle layer.

Middle Layer Ingredients

1/2 cup unsalted butter, melted and slightly cooled.

2/3 cup powdered sugar, sifting this first is good to get any clumps out.

1 cup smooth, natural peanut butter (no salt added) I like Laura Scudder's.

1/2 tsp salt (only use if you bought unsalted PB, otherwise adjust to taste.

1 tsp vanilla

Directions

Add peanut butter and melted butter together in a small bowl, mix in sugar, salt and vanilla until it forms a thick paste. Now it's time to add the peanut butter over the bottom layer of chocolate pretzel goodness. I have thought about doubling the peanut butter layer as I'd like a bit more thickness, so I might try that next time. Now put all of this in the refrigerator while you make the final Top layer. This way the peanut butter has time to get a little stiff, otherwise it's hard to spread the final chocolate layer on top.

Top Layer Ingredients

5 oz. semi sweet chocolate chips (I love bittersweet or just straight dark chocolate bars for this layer, but use any fine chocolate you like)

1 tbsp unsalted butter

Pink Himalayan salt (or any fine sea salt)

Directions

Again if you have a double boiler use that to melt the chocolate and butter.  I use a metal bowl over a lightly simmering pot of water (water should not touch the bowl). Stir until smooth.

Now take the pan from the refrigerator and pour the chocolate mixture over the peanut butter layer and spread it evenly. Then return to the refrigerator about 10 minutes. (top should be a little soft still). Sprinkle light with the Himalayan salt and return the the fridge and let it completely cool until it becomes hard.

Take out the parchment papered bars and cut into squares or rectangles. I've done both and wrapped them in paper with twine for a special presentation, but it's faster to just cut in and eat it, sooooo good. I have a batch in my fridge now that I keep gnawing at, enjoy this perfect match of flavors.

Itss_ChocPeanutButterBars.jpg
Download Recipe PDF
Related Posts Plugin for WordPress, Blogger...

Posted in Bake, Baking, Food, Sweets, Things, Make and tagged with chocolate peanut butter bars, peanut butter, chocolate, sweets.

February 13, 2014 by Tanya Ponce.
  • February 13, 2014
  • Tanya Ponce
  • chocolate peanut butter bars
  • peanut butter
  • chocolate
  • sweets
  • Bake
  • Baking
  • Food
  • Sweets
  • Things
  • Make
  • 1 Comment
1 Comment
LBB ChocEclair.jpg

La Brea Bakery

LBB ChocEclair.jpg

You know when you stumble upon something great and you didn't even plan it. Well today was one of those days. I started off on the trek to Muji in Hollywood, which isn't really that far away, but in L.A. traffic it can be an eternity.

LaBrea Bakery.jpg

So on my way I saw that the La Brea Bakery was open. I had read that Nancy SIlverton was opening up this bakery 25 years after she started this business. She owns two other restaurants, Pizzaria Mozza and Osteria Mozza. Both on my list of favorite places to eat in Los Angeles.  Not to mention all the awards she has one, just go look her up on Wikipedia, she's amazing. So I made a mental note to stop by on my way back. And glad I am.

La Brea Bakery.jpg

Little did I know that today was the GRAND OPENING. Seriously my timing was perfect, well almost. I saw people coming out with bags of baguettes, jumping for joy and super full of from all the goodies they had partaken. Funny thing is I only really wanted a cup of coffee, that wasn't Starbucks, and a french baguette. 

LBB BlueberryCheeseDanish.jpg

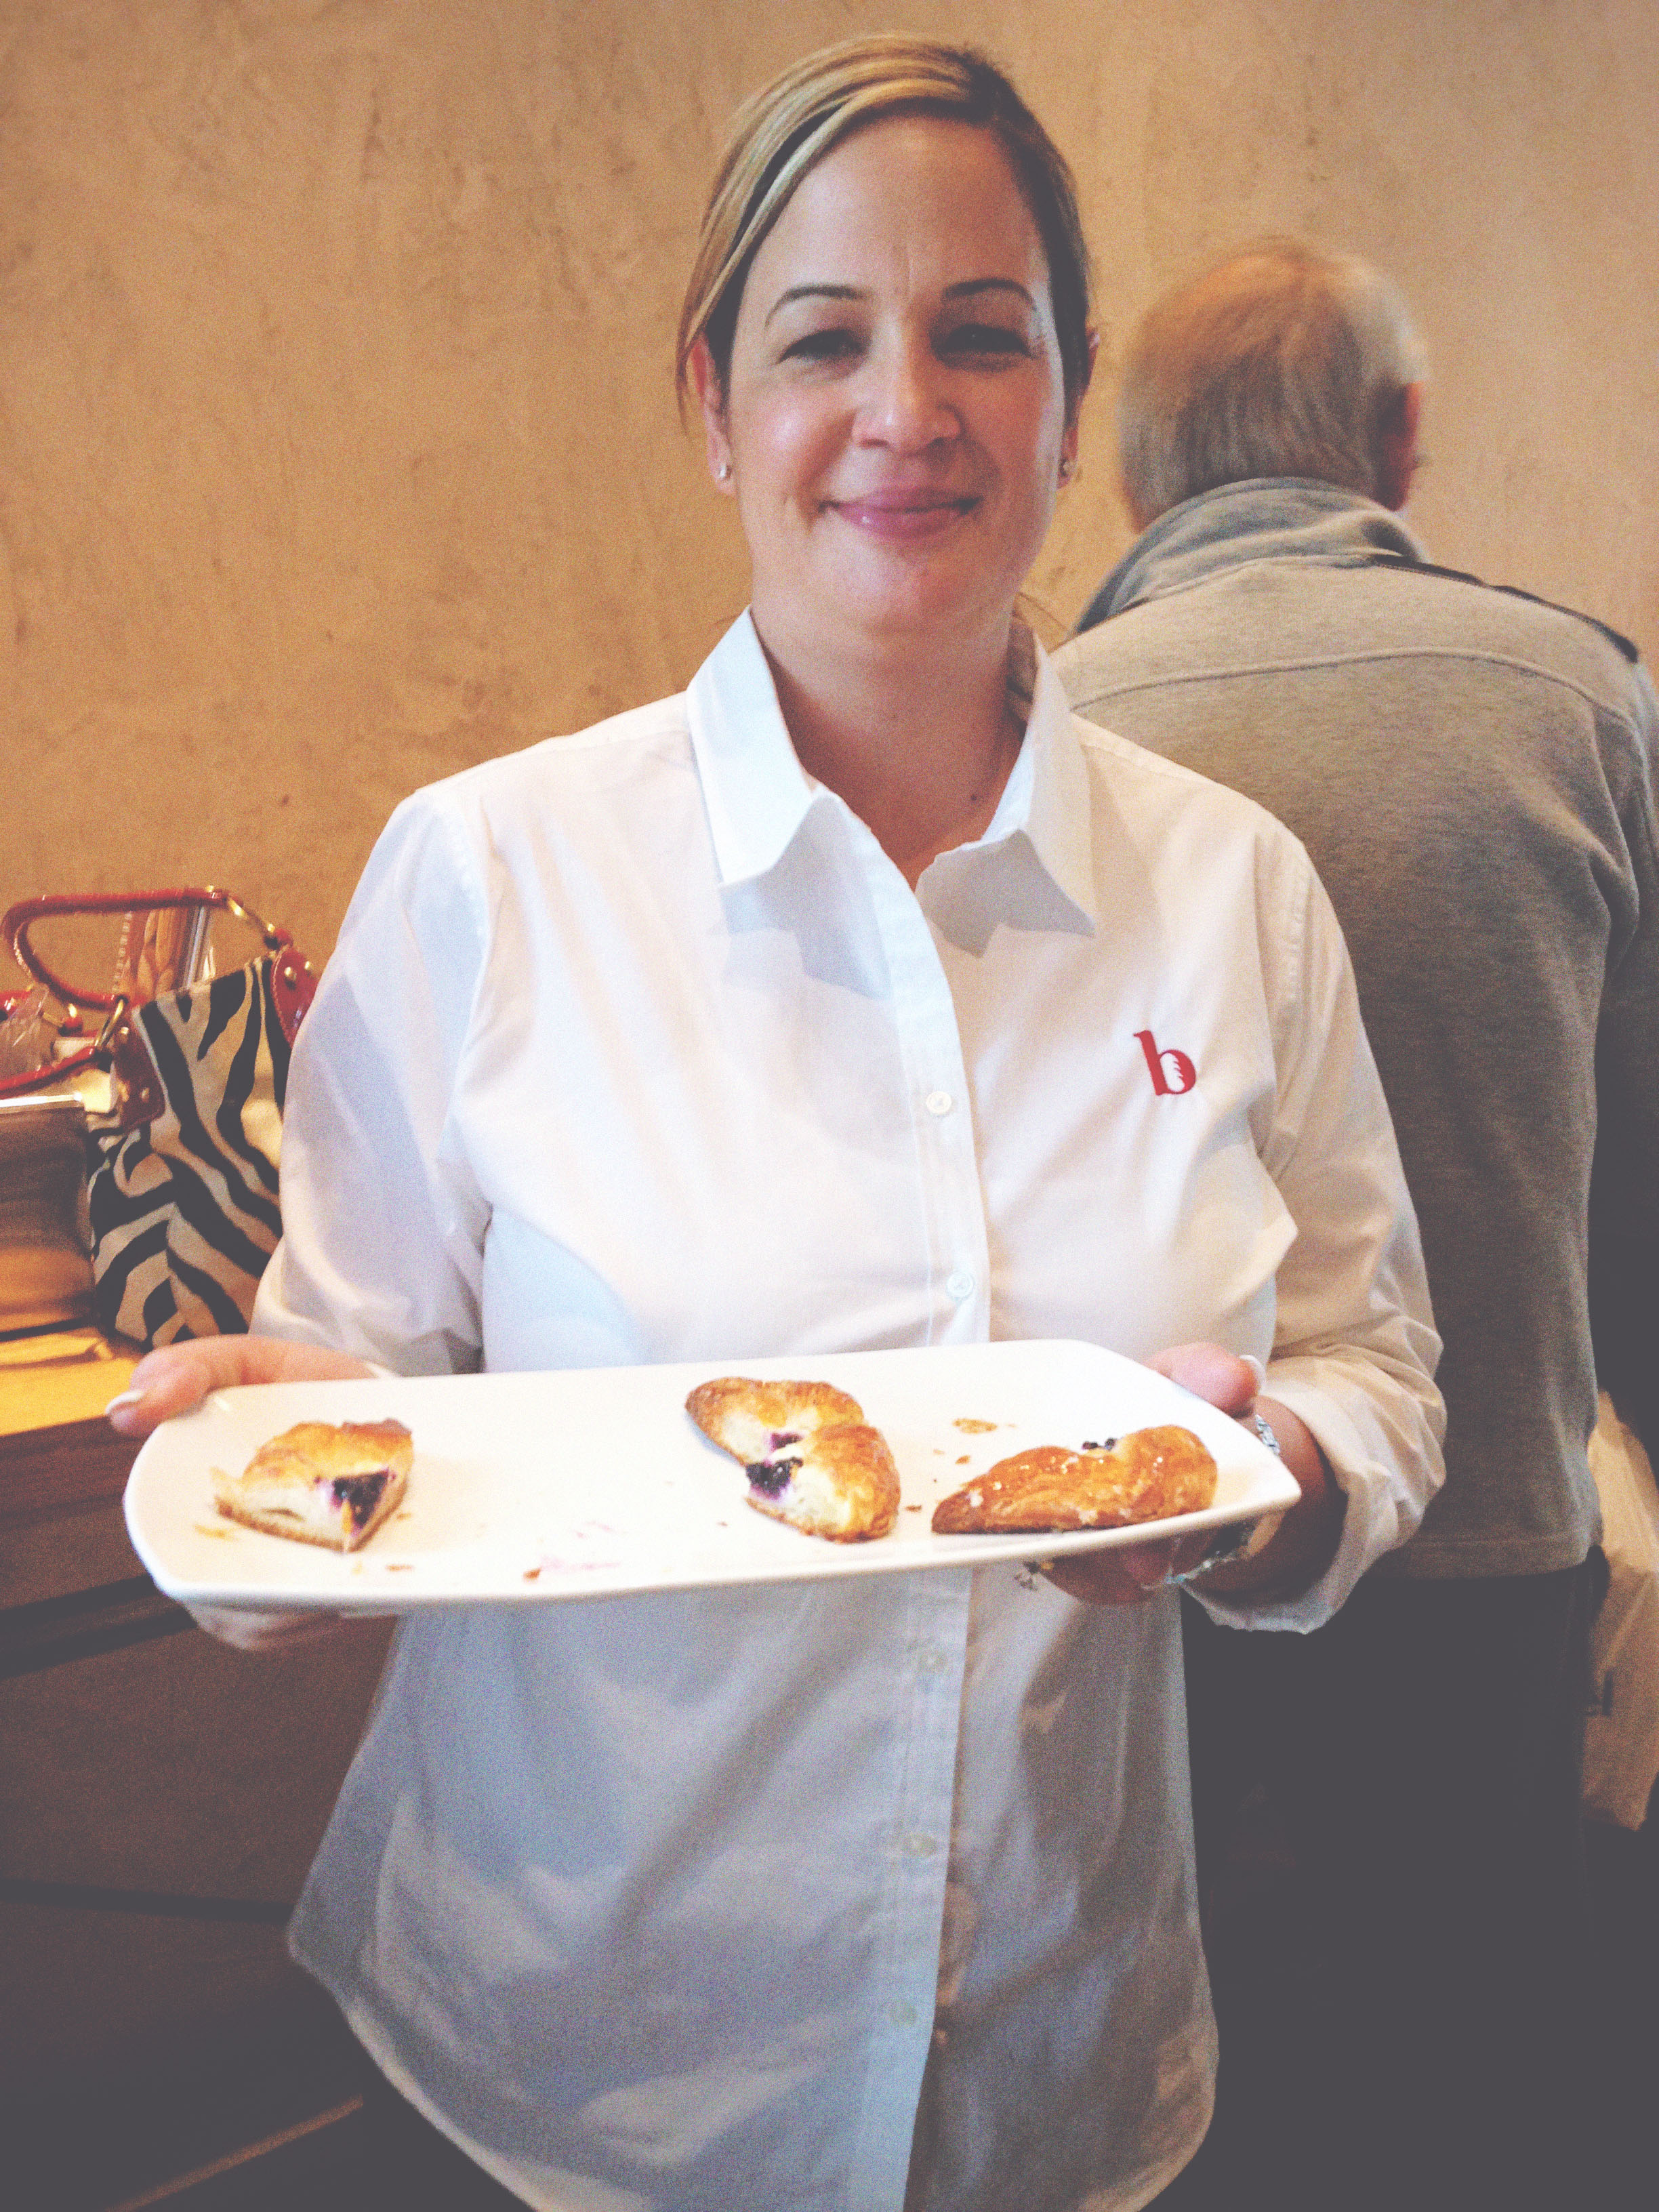
What I got was passed around delicious pastries and this was before I even ordered my coffee and was urged on by the staff to try all the other goodies. Can you just say SCORE!!!  Only thing I missed out on was the free baguettes, they had all been given to the press before I got there, so close, yet so far.  How can I get my a blogger press pass? Nancy, George anyone? Oh yeah George, met him, he has worked for Nancy for 20 years. They are very good friends. I love meeting people like this. He told me of the story when he first started working for her, it was a "bring your kids to work" day. So he put them on a stool and showed them how to work the cash register. Oh to be a kid in a bakery with a world class bread and pastry chef for a mother....what a dream.

PineNutMacaroon.jpg

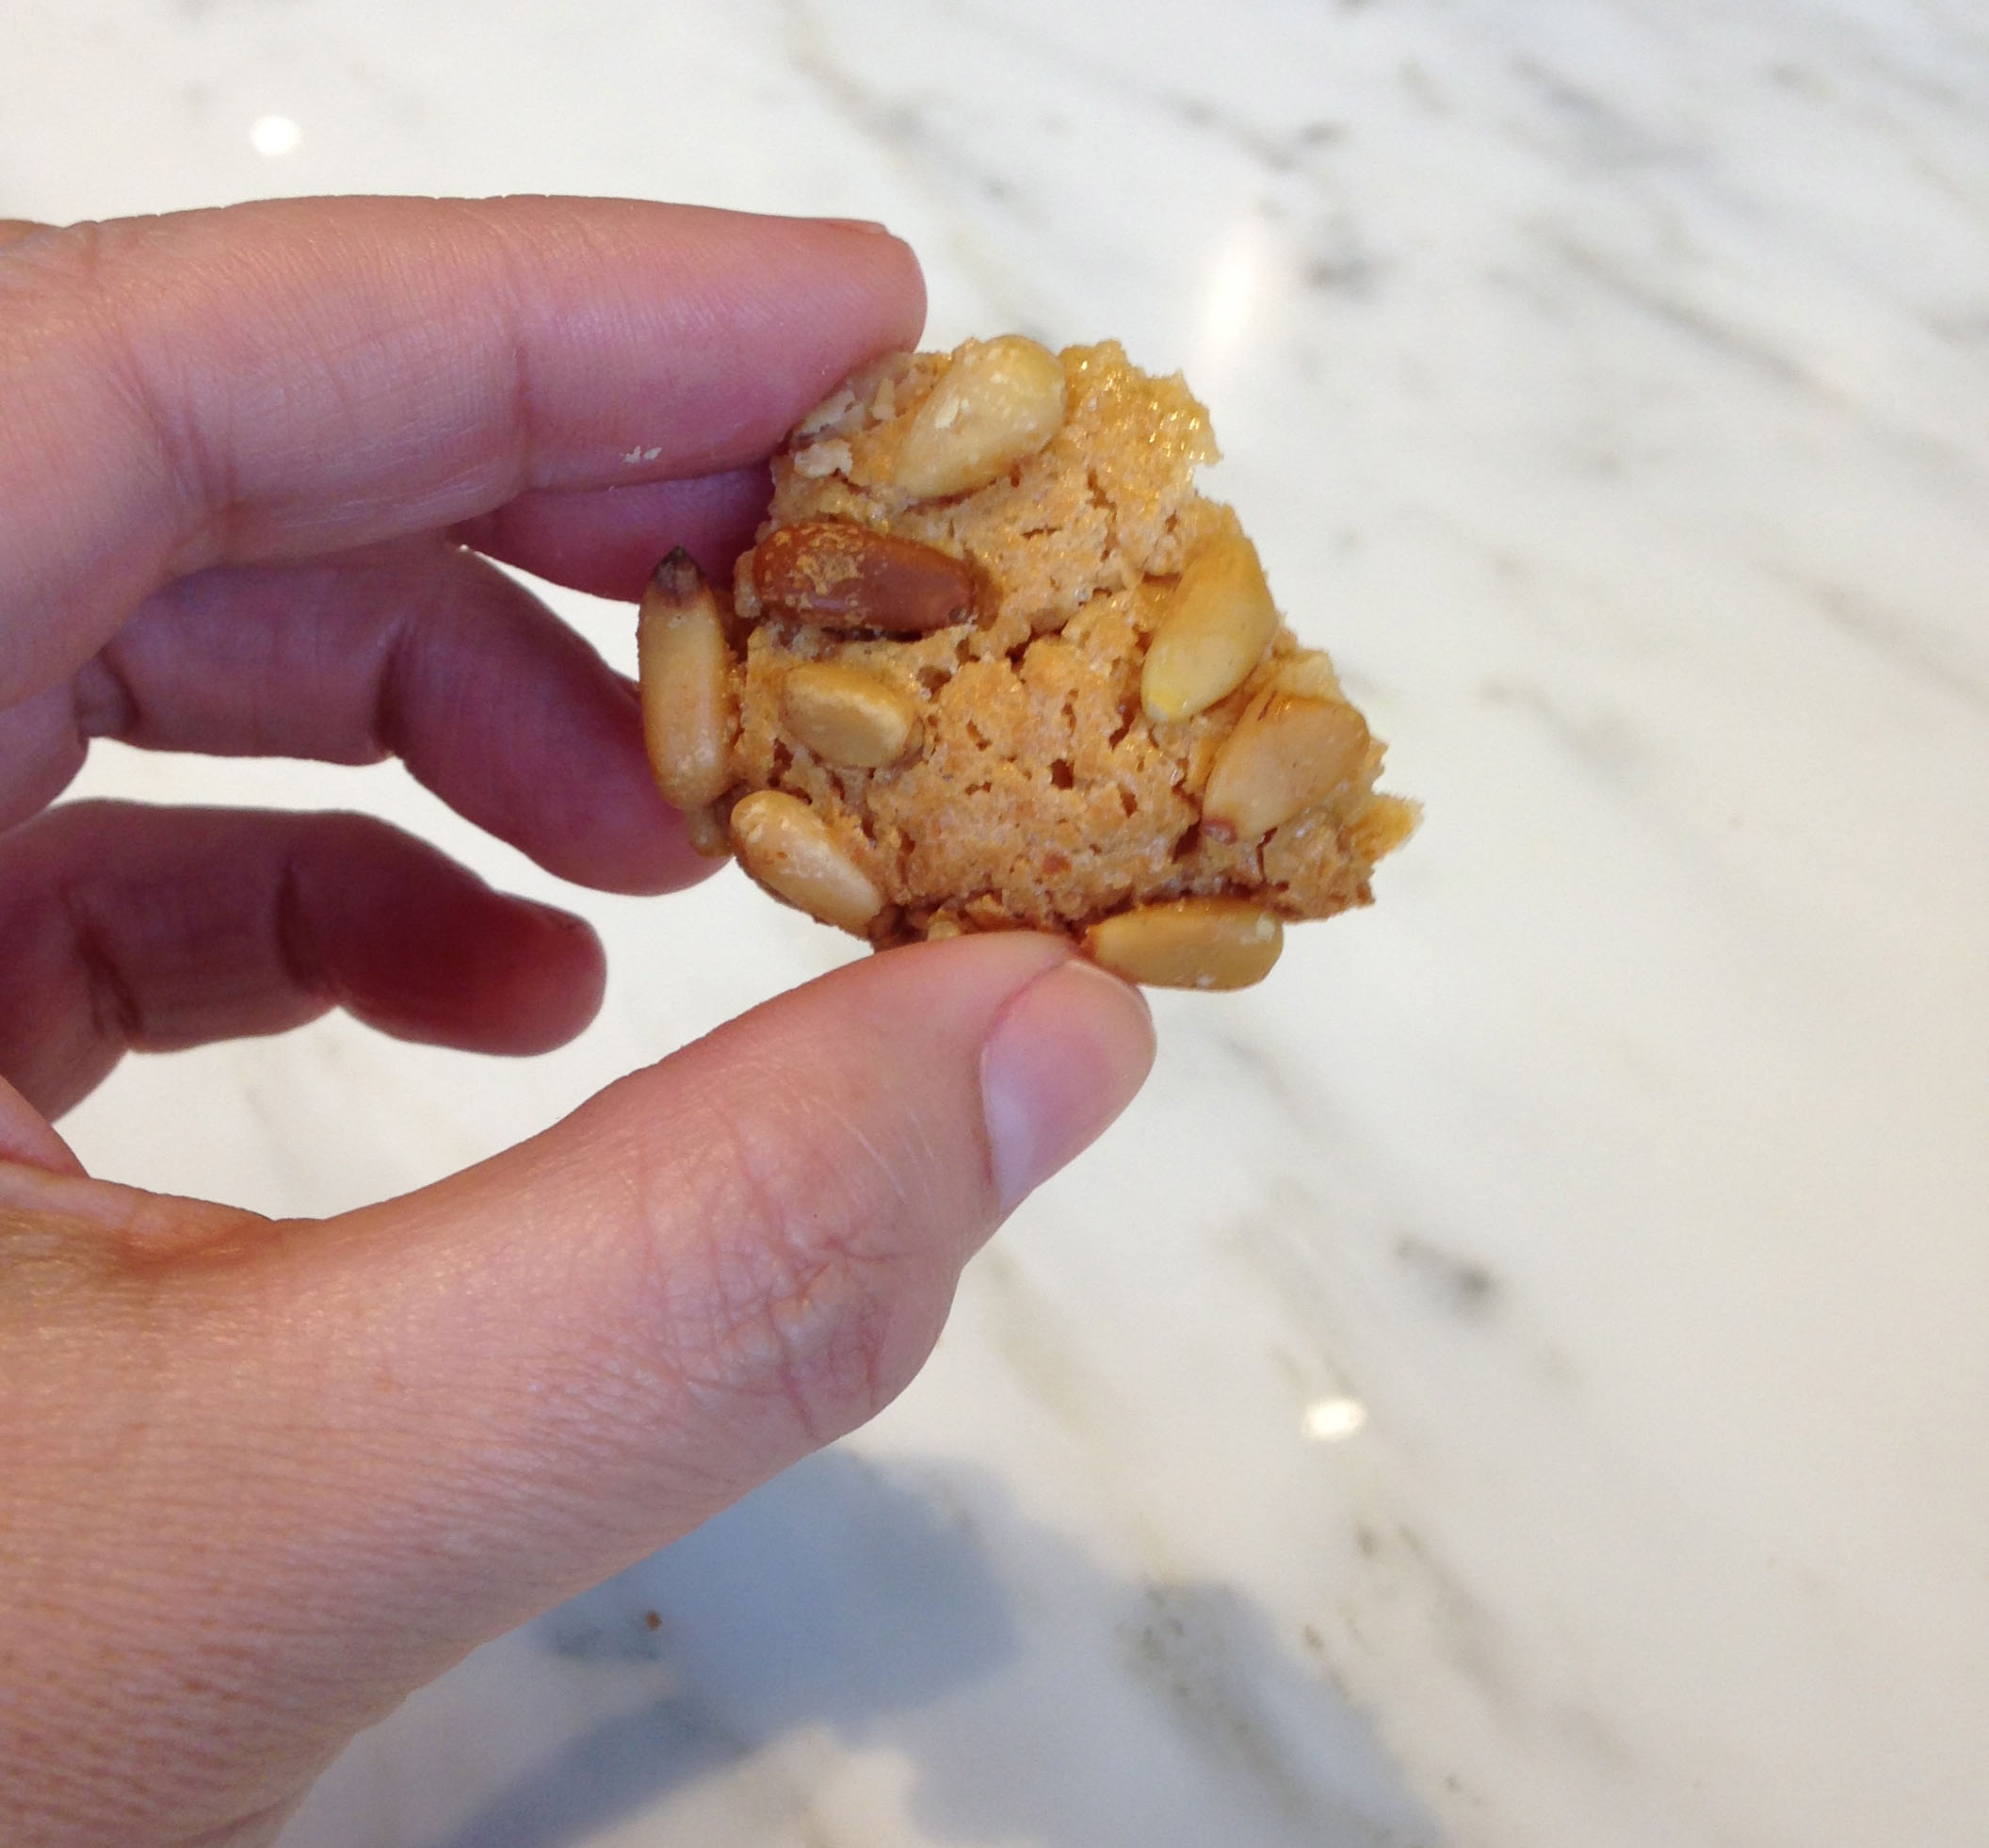
What I got was the lead image above, a Chocolate Eclair, so amazing. I can't wait to go back. That was followed up by a Sunshine Twist (with light glaze and orange zest), a Fleur Macaroon, that was an unbelievable surprise of flavor, a Brownie that I think melted in my mouth, a Pine Nut Macaroon, and an Almost Oreo cookie. 

LBB Sample of Food.jpg
LBB WoodBurningOven.jpg

Those were just the sweets. I did get my Cappuccino, and also sampled the apple fennel salad and red quinoa salad along with a slice of artisan pizza. I watched these guys above make pizza, they were so patient with the dough that just looked so soft and perfectly made. I got to talking to them and they are only 2 weeks into the job, making some amazing creations. Working with guys who have been making pizza's since they were 16. I can't wait to come back.

Here's the best part it was all free. Since it was the grand opening they were giving everyone free samples of there food. SCORE!!!

NancySilverston.jpg

Nancy was there, but I just missed her, though I did take a picture of her fleeing the scene.

And one more bonus, just as I was driving away I caught the entire staff and owner cutting the ribbon. I laughed all the way home. If I had planned this out, it would have never happened so well.  I told all my friends about it tonight, I've already got converts and an excursion planned to La Brea Bakery this weekend.

La Brea Bakery. 468 S. La Brea Ave., Mid-City, 323-939‐6813 or labreabakery.com

La Brea Bakery. 468 S. La Brea Ave., Mid-City, 323-939‐6813 or labreabakery.com

Related Posts Plugin for WordPress, Blogger...

Posted in Bake, Baking, Food, LA Local, Sweets and tagged with La Brea Bakery, Grand Opening.

January 31, 2014 by Tanya Ponce.
  • January 31, 2014
  • Tanya Ponce
  • La Brea Bakery
  • Grand Opening
  • Bake
  • Baking
  • Food
  • LA Local
  • Sweets
  • 4 Comments
4 Comments
creamcheesefrosting1.jpg

Pumpkin Muffins + Cream Cheese Frosting

creamcheesefrosting1.jpg

Can you just stand all this delicious food and recipe's we've been serving you this week.

Now who doesn't like cream cheese frosting and pumpkin muffins? Don't tell me if you do. These were some tasty morsels made for our Fall tasting. I was there the night before the event while she was making these. The whole house smelled amazing and her kids kept asking to eat them. Always a good sign. So hop on over to Deborah's blog to read about how to make these pumpkin cream cheese goodies at My Life at Playtime.

Enjoy! #mylifesimplysweet 

Related Posts Plugin for WordPress, Blogger...

Posted in Baking, Bake, Food, Make and tagged with mylifesimplysweet, pumpkin muffins, cream cheese frosting, my life at playtime.

November 7, 2013 by Tanya Ponce.
  • November 7, 2013
  • Tanya Ponce
  • mylifesimplysweet
  • pumpkin muffins
  • cream cheese frosting
  • my life at playtime
  • Baking
  • Bake
  • Food
  • Make
  • Post a comment
Comment
AcornSugarCookies.jpg

Acorn Sugar Cookies

AcornSugarCookies.jpg

Believe it or not I've never made sugar cookies. But we decided we wanted to do this for the party, it sounded like a nice Fall goodie. I went searching online and texting a few friends that have made them before to get ideas. I finally settled on Food52's blog.

CutAcornCookie.jpg

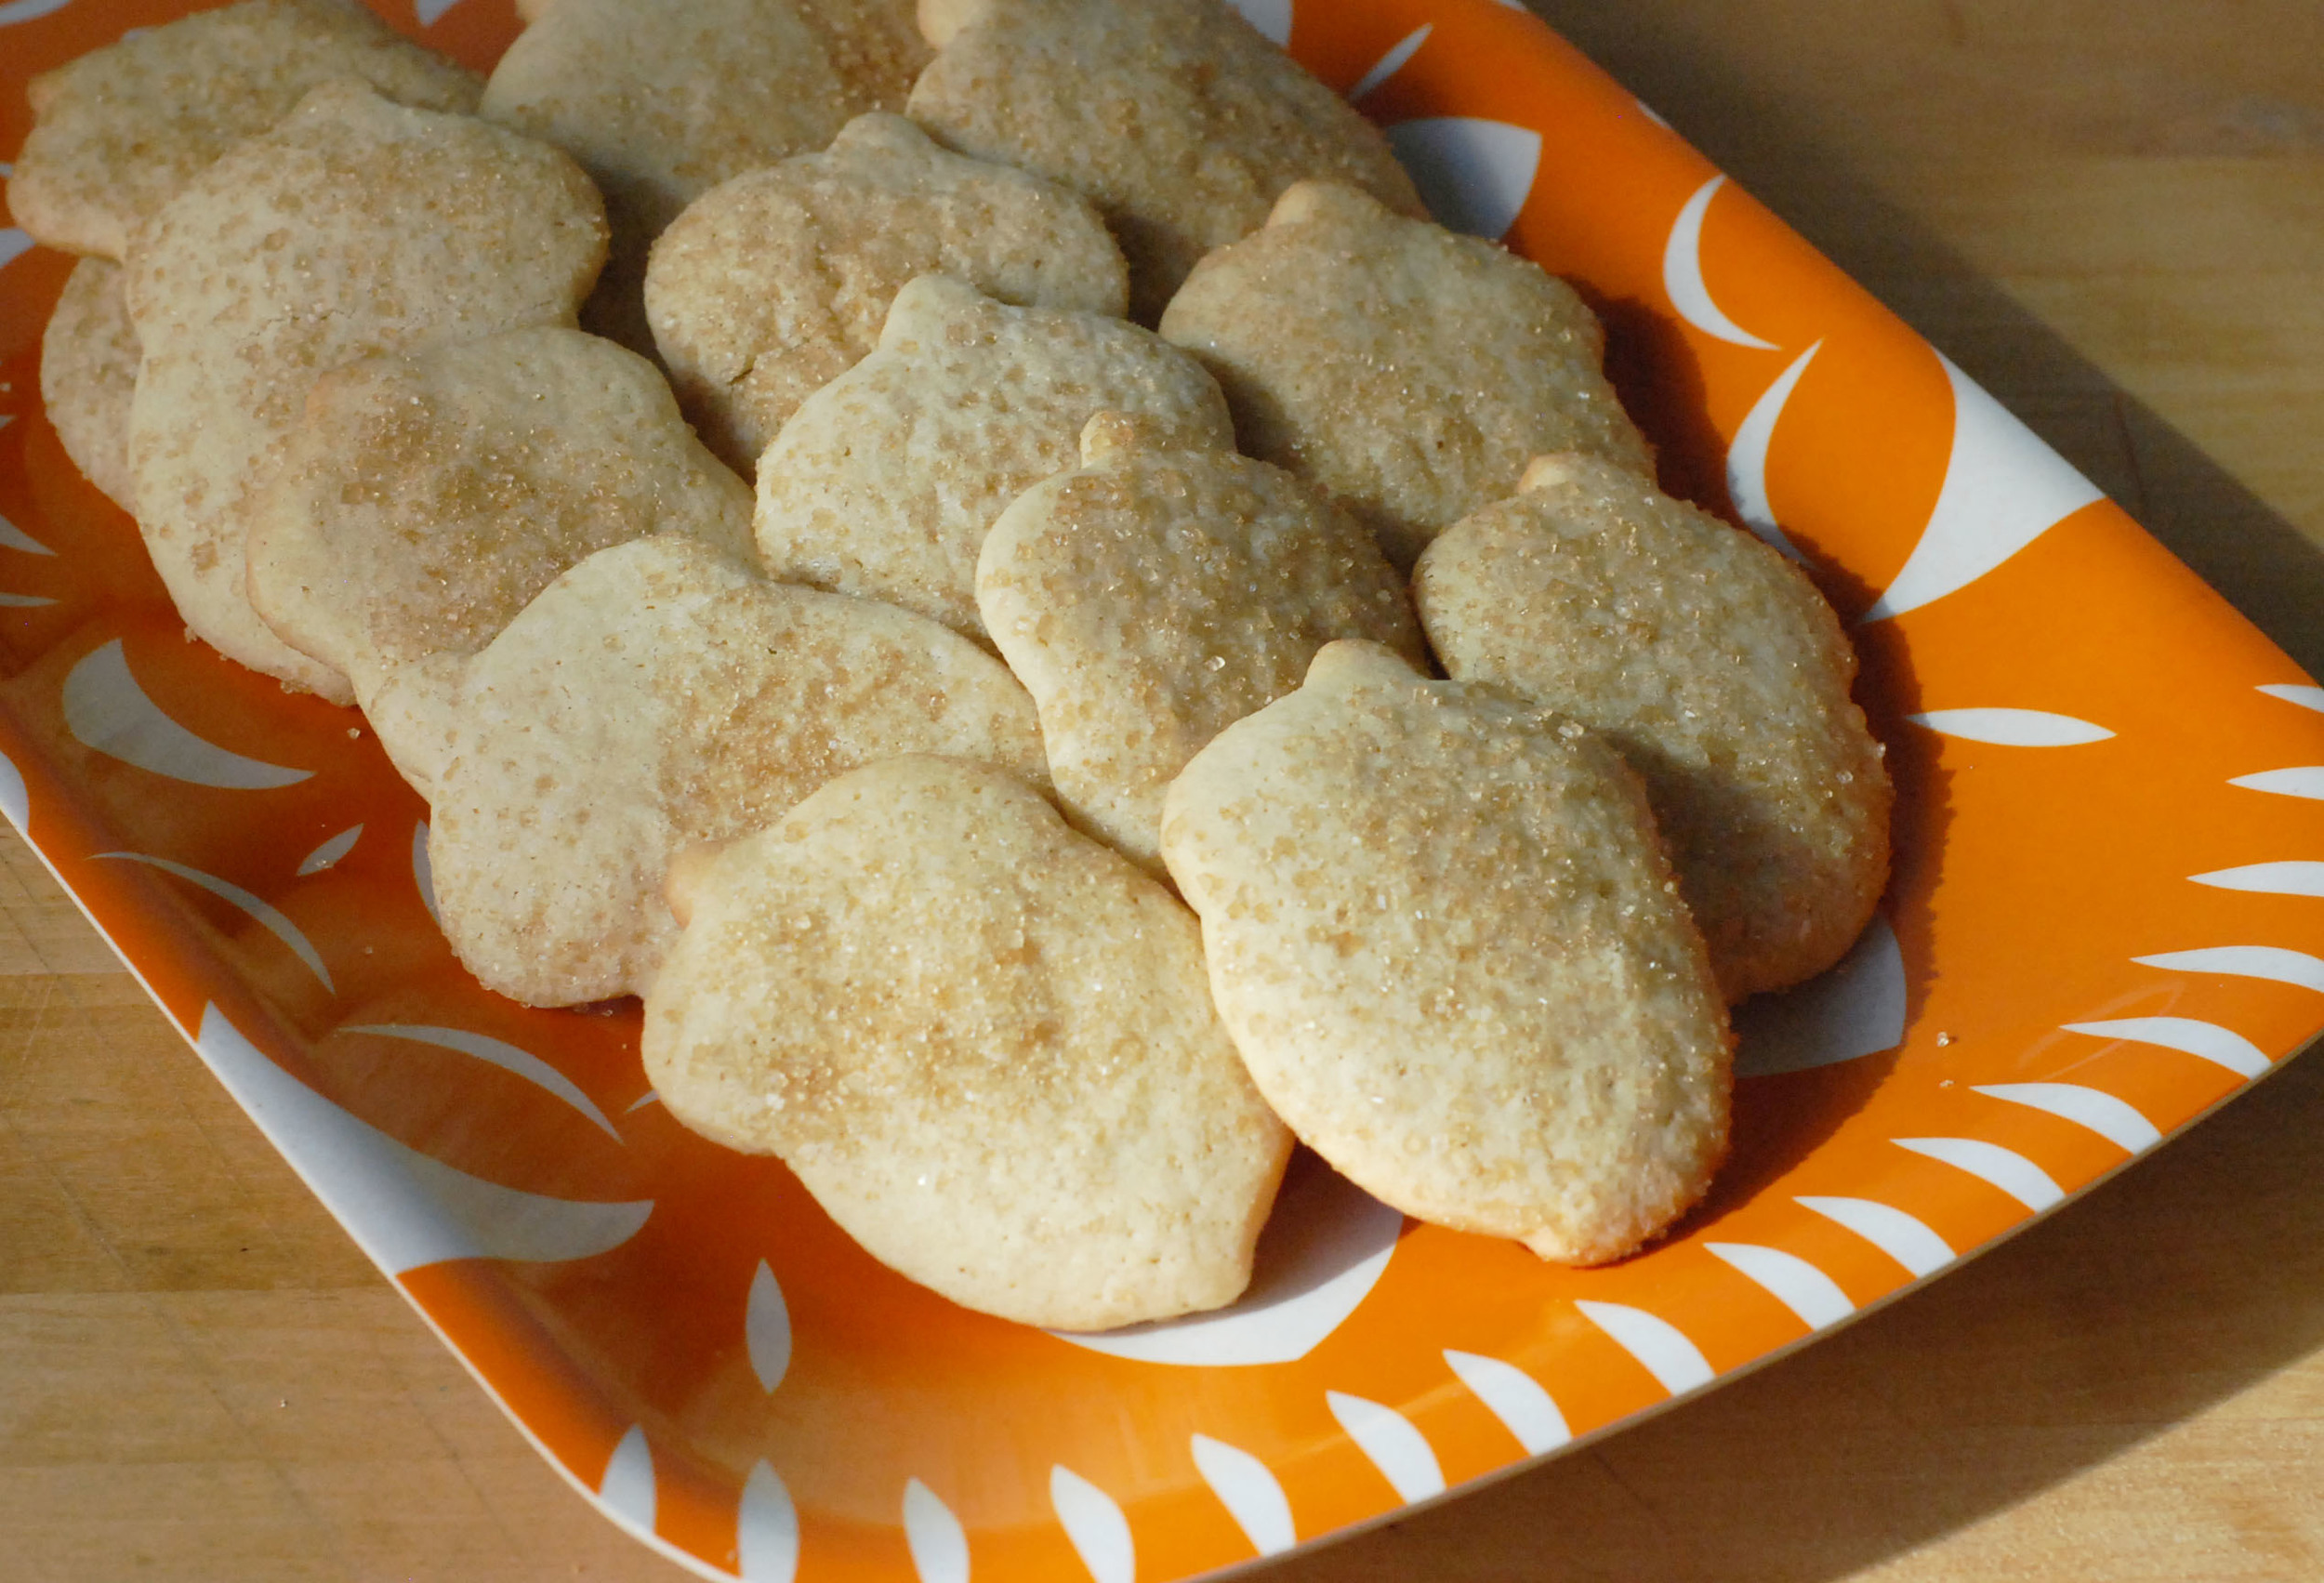
With a cute Acorn cookie cutter provided by Bake It Pretty and an awesome Sugar Cookie recipe from Food 52, these were some tasty goodies!!!

They ended up being THE palate cleanser for the coffee tasting, not intentional, but who doesn't like a good cookie with their coffee. Stephanie pictured below, with cookie in hand, would agree!!!

SugarCookieCleansingPalate.jpg

To me what makes the Food52 sugar cookie recipe so good is the three different types of sugar you put in them. White and brown sugar for the dough and rolling it in turbinado sugar just before baking. The only adjustment I did for this recipe was add 1/2 cup more of flour. This was because I knew I'd need to roll the dough to cut the shapes out. I might add a little more next time as it was still hard to roll out, but that might have been better, you really don't want to over work this dough.

SugarCookiesinTurbinadoSugar.jpg

For the Acorn shape I just coated one side and laid them on the cookie sheet ready to bake. I have to say these cookies were really good. I'd made them two days before to see what I thought of the taste and well SB ate them all. That's a good sign, he's a picky cookie customer. Enjoy this delish recipe. #mylifesimplysweet

SugarCookiesToBake.jpg
Related Posts Plugin for WordPress, Blogger...

Posted in Bake, Baking, Food, Sweets and tagged with sugar cookies, bake it pretty, food 52.

November 7, 2013 by Tanya Ponce.
  • November 7, 2013
  • Tanya Ponce
  • sugar cookies
  • bake it pretty
  • food 52
  • Bake
  • Baking
  • Food
  • Sweets
  • Post a comment
Comment
AppleFritters.jpg

Apple Fritters

AppleFritters.jpg

During the Fall apple season I usually make tarts or turn-overs. And believe me I will. You can see a few of my past posts on these recipes. Tart + Turnover .

This time I saw an apple fritter recipe online at Pioneer Woman's site. She is so fun and I have been trying a few of her recipes. I'm not one to like frying much, but I gave these a chance. You'll need the following ingredients:

Tart Apples (I like granny smith)

Flour

Cinnamon

Granulated Sugar

Whole Milk

Butter

Baking Powder

Salt

Vanilla

Two Eggs

Canola Oil (I used Vegetable, cause that was all I had)

I tried both a sugar glaze and sprinkling on the powder sugar. I think I prefer the powdered sugar.  Either way you might like this baking/frying alternate to apple season Here is the Pioneer Woman's recipe. Enjoy!

Related Posts Plugin for WordPress, Blogger...

Posted in Bake, Baking, Food, Sweets and tagged with apples, apple, fritters, apple fritters.

October 18, 2013 by Tanya Ponce.
  • October 18, 2013
  • Tanya Ponce
  • apples
  • apple
  • fritters
  • apple fritters
  • Bake
  • Baking
  • Food
  • Sweets
  • Post a comment
Comment
GarbanzoBeansChocCookies2.jpg

Gluten-Free Peanut Butter Chocolate Chip Cookies

GarbanzoBeansChocCookies2.jpg

Garbanzo beans, really? I know your going to ask that, I did when my friend Karen shared this recipe with me.  These are pretty scrumptious cookies and they are gluten-free.

Recipe is here.  All you need are the following ingredients: 

Can of Garbanzo Beans

Vanilla Extract

Peanut Butter

Honey

Baking Powder

Salt

Chocolate Chips

Mine don't look as good as Spry's, but they tasted YUMMY. Even the dough before it was cooked was yummy. Go ahead, give it a try, I swear if you like peanut butter, honey and chocolate chips, you'll really like this one.

GarbanzoBeanChocCookies.jpg
Related Posts Plugin for WordPress, Blogger...

Posted in Bake, Baking, Food, Make, Sweets and tagged with gluten-free, garbanzo beans, chocolate chips, peanut butter, cookies.

October 9, 2013 by Tanya Ponce.
  • October 9, 2013
  • Tanya Ponce
  • gluten-free
  • garbanzo beans
  • chocolate chips
  • peanut butter
  • cookies
  • Bake
  • Baking
  • Food
  • Make
  • Sweets
  • Post a comment
Comment
Slice of almond choc gluten-free cake.jpg

Chocolate Gluten-Free Almond Cake

Slice of almond choc gluten-free cake.jpg

As you may already know I've been experimenting with gluten-free baking and my one foray into a vegan recipe, not so good.  In my gluten-free adventures I wanted to make something chocolate, go figure. Since visiting a local health store I've been stocking up on a few different flours. I really like Red Mill's choices. I decided to choose a Oat flour to go along with my Almond meal flour. Coconut flour is on my list to purchase, but it was a bit more expensive. Also, if you haven't already noticed, I almost always use some sort of bittersweet chocolate. I like the richness of it and can control the sugar myself. I am not a milk or white chocolate fan. Occasionally I use semi-sweet. I stock up on this around holiday times, since everyone bakes and bittersweet chocolate chips go on sale, mostly use Ghiradelli, but Trader Joes has a BIG bittersweet chocolate bar option.

Here's a cautionary note of WHAT NOT TO DO if your using a double broiler method to melt the chocolate and butter: #1 chop up the chocolate before putting it in the glass bowl with the butter and #2 NEVER use a knife in the bowl, while it's over the simmering water, that = exploding glass bowl. Yes I did this, and am fortunate enough to be spared glass in my eyes, or on my face, or taking out my jugular. Just a few shards of glass on my arm and ankle, with minor bleeding. Great way to start the day. An hour later, after I cleaned up both me and the kitchen, I started the recipe all over again, since there were shards of glass in my mixtures and pans, etc...

Despite my miss-adventures this recipe was a hit, and as usual I experimented on my friends who loved it too. 

Chocolate Gluten-free Almond Cake Recipe 

6 ounces bittersweet chocolate CHOPPED

1/2 cup unsalted butter, cubed

4 large eggs, separate the yolks from the whites and keep both

1/2 cup granulated sugar (half the sugar will go with the egg yolks and the other half with the egg whites)

1/3 cup plain whole-milk yogurt (I used non-fat Australian vanilla bean yogurt, because that is what I had on hand)

1 teaspoon vanilla extract

1/2 teaspoon salt

3/4 cup almond flour (you can use hazelnut flour as an alternative)

1/4 cup oat flour (you can use buckwheat flour as an alternative)

Almond Slivers

Preheat the oven to 350ºF.

Butter an 8-inch round cake pan and line the bottom with parchment paper.

In a large, heatproof bowl set over a pan of simmering water, don't let the bowl touch the water (SEE MY NOTE ABOVE FOR WHAT NOT TO DO). Melt the chocolate and butter until smooth, then remove from the heat and let cool slightly. You can also quickly melt this in the microwave.

In a medium bowl, whisk together the egg yolks, half of the sugar, yogurt, vanilla, and salt, then whisk them into the melted chocolate. Stir in the almond flour, and the oat flour.

In another bowl of a stand mixer, or hand mixer, whip the egg whites until they form soft peaks. Gradually whip in the other half of the sugar until the whites form firm peaks. Fold 1/3 of the whipped egg whites into the chocolate mixture to lighten it, then fold in the remaining chocolate mixture just until it’s completely combined.

Pour the batter into the pan, level the top and then sprinkle a generous amount of Almond slices over the top, the more the merrier. This gives it a beautiful finished look and adds in extra crunch.

Chocolate gluten-free almond cake.jpg
Wide View Chocoalte gluten-free almond cake.jpg

Bake for 25 to 30 minutes; cake should be set and the center slightly soft.

Let it cool for 10 minutes, then remove from the cake pan and serve.

Slice Chocolate Gluten-free almond cake 2.jpg

Enjoy! 

Related Posts Plugin for WordPress, Blogger...

Posted in Bake, Baking, Food, Make, Sweets and tagged with gluten-free, almond, chocolate, almond flour, oat flour.

September 19, 2013 by Tanya Ponce.
  • September 19, 2013
  • Tanya Ponce
  • gluten-free
  • almond
  • chocolate
  • almond flour
  • oat flour
  • Bake
  • Baking
  • Food
  • Make
  • Sweets
  • Post a comment
Comment
Blueberry Pies.jpg

Mini Blueberry Pies

Blueberry Pies.jpg

I think I might be slightly obsessed with blueberries.  While I normally buy them fresh, especially when they are on sale, we also buy wild frozen blueberries from our favorite store, Trader Joes. We keep these in our freezer for making shakes or defrosting to put into yogurt and now for mini blueberry pies.  I got this recipe from a recent Bon Appetit , I keep challenging myself to make a least one of the recipe's in their magazine, sometimes more come out of it. I'm the dessert maker, SB finds all the savory ones to make. Here's the recipe I used and well the image above is inspired by Bon Appetit too.

Pastry Dough

1 1/2 cups of flour

1/2 tsp sugar

1/4 tsp kosher salt

1/2 cup chilled unsalted butter (i usually cut this into small cubes before I mix it in) 

Use a food processor, if you don't have one use a pastry blender.  Pulse the flour, sugar and salt in the food process and in add in the butter. Pulse until the texture looks like coarse meal. Add 1/4 cup ice water, pulse. Add more water if it's till dry. Dough needs to come together in clumps.

Form into a square (this makes it easier to roll out the rectangle. Wrap in plastic and refrigerate for about 2 hours till it gets firms.  Let it stand to room temperature for 15 minutes before rolling it out.

Preheat oven to 375°.  

Blueberry Mixture

2 cups of blueberries (Either use fresh blueberries or defrost some frozen ones)

1 tsp of lemon zest (usually one lemon)

1 tbsp of fresh lemon juice (usually one lemon) 

1/4 cup sugar

1/4 tsp kosher salt

1 egg large egged whisked with a tbsp of water

Raw sugar

Roll out dough on a floured surface into a large rectangle. Cut into 6 rectangles. If there not perfect, embrace it, these are handmade and should look like it.

Mix berries with lemon zest, lemon juice, sugar, and salt in a medium bowl. Brush edges of rectangles with water; (I used my fingers dipped in the water, it's faster for me).  Place about a tablespoon and half of blueberries in center of each rectangle (may use more or less, depending on how big the piece is.). Fold dough over, and press edges to seal. Place the six rectangles on a parchment-lined baking sheet, brush with egg wash, and sprinkle with raw sugar. Cut slits in tops. You can see i should have cut more slits, but it still turned out yummy.

Bake mini pies for about 35-40 minutes, rotate sheet halfway through, until juices are bubbling and pastry is golden brown (be warned the juices will run onto parchment). Let cool slightly, these can be served warm or at room temperature.

Enjoy! 


Related Posts Plugin for WordPress, Blogger...

Posted in Bake, Baking, Food, Sweets and tagged with blueberry, blueberries, blueberry mini pies, pie, pies, bon appetit.

September 17, 2013 by Tanya Ponce.
  • September 17, 2013
  • Tanya Ponce
  • blueberry
  • blueberries
  • blueberry mini pies
  • pie
  • pies
  • bon appetit
  • Bake
  • Baking
  • Food
  • Sweets
  • Post a comment
Comment
Chocolate Creme Fraiche Tart.jpg

Chocolate Creme Fraiche Tart

Chocolate Creme Fraiche Tart.jpg

I know I teased you all this week on Instagram, but I wasn't really trying.  I just took all my pictures of the above Chocolate tart for the blog and promptly sat down and ate it when I was done. Then I looked over at my fabulous plate from England and saw I had practically licked it clean. So here today is my Chocolate Creme Fraiche Tart. I know rich right and yes RIGHT and so good.  

I know you all go buy the Creme Fraiche at Trader Joes, I cannot be the only one. I use this stuff for everything. Mixed with Tapatio for quesadillas, or chicken taquitos. Mixed with sugar and lemon zest for french toast and whatever else I can come up with. This time when I took the package off I noticed there were recipes on the back. So I thought, I'm having dinner with my friend, she loves chocolate, I love Creme Fraiche. It's a match made in my kitchen. 

Chocolate Creme Fraiche Tart

1/2 cup milk (I used whole milk, cause why not) 

7 oz chopped bittersweet chocolate (I used Ghiradelli) 

1 large egg yolk

7/12 ounces of Creme Fraiche

9 inch tart pastry (I made my own, recipe found below, but you can use a pre-baked pastry shell if that's easier for you) 

Preheat the oven to 325.

Lightly whip egg yolk with the Creme Fraiche and set aside. Bring milk to a boil, stir continuously. Turn off heat and add chocolate to milk. Stir until chocolate is completely melted. Slowly add egg and Creme Fraiche mixture to the chocolate mixture and stir thoroughly. 

Place the pastry into a 9 inch tar pan and pour in the chocolate Creme Fraiche mixture. Bake for 25 minutes. Remove tart from oven and cool to room temperature. Chill in refrigerator for at last one hour before serving. Serves 8.

Tart Pastry

1 1/4 cups (6 1/2 oz/ 200g) cups all purpose flour

1 tbsp sugar

1/4 teaspoon salt

1/2 cup (4 oz/125 g)  unsalted butter, chilled

2 tbsp, or more, cold water

I used a food processor, but you can do this by hand using a pastry blender. 

Place the flour, sugar and salt in the processor. Cut the butter into small pices and add them. Process using rapid pulses until mixture resembles small crumbs or flakes. Add 1 tbsp of water and process a couple of seconds. Add additional tbsps of water untill it is damp enough to form a rough mass. 

Dump the dough onto a piece of clear plastic wrap and form into a cake. I wrapped mine up and let it sit in the refrigerator to cool for 30 minutes. After that pull it out, roll it to a nice round circle and form it into your tart pan. I like to use removable bottom steel tart pans, but use what your used to.

Chocolate Creme Fraiche Tart.jpg

I enjoyed this tart with a cup of coffee in the morning and well a cup of tea in the afternoon. Whatever works for you it was delicious the next day. 


Related Posts Plugin for WordPress, Blogger...

Posted in Bake, Baking, Food and tagged with chocolate, chocolate tart, chocolate creme fraiche tart, tart, creme fraiche, dessert, sweet.

September 14, 2013 by Tanya Ponce.
  • September 14, 2013
  • Tanya Ponce
  • chocolate
  • chocolate tart
  • chocolate creme fraiche tart
  • tart
  • creme fraiche
  • dessert
  • sweet
  • Bake
  • Baking
  • Food
  • 2 Comments
2 Comments
IMG_3454.JPG

Failure Schmailure

IMG_3454.JPG

In the essence of true transparency, I decided to try making a vegan, gluten free dessert. Why you ask? Because quite a few of my friends are vegan or gluten-free and whatever else you can think of, oh raw food eaters (not going to touch that one yet). This is the first time I've tried to make a recipe fully from scratch, I mean developing the ingredients and measurements with no guide. I probably should have started with something simpler, like with BUTTER, and real sugar. 

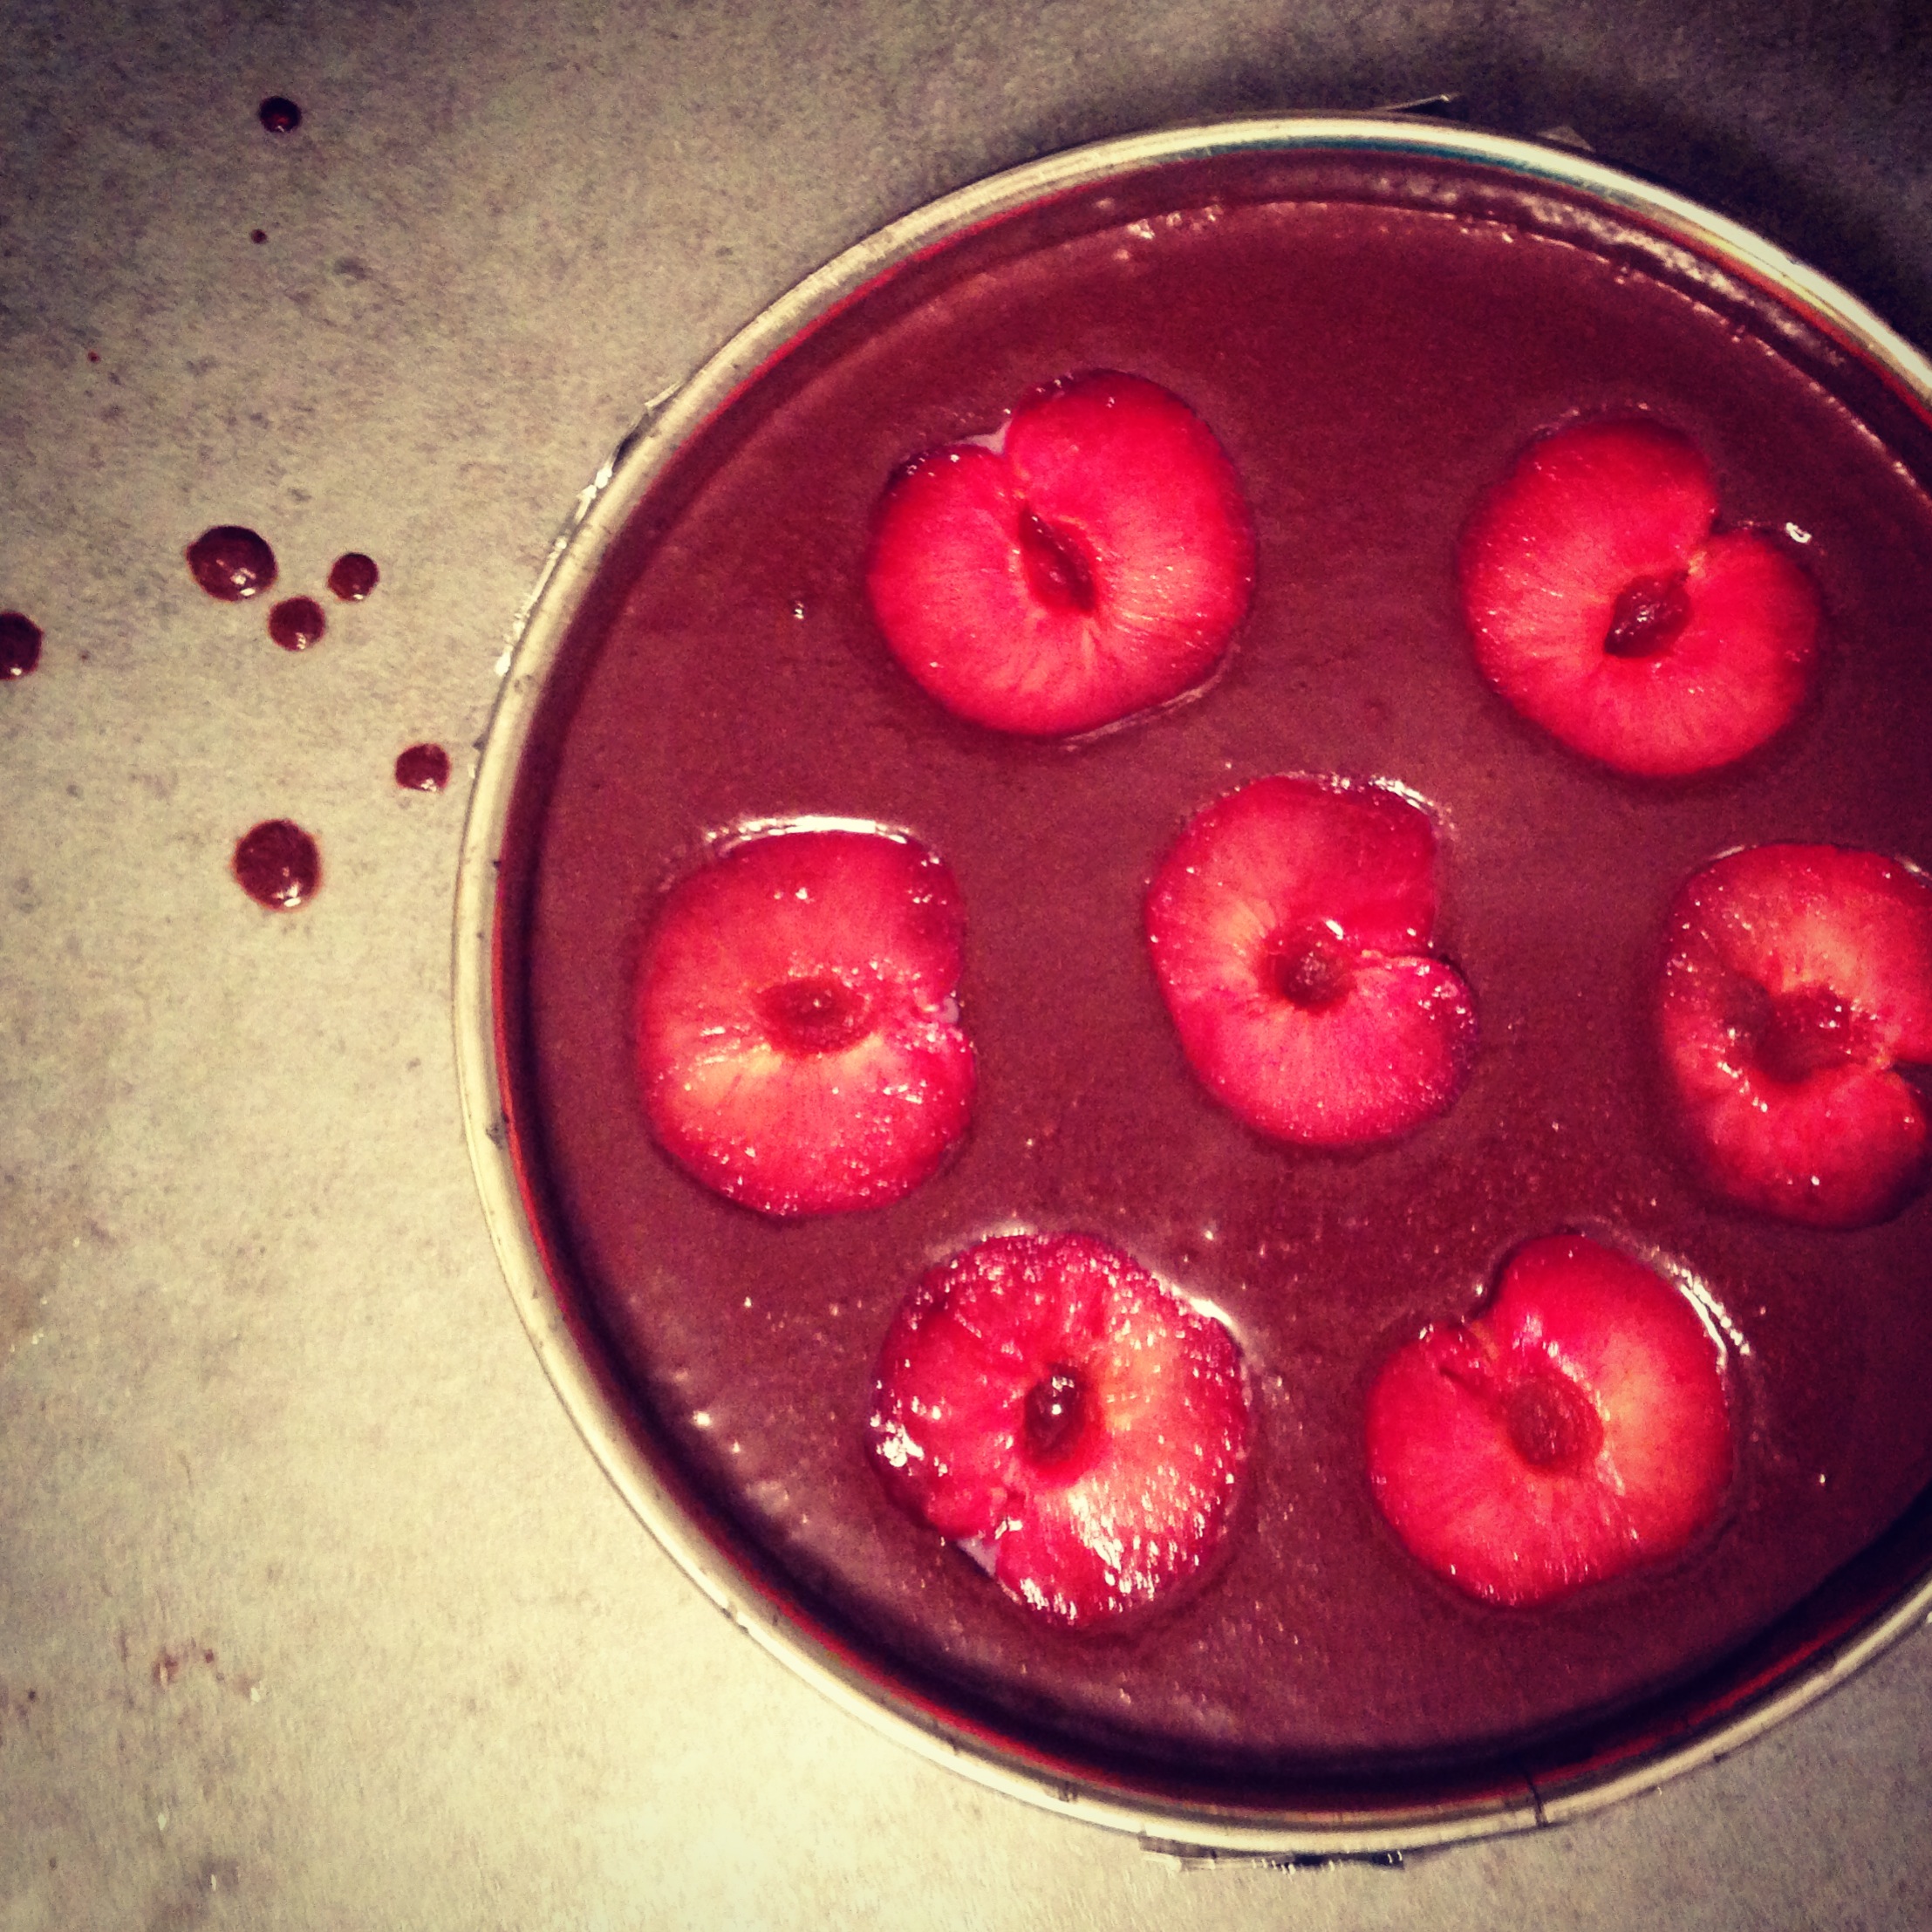
So as beautiful as the batter and the pluots look, this cake didn't exactly turn out right. First off I could taste the earth balance butter and secondly it wasn't sweet enough and one more thing, I think I should have put the pluots in halfway thru the process. They were so juicy the cake really never fully baked. So what I got was a pudding cake. I do have to say the pluots helped the sweetness. However, I think I'll stick to tarts for pluots and stone fruits. Next try will involve canola oil, instead of earth balance butter, and a little more sweetener and probably some almonds on top for crunch and prettiness. 

So I call this Failure Schmailure....yes I'm still trying to eat it, and yes I'll try this again. 

Related Posts Plugin for WordPress, Blogger...

Posted in Food, Bake, Baking, Make, Life and tagged with failure schmailure, vegan.

August 30, 2013 by Tanya Ponce.
  • August 30, 2013
  • Tanya Ponce
  • failure schmailure
  • vegan
  • Food
  • Bake
  • Baking
  • Make
  • Life
  • Post a comment
Comment
Almond Lemon Slice of Cake.jpg

Almond Lemon Gluten Free Cake

Almond Lemon Slice of Cake.jpg

I get so inspired by all the great photo's and blog post and especially about making things gluten-free. I tolerate gluten, but feel better when I don't partake of it. I saw this recipe and knew I had to give it a try. I still haven't been brave enough to try the vegan route...i just can't give up butter. This cake is really moist and very yummy. Give it a try.

Almond Lemon Gluten Free Cake
(Adapted from Cakelets and Dollies Recipe which was adapted from Donna Hay's Recipe)

Almond Lemon Cake Overview.jpg

1/2 cup unsalted butter, softened
1 1/3 cups granulated sugar
1 tsp of vanilla extract

(NOTE: if you have a vanilla bean, use that, split and scrap out the seeds to put in the mix For my recipe I didn't have a vanilla bean on hand, so vanilla extract worked great.) 1/4 tsp almond extract (because why wouldn't you want more almonds)
Zest of 4 lemons, if you want in more lemony taste you can squeeze a little lemon juice, but this is already a very moist cake so be warned.  Original recipe called for 1/4 cup lemon zest which can be about 6 lemons.
4 eggs, separated, make sure you let them get to room temperature
2 1/2 cups almond meal (Surprisingly I found this at Trader Joes, but you should be able to find in a local health food store or Whole Foods)
10 1/2 oz ricotta
Flaked almonds, to decorated and add more crunchiness
Powdered sugar, for dusting

Preheat oven to 325. Butter 8-9 inch cake round, I use parchment paper on the bottom and also butter that, it makes it easier to get the cake out of the pan.

I used my KitchenAid stand mixer, but you can also use a regular beater. Mix softened butter, 1 cup of sugar, lemon zest, vanilla (either extract or vanilla seeds from the bean), until its pale yellow and creamy. I did this for about 6 minutes (thus why i like to use my KitchenAid stand mixer). Add in the separated egg yolks one at a time, that is if you didn't already blend them all together, in that case just drizzle egg yolks in a little bit at a time.  You'll need to scrape down the sides of the bowl through out the process.

Mix in the Almond Meal. Scrape down sides and take bowl from under mixer and fold in the Ricotta.

In a separate bowl mix the egg whites until white and fluffy, slowly pour in the 1/3 cup of remaining sugar until it makes glossy soft white peaks. Gently fold in 1/2 the egg whites, you want to make this a lite and airy cake, finally fold in the rest of the egg whites.

Pour mixture into cake pan. Sprinkle almond slices over the top, I covered mine as much as possible.  Put in the oven and bake for about 45 minutes. May need more time, I think I added about 8-10 more minutes to this, but test center with toothpick to make sure it comes out clean and the cake is fully baked. 

Almond Lemon Gluten Free Cake.jpg

When you pull it out it look like a fluffy cake, once it cools down it deflates a bit. After it cools down dust with powdered sugar and serve. With coffee is great.

Coffee & Almond Cake.jpg
Related Posts Plugin for WordPress, Blogger...

Posted in Bake, Baking, Food, Make, Sweets and tagged with cake, dessert, gluten-free, almond, lemon, ricotta.

August 23, 2013 by Tanya Ponce.
  • August 23, 2013
  • Tanya Ponce
  • cake
  • dessert
  • gluten-free
  • almond
  • lemon
  • ricotta
  • Bake
  • Baking
  • Food
  • Make
  • Sweets
  • 3 Comments
3 Comments
Peanut Butter Kisses Cookie.jpg

Peanut Butter Chocolate Kiss Cookies

Peanut Butter Kisses Cookie.jpg

A few years back I made the peanut butter chocolate kiss cookies above. I find this is still a go to recipe I use all the time.  In fact it was just over 4 years ago, July 15, 2009 last time I posted about it. We have an annual 3 day convention we go to every year and well I find a little treat and pick me up in the afternoon is just the thing to help me pay attention. I've adapted this recipe from a local small town Iowa cookbook. It's super easy and a great idea for something to do with kids. They can unwrap all the kisses and help put them on the warm cookies as you pull them out of the oven.

Peanut Butter Kisses Cookie Dough.jpg

After you mix all the ingredients start hand rolling the dough into small balls.

Dough Rolled Up.jpg

Roll the balls into sugar and lightly coat. 

Peanut Butter Kisses Cookie 1.jpg

Place the rolled cookie dough onto cookie sheets and cook at 375 for 8 minutes.

Chocolate Kisses.jpg

Start unwrapping all your chocolate kisses while you wait for the cookies to bake. 

Peanut Butter Kisses Cookie 2.jpg

After first 8 minutes, take out the cookies and gently smoosh one chocolate kiss in the middle of each cookie. Then return to the oven and finish baking for 5 more minutes, then let them cool on a rack. Then eat away, Enjoy!

Ingredients
1 c. Butter
1 c. Peanut Butter (I use Trader Joes or a Natural Peanut Butter, I've used Skippy before but i like a little more texture in this recipe).
1 c. Sugar
1 c. Brown Sugar, firmly packed
2 eggs, beaten
4 T. milk (in a pinch i used Rice Milk, we never have regular milk in our house)
2 tsp vanilla
3 1/2 c. flour
2 tsp baking soda
1 tsp salt
Additional granulated sugar
1 pkg of kisses

Directions: Cream butter, peanut butter, sugar and brown sugar; add eggs, milk and vanilla.  Sift together dry ingredients, except additional sugar and candies; add to butter mixture.   Shape into balls; roll in sugar and place on cookie sheet.  Bake at 375 degrees for 8 minutes.  Remove from oven and press and chocolate star or kiss on each cookie until the cookie cracks around the edge.  Return to oven for 5 minutes.

Final Peanut Butter Kisses Cookie.jpg
Related Posts Plugin for WordPress, Blogger...

Posted in Bake, Baking, Food, Sweets, Make and tagged with chocolate kiss cookies, peanut butter, peanut butter chocolate kiss cookies, chocolate kisses.

July 23, 2013 by Tanya Ponce.
  • July 23, 2013
  • Tanya Ponce
  • chocolate kiss cookies
  • peanut butter
  • peanut butter chocolate kiss cookies
  • chocolate kisses
  • Bake
  • Baking
  • Food
  • Sweets
  • Make
  • Post a comment
Comment
StoneFruitCrumble.jpg

Stone Fruit Crumble

StoneFruitCrumble.jpg

On one of my farmers market runs I went to get peaches and came back with not only those, but quite a few other stone fruits. This included nectarines and pluot's. The later I had never had, but wow were these sweet and juicy, bursting with flavor. I had to get a few.  I came home right away sliced and ate em. 

Sliced Stone Fruit.jpg

Every once in a while I find a new blog, to me, or a new food show, this time I found both. The Pioneer Woman. Ree Drummond is just so REAL, I would love to meet her in person. She has a great recipe for what she called a "Crisp." Only she made hers with peaches. I decided to combine my farmers market peaches, nectarines and pluot's that I still had on hand and put them in a baking dish below.

StoneFruitSliced.jpg

Zest 1/2 a lemon and squeeze the juice too over the stone fruit and if you want more sweetness add in 2 tbsp's of maple syrup (the good pure kind)

Have I ever mentioned that I someone how always pick the HOTTEST most HUMID day to bake and at the time of day that the sun is beaming into our little apartment. Well I do, at least the house always smells good, that's my excuse to SB. 

StoneFruitCrumbleonTop.jpg

To make the topping, in a separate blow mix 1 cup flour, 1/2 cup of sugar, 1/2 cup of light brown sugar, 1/2 tsp cinnamon, 1/2 tsp nutmeg, 1/4 tsp salt and cut in 1/2 cup cold butter. Either do this with a pastry blender or a good old fashioned fork. I've done both, but prefer my pastry blender I got from Sur La Table a while back, this one.

Fully cover the fruit and pack down lightly. Cover with tin foil and bake in a 350 degree oven for 15 minutes. Uncover and bake for another 20-30 minutes until crunchy on top. I have gone the full 30 minutes to make sure it's nice and crunchy.

StoneFruitCrumbleoutofoven.jpg

You can serve this with vanilla ice cream or vanilla Greek yogurt. I've done both and was happily content.  It's a great recipe, tested on myself and then on my friends three kids, it's a hit. Use whatever stone fruits you have on hand. Peaches are everywhere now, so take advantage of the deals and the amazing juicy fruits.  Enjoy!

Related Posts Plugin for WordPress, Blogger...

Posted in Food, Bake, Baking, Make, Sweets and tagged with stone fruit, peaches, pluots, nectarines, farmers market.

July 18, 2013 by Tanya Ponce.
  • July 18, 2013
  • Tanya Ponce
  • stone fruit
  • peaches
  • pluots
  • nectarines
  • farmers market
  • Food
  • Bake
  • Baking
  • Make
  • Sweets
  • Post a comment
Comment
GoatCheeseHoneyCrostata2.jpg

Quick Appetizer

GoatCheeseHoneyCrostata2.jpg

The other day I literally had 1 hour to whip some type of appetizer together.  So with 5 ingredients I made this happen. Baguette, goat cheese, fresh rosemary, honey, pine nuts (olive oil and salt) is that 7 ingredients now, do we count condiments?

Anyway, I sliced the baguette on an angle, drizzled them with olive oil and toasted them on a cookie sheet in a 425 degree oven, toast both sides. I like them slightly brown and crispy.  Pull them out of the oven and let them cool.

Crostini_AssemblyLine.jpg

Mince the rosemary and toast the pine nuts. Smear goat cheese on each crostini (toasted bread), then drizzle the honey over each one. Finally sprinkle the rosemary and pine nuts over them all.  Serve on a simple platter and decorate with fresh rosemary sprigs.  All done.

Rosemary.jpg

I was complimented on this quite a few times, even the little ones like it.  It's a nice sweet and savory dish.  Enjoy! 


GoatCheeseRosemaryCrostini.jpg
Related Posts Plugin for WordPress, Blogger...

Posted in Bake, Baking, Food, Make and tagged with appetizer, food, rosemary, crostini, goat cheese.

April 2, 2013 by Tanya Ponce.
  • April 2, 2013
  • Tanya Ponce
  • appetizer
  • food
  • rosemary
  • crostini
  • goat cheese
  • Bake
  • Baking
  • Food
  • Make
  • 2 Comments
2 Comments
Older

itsweet & savory itsweet & savory

Food+Travel+Life

Lifestyle blogger who loves coffee, architecture, local cultural interests, good food and travel stories.

  • Home
  • About Me
    • A Simply Raw Life
    • Donuts, Dresses, and Dirt
    • Oh Joy
    • david lebovitz
    • My Life at Playtime
    • Design Mom
    • Curbly
    • AltDesign
    • Peggy Wong
    • A Golden Afternoon
    • Eat, Drink + Be Merry
    • Dylan and Jeni Photography
    • Route 66
    • Cuba A Bittersweet Tale - Part I
    • Cuba A Bittersweet Tale - Part II
    • Cuba A Bittersweet Tale - Part III
    • Cuba A Bittersweet Tale - Part IV
    • Cuba A Bittersweet Tale - Part V
    • Cuba A Bittersweet Tale VI
    • Cuba A Bittersweet Tale - Part VII
    • Cuba A Bittersweet Tale - Part VIII
Mom It Forward: Contributor
Follow on Bloglovin
  • Bake
  • Baking
  • Coffee
  • Cuba
  • Food
  • LA Local
  • Life
  • Make
  • NY Local
  • Play
  • read
  • Sweets
  • Things
  • Travel
  • US City
NYSE for SMPW. Did you get that. New location for us, was a lovely day. Nice to be back down here doing our volunteer work. Always fulfulling.
This was my pre-meal to get me fed and courage to go network with people I don’t know but want to know. Finally got to @barpisellino for their classic Negroni. Did not disappoint.
Quick trip down to the city tonight to Network. So out of practice but was good to make some work connections. Chrysler Building and Grand Central Station pics never get old.
When the light hits your new coffee mug just perfectly. Pottery by @lark_potters
NYSE for SMPW. Did you get that. New location for us, was a lovely day. Nice to be back down here doing our volunteer work. Always fulfulling. This was my pre-meal to get me fed and courage to go network with people I don’t know but want to know. Finally got to @barpisellino for their classic Negroni. Did not disappoint. Quick trip down to the city tonight to Network. So out of practice but was good to make some work connections. Chrysler Building and Grand Central Station pics never get old. When the light hits your new coffee mug just perfectly. Pottery by @lark_potters
twitter
pinterest
facebook

Powered by Squarespace. Content is for demonstration purposes only.