• Home
  • About Me
    • A Simply Raw Life
    • Donuts, Dresses, and Dirt
    • Oh Joy
    • david lebovitz
    • My Life at Playtime
    • Design Mom
    • Curbly
    • AltDesign
    • Peggy Wong
    • A Golden Afternoon
    • Eat, Drink + Be Merry
    • Dylan and Jeni Photography
    • Route 66
    • Cuba A Bittersweet Tale - Part I
    • Cuba A Bittersweet Tale - Part II
    • Cuba A Bittersweet Tale - Part III
    • Cuba A Bittersweet Tale - Part IV
    • Cuba A Bittersweet Tale - Part V
    • Cuba A Bittersweet Tale VI
    • Cuba A Bittersweet Tale - Part VII
    • Cuba A Bittersweet Tale - Part VIII

itsweet & savory itsweet & savory

  • Home
  • About Me
  • Favorites Places
    • A Simply Raw Life
    • Donuts, Dresses, and Dirt
    • Oh Joy
    • david lebovitz
    • My Life at Playtime
    • Design Mom
    • Curbly
    • AltDesign
    • Peggy Wong
    • A Golden Afternoon
    • Eat, Drink + Be Merry
    • Dylan and Jeni Photography
  • Travel Stories
    • Route 66
    • Cuba A Bittersweet Tale - Part I
    • Cuba A Bittersweet Tale - Part II
    • Cuba A Bittersweet Tale - Part III
    • Cuba A Bittersweet Tale - Part IV
    • Cuba A Bittersweet Tale - Part V
    • Cuba A Bittersweet Tale VI
    • Cuba A Bittersweet Tale - Part VII
    • Cuba A Bittersweet Tale - Part VIII
May Seasonal.JPG

May Seasonal Eats

May Seasonal.JPG

It’s finally, really, Spring going on Summer here in the Hudson Valley. Last weekend I planted my vegetable box. Of the illustrations above only beets went in as seeds a few weeks prior and I’m already seeing the tops of the leaves. Few things planted as seeds that I started or sowed directly in the soil, the rest I had to buy small plants. My seeds starter kit didn’t do so well when I took it outside for a while, it was still too cold at night and scared the seeds. Farm lesson learning number #537.

People really love Rhubarb up here and probably everywhere except my household. I watched an older gentleman in the store meticulously pick out his Rhubarb leaves. I so wanted to ask what he was making, though I doubt I would have tried it. Have you watched Zoe Eats or own any of her cookbooks? The only episode on Discovery+ right now is her making a Rhubarb pie. I was almost sold on that. We shall see.

My neighbors found some wild mushrooms growing in their part of the yard, they looked like Morels, and while they are adventurous outdoor people who forage for wild mushrooms, I wasn’t brave enough to try them. It stems back from my first advertising job where I had to research mushroom names and what was poisonous and what wasn’t. After seeing how similar they looked I vowed to leave it to the groceries stores. Y

Yet another thing to explore given forever in the future, that along with growing vanilla beans and harvesting my grapes and tending my orchard. Yeah my farming list is long and grows everyday. That and my artistic endeavours. Enjoy the beginning of the planting and growing season.

Related Posts Plugin for WordPress, Blogger...

Posted in Gardening, Food and tagged with Garden, vegetable, vegetables, seasonal fruits, seasonal veg.

May 21, 2021 by Tanya Ponce.
  • May 21, 2021
  • Tanya Ponce
  • Garden
  • vegetable
  • vegetables
  • seasonal fruits
  • seasonal veg
  • Gardening
  • Food
  • Post a comment
Comment
January Seasonal.jpg

January Seasonal Eats

January Seasonal.jpg

January what a crazy month, actually a REALLY long month. As most people want to start the year on a healthy kick I bought a juicer. Goal was to make me eat more vegetables. I was nervous about this juicer, I think I’ve been scared of the cleaning juicer part. I bought a Korean brand called Hurom, it’s this one. So far I really love it, super easy to use and clean. You do have to chop up your produce to smaller bits to put in the shoot, but I really don’t mind this. Be warned fibrous veg, like stems, celery, ginger you may have to stop and clean out the filter so it doesn’t block the pulp from coming out. This is a juicer problem across the board. Chopping up the veg in smaller pieces does give me a chance to take inventory and deternine my own concoctions. As most appliances come with recipe books this is a great way to get inspired on what to make. The best part is I’m eating more vegetables. Which was the goal.

We also learned that to yield one cup of juice of any kind you need A LOT of fruit and veg. We’ve been ordering from local grocery story for pick-up, trying to avoid going in the store. However, knowing I need more produce we started ordering from Misfits Market. Our first box arrived this week, we just ordered the small one. What we received and chose was the following: swiss chard, russett potatoes, sweet potatoes, jalapenos, roma tomatoes, carrots, ginger, cabbage, oranges, and pears. We’ve used just about it all for soaps, juices, and salsa. Super happy about our uptick on taking in more vegetables and fruit. My juice combos have been delicious, beets, wheat grass and pears; apples, carrots, cabbage, and ginger. You don’t need much ginger, because it turns super spicy with too much ginger. Trust me.

As for swiss chard I decided to make a Torta. My neighbor in Santa Monica made an amazing one, I searched online for a good recipe and just decided to text her and ask for hers. Of course it’s from a saved Saveur Magazine probably from the 90’s. This was very easy to make and delicious. I’m not a huge onion or feta fan, so I just put less of it in. Would be fun to maybe swap out feta for ricotta. Copy of the recipe image below along with a few of my pictures.

Torta Verde - Saveur Magazine
IMG_0893.jpg
IMG_7847.jpg
IMG_7852.jpg
IMG_7860.jpg
Torta Verde
Related Posts Plugin for WordPress, Blogger...

Posted in Food, Make and tagged with vegetable, vegetables, seasonal fruits.

January 31, 2021 by Tanya Ponce.
  • January 31, 2021
  • Tanya Ponce
  • vegetable
  • vegetables
  • seasonal fruits
  • Food
  • Make
  • Post a comment
Comment
November Seasonal.JPG

November Seasonal Eats

November Seasonal.JPG

Is bread a seasonal eat? Because that’s what I did for the month of November. I ate lots and lots of bread. Traditonally Rob and I like to call in NoBreadmer. Which means no bread for 30 days. Yeah we did the opposite. Oh Boy.

Originally I creating these seasonal eat explorations because we had moved to an agricultural area in Central California. On any given day during the summer you would see trucks full of tomatoes and garlic barely down the 99. Driving the country roads were the migrant workers hauling in the sweet potato crops, or the infamous dust bowl created by the shaking of the almond trees. Everytime we’d drive down one of these roads and I see a new tree and stop the car to get a closer look. I saw a pistachio tree for the first time on rural country road. Walnut trees in huge groves. It was inspiring to see the variety. Oddly enough there were no great farmer stands out there. All the good stuff was shipped to the cities and restaurants through out California and beyond.

We take these moments for granted. While the triple digit heat in the summer and the dusty cloud of farming settled in the area, it’s what started this whole adventure. Now I’m nearly 3,000 miles in the opposite direction. Struggling to make myself eat anything other than the comfort of bread.

I recently read about an ad campaign in the UK to get kids to eat their vegetables. It’s called Veg Power. It’s unconventional approach to getting kids, and aaaheeem, some adults to eat more veg. Props to Adam + Eve/DDB for creating this brillant idea that also saw a massive increase in vegetable sales in 2020. I mean this is the year of the Sourdough starter. In their words “We created a daring counter-intuitive idea targeted at children and their parents. The idea: vegetables are trying to take over the world and the only way to beat them is to eat them. Casting them as evil, created a fun, distinctive, humorous campaign.”

Brillant. Let’s see if I can trick myself into eating more veg. Call it my 70’s childhood where mom boiled everything to it’s oblivion and i just never developed a love for them. Other than my grandma letting me plant my own radish patch, which i remember so fondly, vegetables were evil and I never thought that eating them would make be a motto “eat to defeat.” Here’s to Veg Power!!!

Featured
IMG_5885.jpg
Life, NY Local, Travel, US City
Manic Monday
Life, NY Local, Travel, US City
Read More →
Life, NY Local, Travel, US City
May Seasonal.JPG
Gardening, Food
May Seasonal Eats
Gardening, Food
Read More →
Gardening, Food
January Seasonal.jpg
Food, Make
January Seasonal Eats
Food, Make
Read More →
Food, Make
Small Business Love.jpg
Art, Life, Make, LA Local, NY Local
Small Business Love
Art, Life, Make, LA Local, NY Local
Read More →
Art, Life, Make, LA Local, NY Local
November Seasonal.JPG
Food, Life
November Seasonal Eats
Food, Life
Read More →
Food, Life
October+Seasonal.jpg
Food, Make
October Seasonal Eats
Food, Make
Read More →
Food, Make
Fall Leaves
Life
Mindless Monday
Life
Read More →
Life
Abstract Mind.jpg
Life, Make, Things, Art
Art in the Making
Life, Make, Things, Art
Read More →
Life, Make, Things, Art
NoKneadBread.jpg
Baking, Bake, Food, Make
Baking Bread
Baking, Bake, Food, Make
Read More →
Baking, Bake, Food, Make
Pink Hydrangea
Life
Mindless Monday
Life
Read More →
Life
Related Posts Plugin for WordPress, Blogger...

Posted in Food, Life and tagged with seasonal veg, vegetable, vegetables.

November 27, 2020 by Tanya Ponce.
  • November 27, 2020
  • Tanya Ponce
  • seasonal veg
  • vegetable
  • vegetables
  • Food
  • Life
  • Post a comment
Comment
October+Seasonal.jpg

October Seasonal Eats

October+Seasonal.jpg

October is well on it’s way and Fall is in full swing. Normally it’s all about apples, pumpkins and squash this time of year. And up here in the Hudson Valley, it’s ALL about apples. Apple ciders, the sweet chewy kind, and hard ciders, the alcoholic kind. My season eats include a few additional veg and fruit. I love pears and did a little pear comparison back in January that you might like. Kumquats, I don’t see here, but there were plentiful in California. And I’m alway itching to make myself eat more greens, so i’ll attempt to find some escarole and make something with it.

As for apples, Tantillo Farms in Gardiner is one of many orchards, it was voted top five places for the best apple cider donuts. They were warm and sugary and oh so good, barely made it home with any left over. Apple picking is all the rage up here and a great outdoor activity for the whole family, in normal times we would be all over it. Angry Orchard, who makes amazing hard ciders is up here too. This was a favorite stop for us to go try some free cider samples and sit outside near the orchards. They also sale apple cider donuts if remember correctly filled with cannoli cream. During these pandemic times they have outdoor seating only by reservation. Which is good as it limits the number of people there. We’re still not comfortable with eating out, we’re not feeling the need to make any unnecessary risks. This is a sacrifice as it’s something we both LOVE to do.

Cooking and baking at home are all good for us. Its given me a chance to try the hard recipes that I never seemed to have the patience for before this. Enjoy the month of October and let me know what you got cooking.

Related Posts Plugin for WordPress, Blogger...

Posted in Food, Make and tagged with pears, walnuts, kumquat.

October 10, 2020 by Tanya Ponce.
  • October 10, 2020
  • Tanya Ponce
  • pears
  • walnuts
  • kumquat
  • Food
  • Make
  • Post a comment
Comment
NoKneadBread.jpg

Baking Bread

NoKneadBread.jpg

Have you tried baking bread and it was just always a brick? That’s been my past experience. Like everyone else stuck at home since March I tried my hand at baking bread. I started with something easy. A recipe from PBS of all places. On a sidetrack I’m OBSESSED with PBS. I use this app the most on my Apple TV. How did I NOT know there were recipes too?

It’s called no Knead Bread and it’s the easiest thing ever. You can make this as long as your yeast isn’t expired or you even have yeast. Apparent yeast was another COVID phenomenom of items hoarded or a result of a low supply chain, it was right up there with toilet paper and flour missing from the shelves.

PBS No Knead Bread

I did try my hand many times at making sourdough bread. It’s the starter, it’s just to much for my mind to remember to feed everyday and then every week. Perhaps if I got a pet maybe i’d be more scheduled and remember this. The one time I did make great starter my bread turned out flat and dense. So I at the moment I’ve once again given up on that. One day I’ll get it right, just not today.

Fresh from the oven, cooled slightly so when you slice it crunches and slathered with butter, it really doesn’t get any better than that. You can do it, it’s about to turn colder, we hope for you in Cali really soon. Temperatures on the East Coast are still a bit warm, but it’s changing, and I can’t wait to bake through my second Winter in New York

BreadandButter
Related Posts Plugin for WordPress, Blogger...

Posted in Baking, Bake, Food, Make and tagged with bread, pbs, no knead, baking.

September 8, 2020 by Tanya Ponce.
  • September 8, 2020
  • Tanya Ponce
  • bread
  • pbs
  • no knead
  • baking
  • Baking
  • Bake
  • Food
  • Make
  • Post a comment
Comment
September Seasonal.JPG

September Season Eats

September Seasonal.JPG

It’s already September 2020. Where did 2020 go? Down in history we all hope. It’s been the longest and shortest year all at the same time. I live in a new area since I last posted in February 2019. Since that time we have moved from the West Coast to the East Coast. It might as well be another continent. I’m still figuring out the seasons, literally, and what is available that’s locally grown. There are a couple of great stores here that sell locally grown fruit and vegatables. My shopping expeditions are limited, due to this pandemic situation, for those reading this in 2030 (I so hope your not reading this in 2030), it’s the COVID Pandemic of 2020, let’s hope it doesn’t last too much past this nutty year.

I’ve not explored past my regular supermarket, here it’s called Hannefords, and an occasional hour drive to Trader Joes. Of the images above i think i’m most likely to explore the figs the most. But I’m kind of craving something simple with melon and proscuitto. That’s always a good sweet and savory combo. I love pomegranites and hope to secure some, last year i was gifted quite a few, I know they aren’t cheap to buy, so let’s see if these even grow well on the east coast.

Do you find when you move that your a little stunted in the cooking area? I’ve moved twice in the past 5 years and both times I just forgot what I use to make. Moving here to New York, completely stumped us. It took my friend visiting in October (that would be about 5 months after moving here) to figure out what to make. She really helped me get out of the cooking rut. That’s not to say we don’t OFTEN go to our regular taco mode, super easy and simple to make. But i did start dusting off my cookbooks and we shared a few recipes to get us in the mode.

Then the Pandemic. Oy vey, I need to write a post on all the baking I did. To my defense it was still winter here in New York, my favorite time to bake. Although the heat never stopped me either. I’ll write all about the hard recipes I tried, i feel like I really pushed myself out of my cooking funk. In the meantime, let’s celebrate what we CAN do and that’s eat locally grown foods. Try and find out what’s fresh and in season in your area and act like your on “Chopped” open that basket and use your creativity to make something delicious. Enjoy Fall or Autumn, depending on where you live. This is my second favorite time of year after Spring. It’s the changing of the seasons I love. And Fall in New York is amazing.

Related Posts Plugin for WordPress, Blogger...

Posted in Food, NY Local and tagged with life, seasonal veg, seasonal fruits.

September 1, 2020 by Tanya Ponce.
  • September 1, 2020
  • Tanya Ponce
  • life
  • seasonal veg
  • seasonal fruits
  • Food
  • NY Local
  • Post a comment
Comment
February+Seasonal.jpg

February Seasonal Eats

February+Seasonal.jpg

In the month of February these are some of the fruit and veg that are in season Grapefruit, Anjou Pears, Hedgehog mushrooms, asparagus, broccoli, and butternut squash.

This month I focused on Asparagus. According to the Farmers Almanac it may take 2 - 3 years to truly get started and producing. So patience is required…I think I’ll have to work on this one.

  • Because Asparagus don’t like to be sitting in wet dirt, this plant is ideal for raised vegetable boxes or in the dirt when the soil can be tilled, make sure you have good drainage. Typically Asparagus are planted in the Spring.

  • Dig shallow trenches of about 12 inches wide and 6 inches deep (or 8 inches if you have sandy soil and 4 inches if you have especially heavy soil).

  • Space the crowns 12 to 18 inches apart in rows that are 4 to 5 feet apart. Spread the roots out in the trench with the buds pointing upward.

  • After planting, completely fill in the trench with soil. (Though commonly done in the past, it’s not necessary to gradually fill in the furrow as the plants grow.) 

  • When the trench is filled, add a 4 to 8 inch layer of mulch and water regularly.

  • Do not harvest the spears in the first year (the plant needs time to grow out its root system), but cut down dead foliage in late fall and side-dress with compost. 

  • During the second year, keep the bed thickly mulched, side-dress in spring and early fall, and cut down dead foliage in late fall.

Harvesting (directions from Farmers Almanac)

Asparagus can take three growing seasons to harvest, though you may be able to lightly harvest during the second year.

  • In the first year, just let the asparagus go vegetative to give the crown a chance to get well established. Next spring, remove the old fern growth from the previous year, and keep an eye open for the new spears beginning to emerge.

  • Harvest spears at approximately 8 inches tall, cutting the spears off with a knife or scissors at the soil line.

  • Check your plant every other day for harvest-ready spears. Spears grow quickly and may become too woody before you know it!

  • Stop harvesting spears when the diameter of the spears decreases to the size of a pencil. At that point, it’s time to let them grow and gain strength for next spring.

While cleaning out our garage a few months ago I went through boxes of keepsakes that I was holding on for WAY TOO long. But I did find this recipe card from a dear friend that was given to me at my Bridal Shower. I made sure to make it this month as Asparagus was abundant at the local grocery stores and I still have loads of lemons.

Lemon Asparagus Fettucini Recipe -1.jpg
Lemon Asparagus Fettucini Recipe -2.jpg

I made this recipe and it was delicious I may have put more lemon juice then required, but it was still tasty. I wanted to explore Butternut Squash this past month but just ran out of time. Only 28 days in the month and boy does that fly. Enjoy whatever you made this past month.

Lemon Asparagus Fettucini Pasta.jpg
Related Posts Plugin for WordPress, Blogger...

Posted in Food and tagged with #whereyourfoodgrows, February, Seasonal veg, seasonal fruits.

March 3, 2019 by Tanya Ponce.
  • March 3, 2019
  • Tanya Ponce
  • #whereyourfoodgrows
  • February
  • Seasonal veg
  • seasonal fruits
  • Food
  • Post a comment
Comment
January Seasonal_1.jpg

January Seasonal Eats

January Seasonal_1.jpg

About three years ago I moved from Southern California to Central California. I’m in a very agricultural area where about 90% of the food consumed in California is grown here. Due to the lack of farm to table (go figure) restaurants in the area I have been cooking and baking more. Just about 3 years ago I started monthly drawings of fruit and vegetables that were in season. Many of them cross over into more than just one month. However, I chose those of which I would like to know more about, use in recipes, and generally want to challenge myself in understanding what we eat and where it comes from. #whereyourfoodgrows

In January and February what I saw in the grocery store were Pears. I grabbed four different Pears, one of which is shown in this months drawing. Which one do I like, what’s the difference other than color, which would work for what kind of recipe. So here are my amateur notes on this exploration and a great resource https://usapears.org where i found much of the history of Pears.

January Pears.jpg


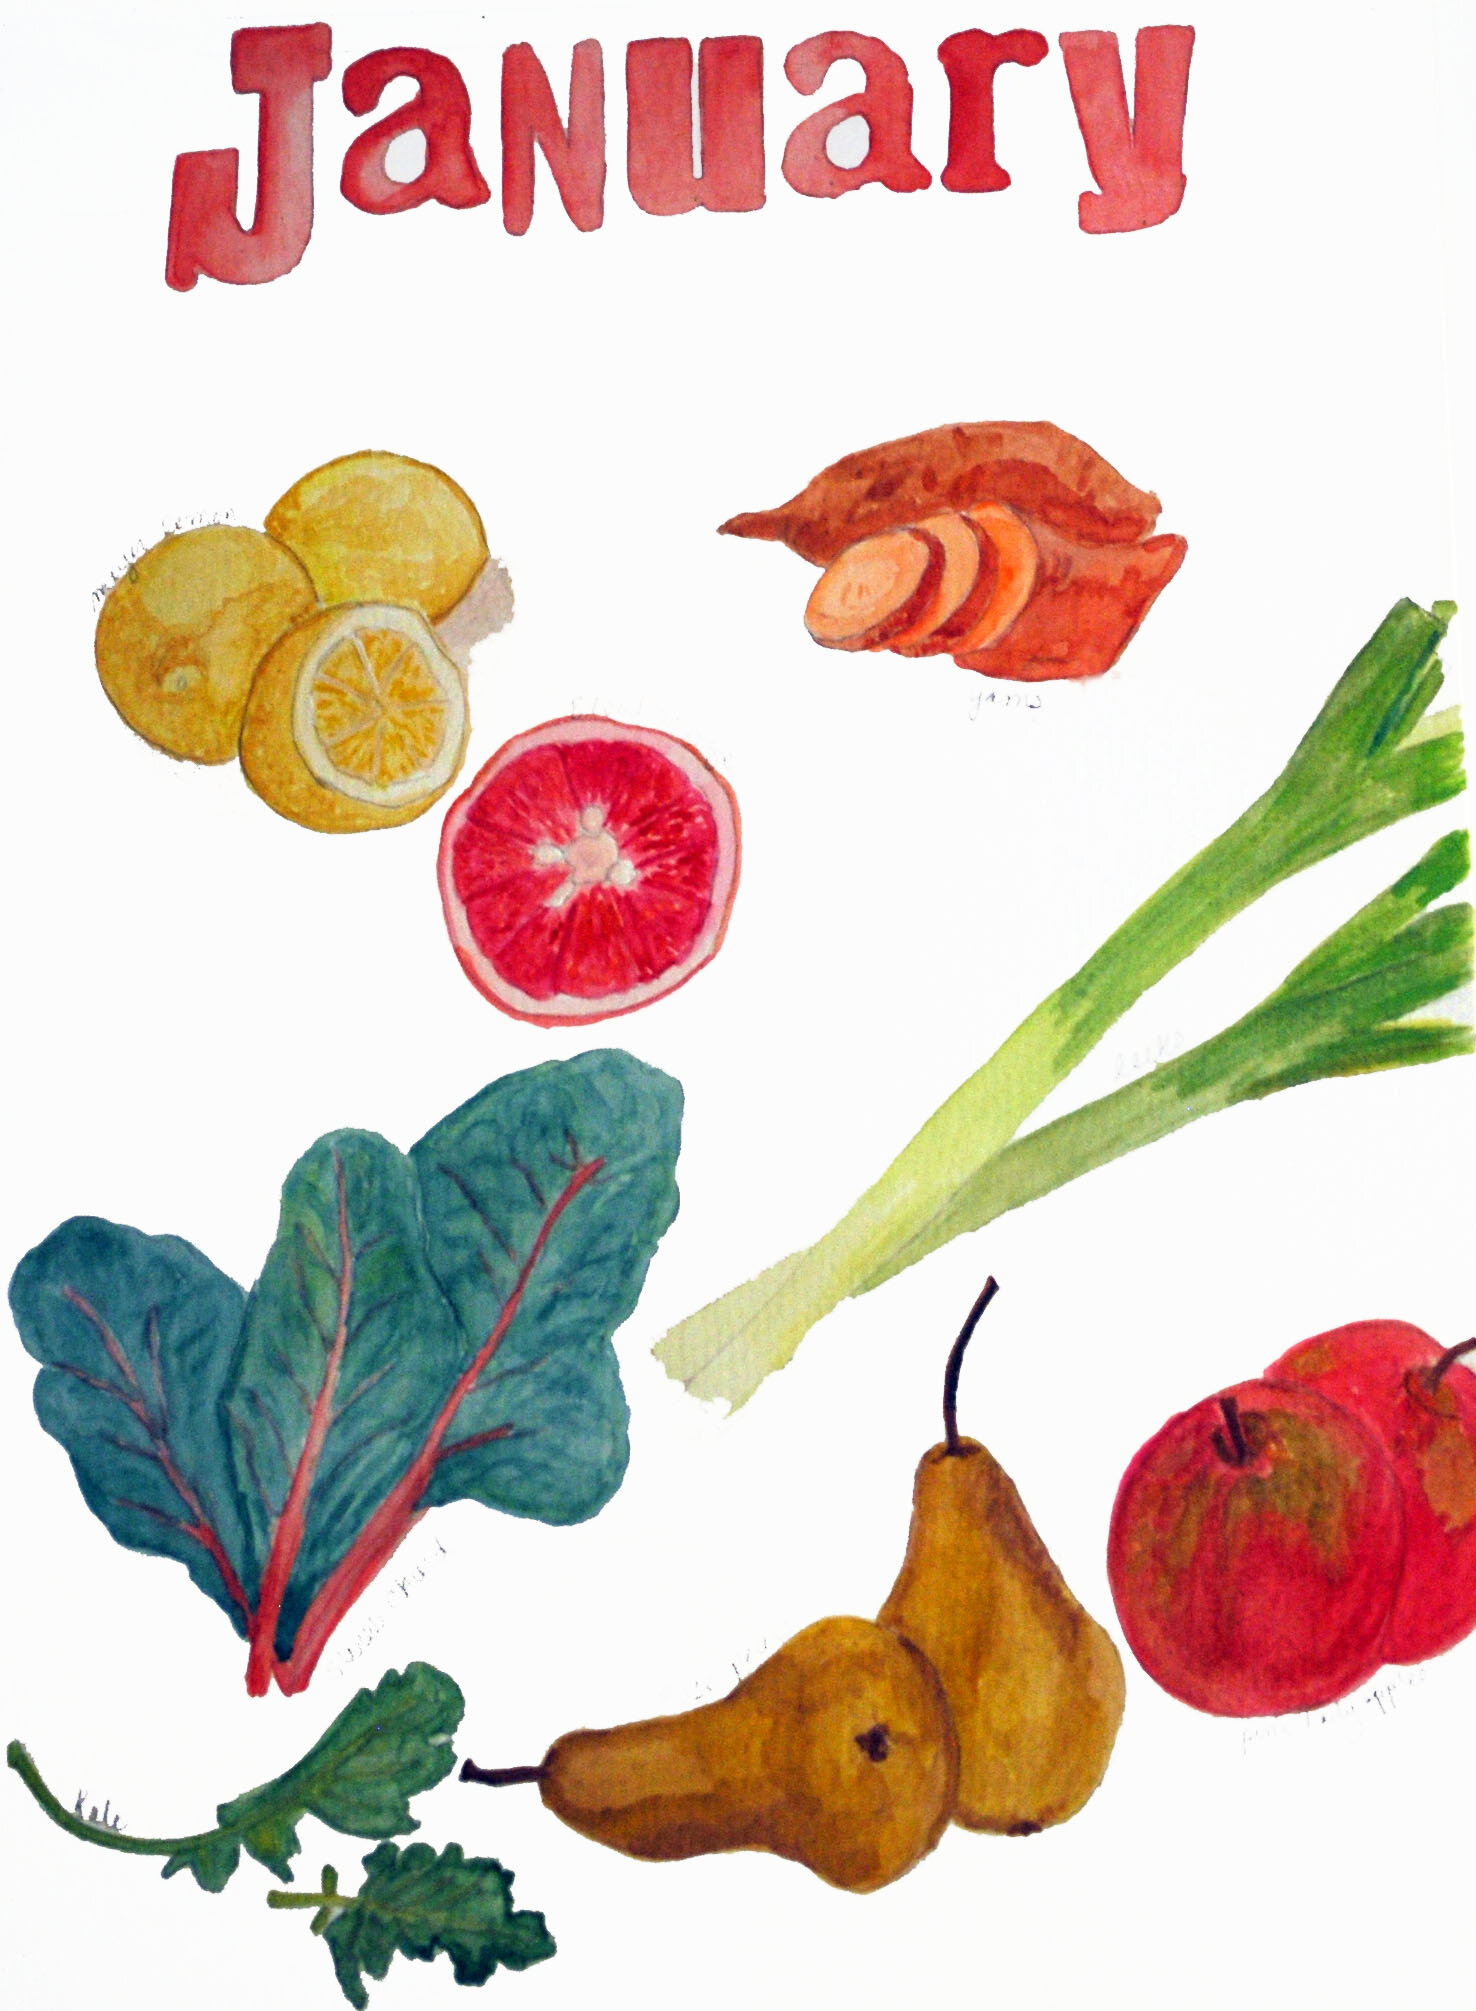
Bosc (BAHsk) Drawn above have a curved stem and elongated neck that widens gradually to a full rounded base creates that is unique among pears. Bosc colors look like warm cinnamon brown with deep rusts on the surface of the skin. Many artists use these type of pears in their still life paintings, which is probably why I was drawn to including it in this months watercolor.

Bosc pears have a more firm and are ideal for use in baking, broiling or poaching. I found their consistency dense but flavor very sweet.

It remains a matter of contention whether Bosc are of Belgium or French origin. Bosc Pears were discovered sometime in the early 1800's. Some refer to them as Beurré Bosc which means "buttery" and named after M. Bosc who was the director of the Paris Botanical Garden.

In the United States the variety was first planted in 1832 or 1833, and those trees first bore fruit in 1836. The first plantings were done in the eastern U.S., on large estate orchards and later commercial orchards. Bosc are grown largely in the Northwest, these trees seem to thrive best in the soil and climate of the Pacific Northwest states of Oregon and Washington. (source USpears.org)

Bartlett ( BART-let) carries a true "pear shape:" a rounded bell on the bottom half of the fruit. Bartlett’s often found in local grocery stores are green, they change to yellow as they ripen at home when left at room temperature.

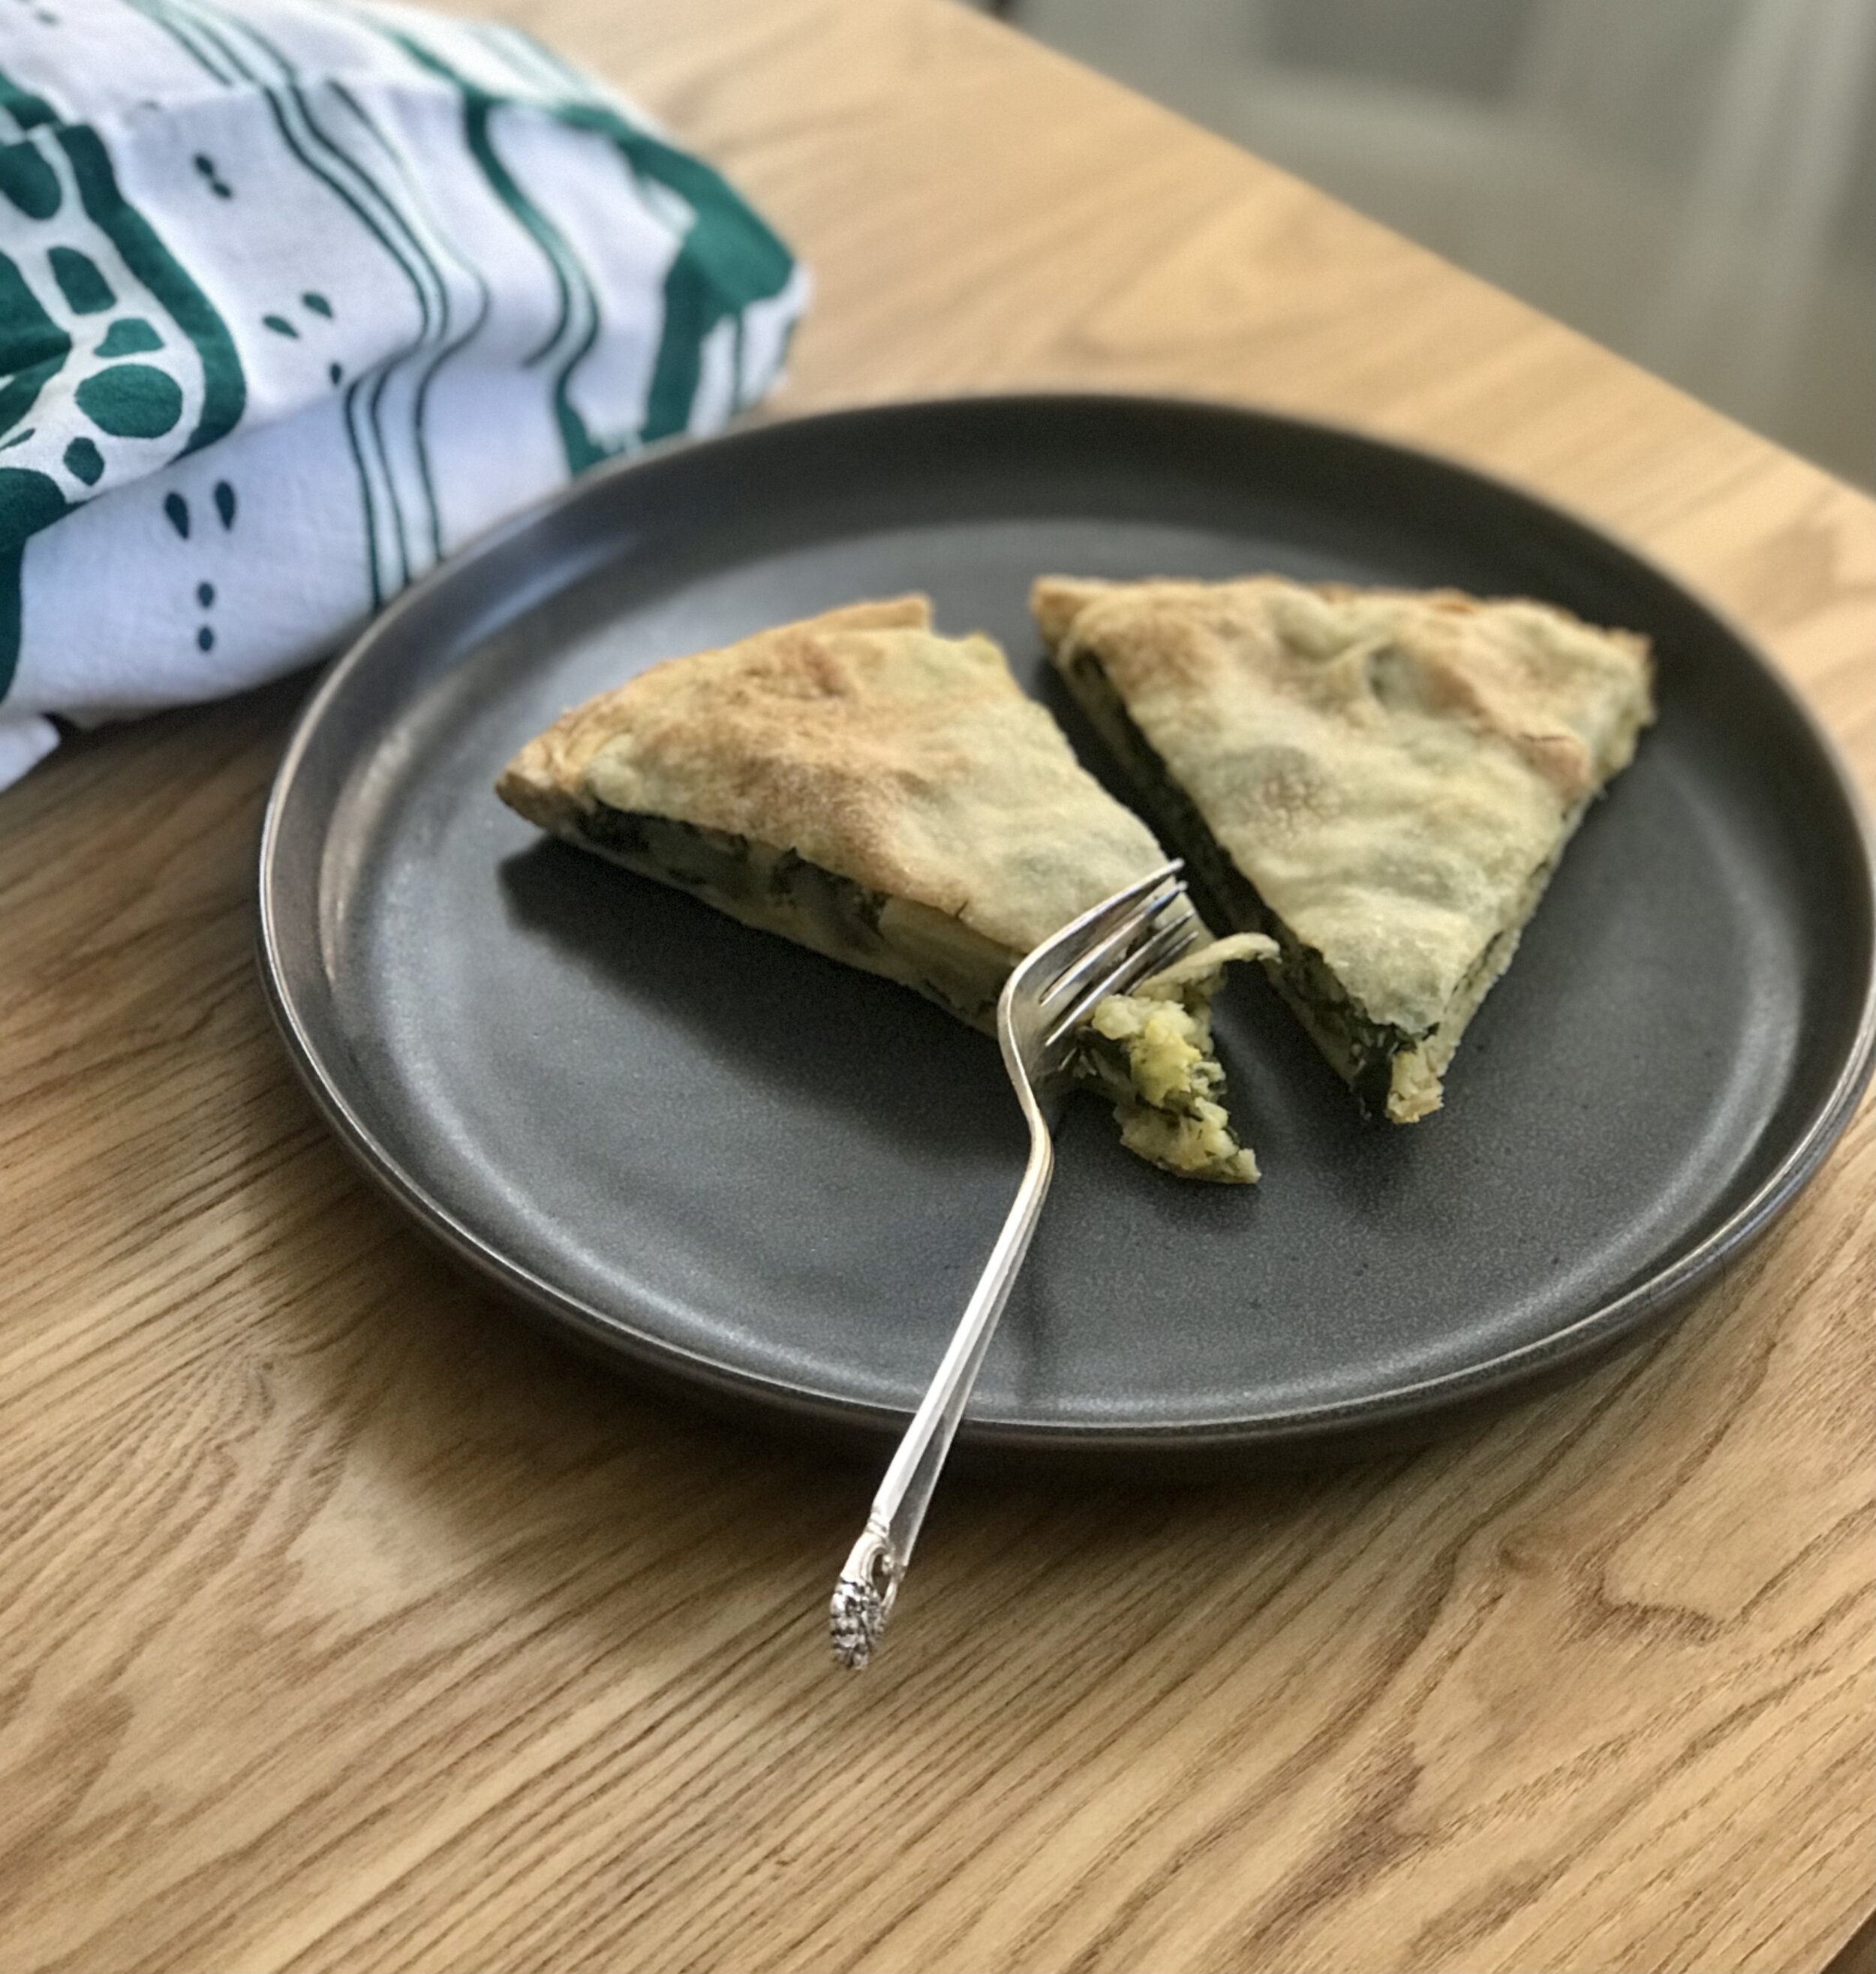
Sliced Bartlett on top of a green salad with your favorite dressing or freshly sliced wedges with cheese for an appetizing snack. Any recipe calling for apples can be made using fresh pears. I found these much softer than the bosc pear and more of a champagne taste.

The variety of pears were discovered originally in 1765 by a schoolmaster in England named Mr. Stair, the Bartlett was first referred to as Stair's Pear. A nurseryman named Williams later acquired the variety, and after introducing it to the rest of England, the pear became known as the Williams Pear. Around 1799, Mr. James Carter imported several Williams trees to the United States, and they were planted on the grounds of Thomas Brewer in Roxbury, Massachusetts. Later, Enoch Bartlett of Dorchester, Massachusetts acquired the Brewer estate. Not knowing the identity of the trees, Bartlett propagated and introduced the variety to the United States under his own name. It was not until 1828, when new trees arrived from Europe, that it was realized that Bartlett and Williams pears were one in the same. By then it was too late... the variety had become widely popular in the U.S. under its adopted name: the Bartlett. (source USpears.org)

D’Anjou (ON-ju) D’Anjou, also know as d'Anjou pears are thought to have originated in Belgium, and they are named after the Anjou region in France. The variety was introduced to England early in the 19th century. Called Beurré d' Anjou, they were introduced to America in about 1842.  They are recognizable for their egg-shaped appearance, having a larger spherical lower portion that begins a gradual taper above the mid-point to a narrower rounded top. Their skin color is bright green, and sometimes has a soft red blush.

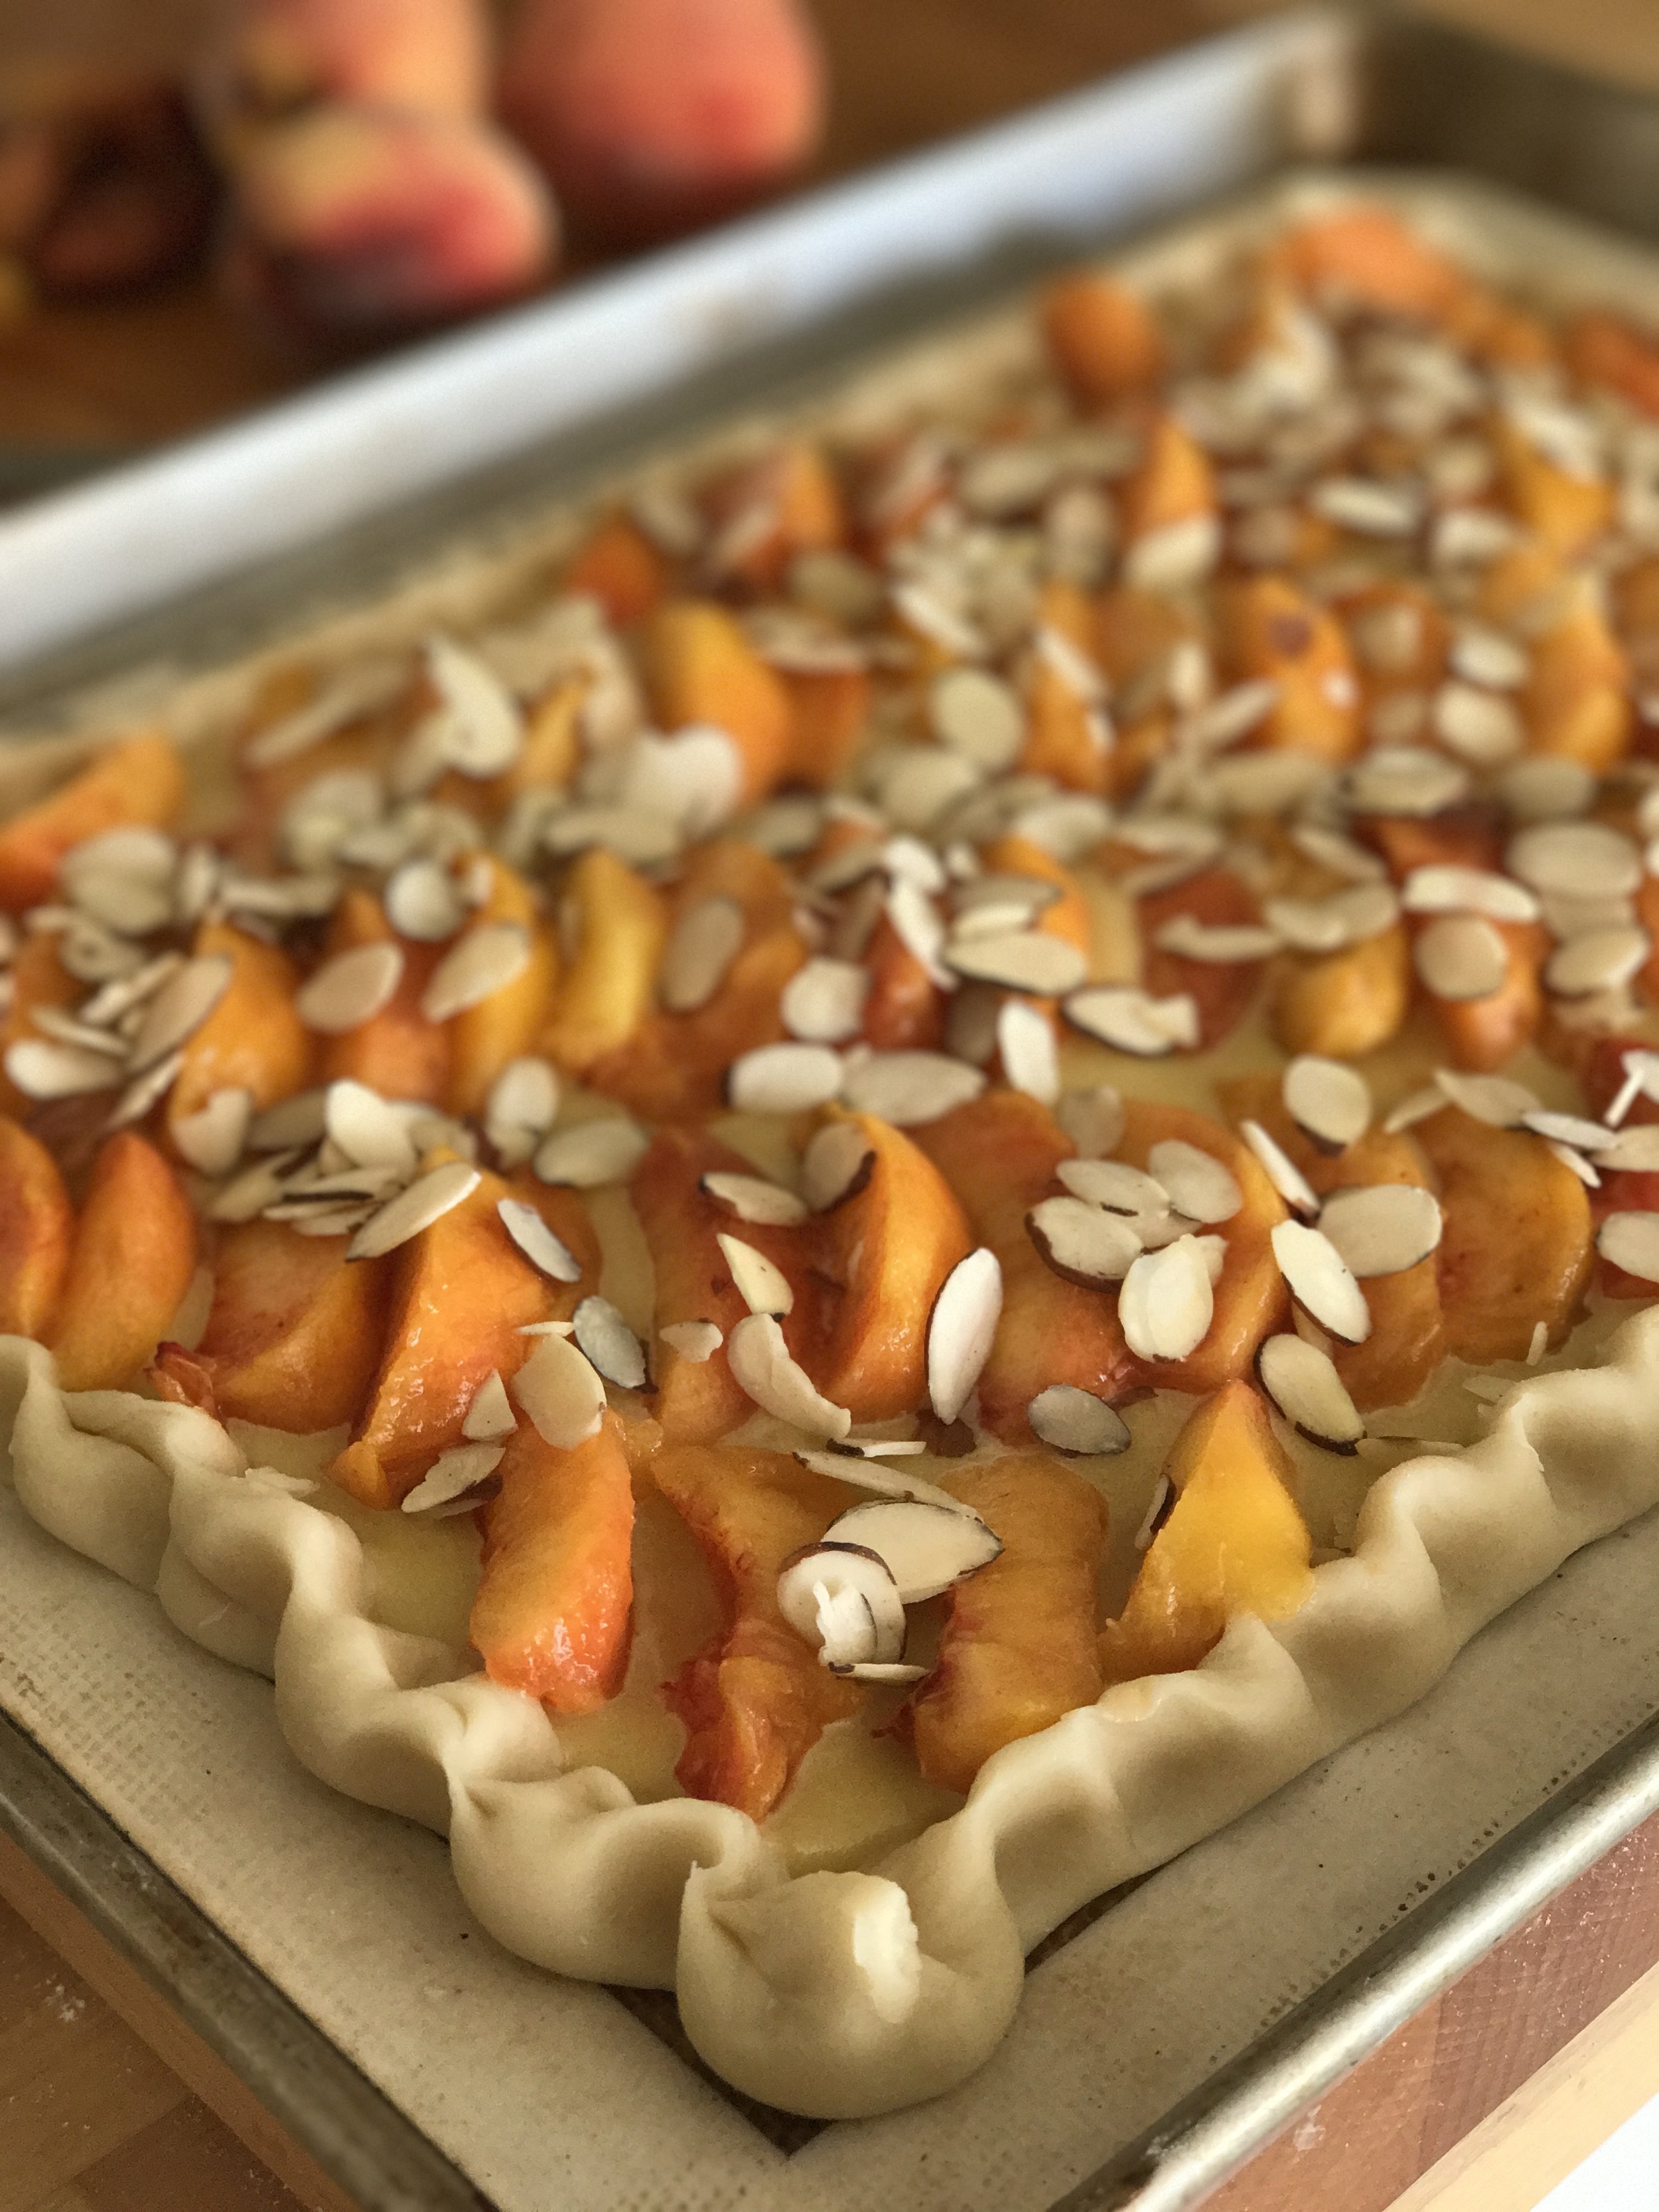
The Anjou is an all-purpose pear. They are juicy when ripe, with a hint of lemon-lime flavor. They hold up well in baking, poaching, roasting, or grilling and they are delicious when sliced fresh in salads or eaten as a snack. This pear was sweet with almost an apple taste to them

Red D’Anjou (ON-ju) Recognizable for their egg-shaped appearance, having a larger round lower portion that taper above the mid-point to a narrower rounded top, like an egg. The color of Red Anjous varies from pear to pear, however, they are generally dark maroon in color, sometimes with light vertical streaks of color that were naturally created by the sun while the pear was still on the tree. The red D’Anjou was more grainy in texture then the green version.

Pear Clafoutis_2013_itsweetsavory.jpg

I’ve made Pear Clafoutis before and usually use the the Bartlett or D’Anjou Pears for those. Its a simple recipe and delicious. I can’t remember which recipe I used for the version above, but I love the layout of the fruit compared to ones i see online. Ina likes to add Pear brandy and Martha likes to add dried cherry’s. You can’t go wrong with either of their recipes and Epicurious has a great one to.

However you eat your pears, enjoy their flavors and texture and consume them with your favorites. Pastry wrapped pears with vanilla ice cream and drizzled chocolate, sliced on a salad, poached in a wine sauce, or simply sliced over a salad or a snack with some sharp cheddar cheese. Enjoy!

Related Posts Plugin for WordPress, Blogger...

Posted in Food and tagged with #whereyourfoodgrows, food, january, seasonal veg, seasonal fruits, Pears, bartlett, bosc, d'anjou, anjou.

February 15, 2019 by Tanya Ponce.
  • February 15, 2019
  • Tanya Ponce
  • #whereyourfoodgrows
  • food
  • january
  • seasonal veg
  • seasonal fruits
  • Pears
  • bartlett
  • bosc
  • d'anjou
  • anjou
  • Food
  • Post a comment
Comment
itss_glutenfreealmondcake.jpg

Gluten Free Almond Cake

itss_glutenfreealmondcake.jpg

When I post anything on Instagram that has "Gluten free" in the description I usually get quite a few asks on the recipe, this gluten free almond cake was no exception. While I am not a professional recipe tester, I have found an awesome gluten free mix that I can't brag enough about. It's actually from the Huckleberry Cookbook by author Zoe Nathan. I make this in advance and just substitute it for when a recipe calls for regular or cake flour. 

Gluten free flour mix from Huckleberry Cookbook

2 ¾  cups brown rice flour

1 ¾  cups oat flour

1 ¾  cups potato starch

½  cup cornmeal

Almond Cake Ingredients (adapted from Everyday Italian by Giada De Laurentiis)

1/2 cup fine yellow cornmeal

1/2 cup gluten free flour mix from Huckleberry Cookbook

1 tsp baking powder

1 stick (4 ounces or 1/2 cup) unsalted butter, softened

1/4 cup almond paste, cut into half-inch pieces

1 1/4 cups confectioners' (powdered sugar) sugar, plus more for dusting

1/2 tsp pure vanilla extract

2 eggs

4 egg yolks

1/4 cup sour cream

Raw almond slices

itss_raw almondcakebatter.JPG

Directions

Preheat oven to 350 degrees F.

Grease an 8-inch round cake pan with vegetable spray or butter and flour the cake pan.

In a medium bowl, whisk together the cornmeal, gluten-free flour and baking powder and set aside.

Using a stand mixer with a paddle attachment, I have a KitchenAid, or you can use a hand-mixer, beat the butter and almond paste on high speed until smooth, takes up to 5 minutes. Reduce speed to low and slowly add powdered sugar also called confectioners sugar. Mix until thoroughly combined till it's light and fluffy. Increase speed to high and add the vanilla extract, whole eggs and egg yolks. Add the eggs 1 at a time. Mix until well combined. Reduce speed to medium and add the sour cream and dry ingredients and mix until just incorporated.

Pour the batter into the prepared cake pan and smooth the surface with a spatula. I added sliced almonds on top to give the take even more texture. Bake in the lower third of the oven for 35 minutes, or until the cake is golden and pulls away from the sides of the pan. Transfer pan to a wire rack and let cool. Remove from pan and dust with confectioners' sugar if you'd like. Looks fine without it too.

I polled my Instagram followers on what topping to put on the cake and well Cardamom Whipped Cream won. I basically whipped up some heavy whipping cream and added some cardamom, a sprinkle of sugar and a dash of vanilla extract until i liked the tasted. It was the perfect compliment to this cake.

Enjoy.

Related Posts Plugin for WordPress, Blogger...

Posted in Bake, Baking, Food, Sweets and tagged with cake, gluten-free, almond cake, gluten-free almond cake, gluten free, huckleberry.

March 6, 2018 by Tanya Ponce.
  • March 6, 2018
  • Tanya Ponce
  • cake
  • gluten-free
  • almond cake
  • gluten-free almond cake
  • gluten free
  • huckleberry
  • Bake
  • Baking
  • Food
  • Sweets
  • Post a comment
Comment
Peach Almond Cream Tart_tanyaponce

Peach Almond Cream Tart

Peach Almond Cream Tart_tanyaponce

Peaches are in season and once again a friend dropped off a bounty of peaches and plums. I saw a post on Instagram of individual peach tarts and decide right then I was going to make a peach tart. It looked like they may have added a cream to the tart. As live in an almond orchard valley in Central California, you would think almonds would be cheap here, but I've yet to find that. So I decide i was going to figure out how to make almond cream. After a little research I decide to mash up a few recipes to make this delicious Peach Almond Cream recipe. Enjoy this summer delight.

1. Pastry Tart Crust

2 cups all-purpose flour

1/2 teaspoon kosher salt

1 tablespoon sugar

12 tablespoons (1 1/2 sticks) cold butter (small cubes for easier mixing)

2. Almond Cream

7 ounces almond paste (usually sold on the baking aisle of major grocery stores. In the US it comes in tubes or small 8 oz boxes)

1/4 cup unsalted butter, softened

2 large eggs, at room temperature

1 tablespoon sugar

2 tablespoons flour

1/8 teaspoons salt

2 teaspoons Amaretto

3. Peaches and Sugar

2-4 medium peaches, peeled and thinly sliced

1 tablespoon Turbinado sugar

Handful sliced almonds

1. Pastry: I use my Cuisinart food processor for this, its the fastest easiest way to make this happen. You could use a pastry cutter and then do a little kneading, into a ball, just be careful to not over knead. For the pastry, place the flour, salt and sugar in the food processor fitted with the steel blade. Pulse to mix the dry ingredients a few seconds and then add the butter (I cube my butter into small pieces with a knife before putting it the processor), and pulse 10 - 12 times. While the motor is running pour in 1/2 cup of ice water down the feed tube. You will see the pastry quickly comes together into a ball. Dump this onto a floured surface and make sure you knead this into a ball, mine just about always is already in a ball, I just pat it together and wrap in plastic and refrigerate for an hour.

When ready to use take out of the refrigerator for a few minutes before rolling it out. I roll out the tart out just big enough to fit on my cookie sheet. I use either parchment paper or silicone sheet to line my cookie sheet. Fold over the edges to make a nice crust or leave flat.

2. Almond Cream: Place almond paste and butter in a food processor and blend. Add eggs and process until smooth. Add sugar, flour, salt, and Amaretto; process until combined. Pour the almond cream on your rolled out pastry dough. Smooth it a nice even layer over the entire tart (Not the folded over crust if you choose that route)

3. Add sliced peaches in a few rows. Be creative on how you want them to lay out. I like them in long rows. Sprinkle with the Turbinado sugar and almond slices and put in the oven.

Raw Peach Almond Cream Tart_tanyaponce

Bake for 45 minutes to an hour in a 400 degree oven. Cool, slice and EAT.

Peach Almond Cream Tart_tanyaponce
Related Posts Plugin for WordPress, Blogger...

Posted in Bake, Baking, Food, Sweets and tagged with Bake, almond, almond cream, peach, peaches, peach almond cream tart, tart.

June 28, 2017 by Tanya Ponce.
  • June 28, 2017
  • Tanya Ponce
  • Bake
  • almond
  • almond cream
  • peach
  • peaches
  • peach almond cream tart
  • tart
  • Bake
  • Baking
  • Food
  • Sweets
  • Post a comment
Comment

Mindless Monday: Orange Dreamsicles

It's Hot. I'm done with the heat, are you SoCal peeps? Is it raining in your region of the world? Can you send some of it our way, we so need rain here. The humidity bodes well for a rainy winter, so hopefully that really happens.

This weekend was beyond hot. and hardly anyone has air conditioning on the Westside, they all think we get ocean breezes. Uhmm no, I'm 10 blocks away, with multiple buildings blocking my breeze. Seriously SB and I couldn't wait to get into our car just to put the AC on. Getting ready for a meeting or going out to eat was miserable, dripping sweat and make-up is no bueno.

Something had to be done so I decided to make yogurt popsicles. Did your mom ever make these for you growing up, mine did all the time. I have to tap her brain for what she put into them. However for me the questions was, "what did i have in my refrigerator?" Yogurt, check. Left over sweet condensed milk, from my last popsicle trial, check. Oranges and lemons, check. I decide I wanted an Orange Dreamsicle. This was the easiest recipe EVER.

2 cups yogurt (I used Vanilla, next time maybe i'd try Greek plain yogurt)

1/3 cup sweet condensed milk

Zest of one Orange

OrangeDreamsiclePrep.jpg

Mix and pour into your popsicle molds and freeze overnight. Seriously the mixture was so good I was dreaming about these till the next day when I could eat them and I almost ate them for breakfast, I mean it's the equivalent of orange juice, right? These were easy to make and a welcome little treat. Too bad today I'm starting a 2 week NO SUGAR kick. How will I ever make this happen! Happy Monday.

Related Posts Plugin for WordPress, Blogger...

Posted in Food, Life, Make, Sweets and tagged with Life, popsicles, dreamsicle, orange, yogurt, food, yum.

September 1, 2015 by Tanya Ponce.
  • September 1, 2015
  • Tanya Ponce
  • Life
  • popsicles
  • dreamsicle
  • orange
  • yogurt
  • food
  • yum
  • Food
  • Life
  • Make
  • Sweets
  • Post a comment
Comment

Superba Food + Bread

In Los Angeles the food options can be limitless. Recently opened Superba Food + Bread is making headlines already. I love to see seemingly old abandoned buildings repurposed to new adventures. This building was once a auto mechanic garage and supply store. Superba Food + Bread is located at 1900 S. Lincoln Blvd. in Venice, CA, on the corner of Marco Pl. between Superba Ave. and Amoroso Pl.  Ambitiously they opened for breakfast, lunch and dinner during the week, with the addition of brunch on the weekend. That's a big deal to open with serving three meals a day, but I can say after driving back and forth pass this place, it's always busy and in the evenings the lighting looks magical.

First time here was a few days after opening, we really just wanted to get a quick coffee and breakfast snack, not a full service sitting. This didn't seem like an option, but they were nice enough to accommodate us. At the time they were serving Stumptown coffee, but have since switched over to Heart Roasters, which at the time I wrote this Heart Roasters is only served at three places in LA.

I've gone back a few times for breakfast and lunch and really just love this place. It's decor is beautiful and simply designed, and already winning awards [2014 AIA Restaurant Design Award Winner]. 

I am kind of coveting the custom made Heath Ceramics that they serve their food on. The teeny tiny jars of lemon curd are amazingly delicious, if not a bit pricey, but a splurge once in a while is ok, right?

I am obsessed with this color combination. When driving back and forth down Lincoln Blvd, where Superba is located I was drawn by the mural being painted during construction. Subliminally I may have been influenced by this color as my newly updated bedroom indicates the same palatte. I'm seriously considering painting the doors with these stripes. I know they will replace our old doors when we move, so what do you think?

Say "Yes" to Super Food + Bread.  Incidentally I've noticed this simple circular sign design everywhere now. It seems to be standard use on old Route 66 auto shops in the day. Just love the nostalgia of it.

Superba Food + Bread

1900 S. Lincoln Blvd.

Los Angeles, CA 90291 

(East side of the corner of Marco and Lincoln, 1 block South of Superba)

Related Posts Plugin for WordPress, Blogger...

Posted in Food, LA Local and tagged with superba, superba food and bread, superba food + bread, food + bread, food, bread.

August 6, 2014 by Tanya Ponce.
  • August 6, 2014
  • Tanya Ponce
  • superba
  • superba food and bread
  • superba food + bread
  • food + bread
  • food
  • bread
  • Food
  • LA Local
  • Post a comment
Comment
GrapefruitCocktailGoodness.jpg

Grapefruit Gin Martini

GrapefruitCocktailGoodness.jpg

Poor me had to taste test Grapefruit Gin Martini's.  This little concoction and these gift tags are featured on Tiny Prints blog today. Go check it out.

Related Posts Plugin for WordPress, Blogger...

Posted in Food, Make, Life and tagged with grapefruit gin martini, tiny prints, gift tags, tiny prints gift tags, martini, grapefruit, gin, cocktail.

May 13, 2014 by Tanya Ponce.
  • May 13, 2014
  • Tanya Ponce
  • grapefruit gin martini
  • tiny prints
  • gift tags
  • tiny prints gift tags
  • martini
  • grapefruit
  • gin
  • cocktail
  • Food
  • Make
  • Life
  • Post a comment
Comment

Mindless Monday

Are you craving Margarita's today? I think many of you are. I tried to make one the other day. I'm not a huge tequila fan these days, but this was a tasty way to use a seasonal ingredient like blood oranges. With that said, Megan from the blog The House Wife In Training Files does it right. Look at her amazing images and recipes here, I found her on Pinterest and had to try this refreshing cocktail. Whatever you are drinking, personally I'm still on my second cup of coffee, enjoy your week!

Related Posts Plugin for WordPress, Blogger...

Posted in Life, Food, Things, Make and tagged with mindless monday, blood orange margarita, magarita, blood oranges.

May 5, 2014 by Tanya Ponce.
  • May 5, 2014
  • Tanya Ponce
  • mindless monday
  • blood orange margarita
  • magarita
  • blood oranges
  • Life
  • Food
  • Things
  • Make
  • Post a comment
Comment

Double Chocolate Hazelnut Biscotti

What to make for dessert when you are having an Italian appetizer party? Biscotti of course. I wanted something simple and not messy that people could walk around with. Although, admittedly biscotti does generate a lot of crumbs, but oh well. I had made biscotti forever ago, but it was a basic recipe, white flour with almonds. This time I wanted chocolate and lots of it. Its funny when I thought about making the biscotti I thought of my friends Dad who also happens to be my neighbor. We've had plenty of meals with their family and I've always seen him dip his biscotti in Prosecco or wine of any kind. So I made sure we had that Prosecco on hand for the party since he and his wife were attending. He did not disappoint. 

Here's how I made them.

Ingredients

2 cups all-purpose flour

1/2 cup unsweetened cocoa powder, I used Valhrona

1 tsp baking soda

1 tsp salt

3/4 stick (6 tablespoons) unsalted butter, softened

1 cup granulated sugar

2 large eggs

1/4 tsp almond extract

1 cup roasted hazelnuts, chopped (I buy raw ones and roast them in a cast iron skillet. After they cool i rub as much of the skin off as I can, but you can leave it on if you'd like)

3/4 cup dark chocolate chips

Preheat oven to 350°F. Butter a cookie sheet.

In a bowl whisk together flour, cocoa powder, baking soda, and salt. In another bowl with an electric mixer beat together butter and sugar and almond extract until light and fluffy. Add eggs and beat until combined. Stir in flour mixture to form a stiff dough. Stir in chopped hazelnuts and dark chocolate chips.

On prepared baking sheet, you might want to flour your hands, form dough into two slightly flattened logs, each 12 inches long and 2 inches wide. I find that longer thinner logs is the way to go, that way when you get to the slicing part you have smaller biscotti cookies, but that's entirely up to you.  Bake logs about 35 minutes, or until slightly firm to the touch. Cool biscotti on baking sheet 5 minutes.

On a cutting board cut biscotti diagonally into 3/4-inch slices. Arrange biscotti on baking sheet and bake until crisp, about 10 minutes. Cool biscotti on a rack. You can keep them in an airtight container for 1 week and frozen, 1 month. I like my biscotti crunching and hard so I baked them slightly longer, no more than a total of 20 minutes.

Final task was packaging and sending them on their way. I'm loving these new gift tags from Tiny Prints, which I personalized, actually I'm kind of addicted to them. My friends loved the little packages of goodies and a few friends will get them in the mail with the recipe on my new note pad (seen above) which incidentally looks perfect with the biscotti.

Related Posts Plugin for WordPress, Blogger...

Posted in Bake, Baking, Food, Make, Sweets and tagged with double chocolate hazelnut biscotti, chocolate, chocolate biscotti, chocolate hazelnut biscotti.

May 4, 2014 by Tanya Ponce.
  • May 4, 2014
  • Tanya Ponce
  • double chocolate hazelnut biscotti
  • chocolate
  • chocolate biscotti
  • chocolate hazelnut biscotti
  • Bake
  • Baking
  • Food
  • Make
  • Sweets
  • 4 Comments
4 Comments

Candied Grapefruit Peels

Candied grapefruit, doesn't that just sound delectable. Well in my quest to make a refreshing cocktail, I thought about what would I garnish it with. Since the major citrus ingredient in my cocktail was grapefruit, why not use the peels for something extra sweet and special.

I've made candied orange peels here before, so I new it wasn't too hard to do, just a little time consuming. So here's how:

Ingredients

2 large red or pink grapefruits

1 cup of sugar, plus extra for tossing the peels in

Cut peel from grapefruits into strips or small triangle pieces, you can leave about 1/4 of the  white pith. Place the peels in a small saucepan, add cold water to cover over them. Bring water to a boil, then drain; you will need to repeat this process twice.

After you've done the above twice, bring the peel, 1 cup sugar, and ½ cup water to a boil in same saucepan. Reduce heat and simmer until peel is translucent, 15–20 minutes. Drain and then transfer peel to a wire rack and let dry, 2–4 hours. Toss in more sugar. (See above for what they look like once they have been boiled in the sugar and after they have been tossed in the sugar)

These are great as garnishes to a drink. I might dip a few in chocolate next, because everything taste better in chocolate.

Related Posts Plugin for WordPress, Blogger...

Posted in Food, Make, Sweets and tagged with grapefruit, candied grapefruit, cocktail garnish, candied grapefruit peels, peels, candied peels.

May 2, 2014 by Tanya Ponce.
  • May 2, 2014
  • Tanya Ponce
  • grapefruit
  • candied grapefruit
  • cocktail garnish
  • candied grapefruit peels
  • peels
  • candied peels
  • Food
  • Make
  • Sweets
  • Post a comment
Comment
BrandyChocolateTruffleswCoconut.jpg

Brandy Infused Chocolate Truffles With Coconut

BrandyChocolateTruffleswCoconut.jpg

That has to be the longest title ever, but there is so much to say about these brandy infused chocolate truffles that I rolled into shredded coconut, OH MY! This recipe is adapted from Alton Browns recipe on Food Network. I made these for my friend Deborah's photo styling project, here, but of course was able to sample a few myself before delivery. Here's the recipe and my notes.

Ingredients

10 ounces bittersweet chocolate, finely chopped

3 tbsp unsalted butter

1/2 cup heavy cream

1 tbsp light corn syrup

1/4 cup of brandy

1/2 cup cocoa powder (Valrohna cocoa powders is what I use to roll the chocolate truffles in)

Shredded Coconut (Trader Joe's brand is what I had on hand to roll the truffles in, but you can use any brand)

BrandyChocolateTruffleswCoconut4.jpg

Directions

Place finely chopped chocolate and butter in a glass mixing blow and mircrowave for 30 seconds. Remove, stir and repeat the process one more time. Set aside.

Heat the cream and corn syrup in a small saucepan over medium heat until simmering. Remove from heat and pour the mixture over the chocolate, let it stand for no more than 2 minutes. Stir gently with a rubber spatula until smooth and creamy. Here's the boozy part, pour the 1/4 cup of brand into the mixture and stir. You can pour the mixture into a square glass backing dish or leave it in the glass bowl and refrigerate for 1 hour.

For rolling out the truffles I'd suggest using a small ice cream scoop. I used and melon baller and it was hard to get the chocolate out of the baller (is that a word, well it is now), so I switched to a small teaspoon and used my warm hands to roll the truffle balls. Next time small ice cream scoop like this one from Target.

BrandyChocolateTruffleswCoconut2.jpg

Once formed you can roll them in the cocoa powder if you want them covered only in that, but I opted for rolling them in shredded coconut. Let me tell you the texture and brandy taste is exciting and surprising. Enjoy!

Related Posts Plugin for WordPress, Blogger...

Posted in Baking, Bake, Food, Sweets and tagged with brandy infused chocolate truffles with coconut, shredded coconut, brandy infused chocolate truffles, truffles, chocolate truffles, chocolate, brandy chocolate.

March 5, 2014 by Tanya Ponce.
  • March 5, 2014
  • Tanya Ponce
  • brandy infused chocolate truffles with coconut
  • shredded coconut
  • brandy infused chocolate truffles
  • truffles
  • chocolate truffles
  • chocolate
  • brandy chocolate
  • Baking
  • Bake
  • Food
  • Sweets
  • Post a comment
Comment

Indulge Your Sweet Tooth with These Trends

This is a guest post from by Rachel Dawes. Rachel spends one-fourth of her day working on her figure and the rest of the day as a loving wife and mother to her sons. Aside from fitness and nutrition, Rachel also loves to spend her time writing and upcycling pre-loved items. Don't let her demeanour fool you, though, as Rachel is also a fan of Brazilian Jiu-Jitsu and just started to enroll in a mixed martial arts academy near her area. 

The cupcake has been a ubiquitous trend over the past few years and spawned a ton of TV shows like Cupcake Wars that stars little morsels of joy engaging in battle with other cupcakes. But we live in a society where a simply delicious dessert can make anyone’s conflict-ridden day seem like a dream and one should be immensely grateful for that. This 2014, there are exciting (and oh so yummy) trends that can make any sweet confection its most saccharine version yet. But before getting too excited and consuming many unnecessary calories, this is the perfect time to bake and explore all the possibilities this year has in store for us.

Cakes aren’t just all about presentation and decorations. Sometimes it’s what's inside that counts and those Peek-A-Boo cakes are the epitome of this. These cakes look deceptively simple on the outside, usually with just plain fondant frosting but a medley of colors and flavors await.

Another baking trend that has been widely publicized is artisanal marshmallows. Don’t underestimate these seemingly light treats because they come in the form of plenty of flavors that range from vanilla bean to rosemary like those in Three Tarts in New York.

Multi-tiered cakes still haven't lost their appeal. Despite being used, abused, and overused over the years, it seems like these cakes are still in demand. While these cakes remain a popular choice among birthdays and weddings, multi-tiered cakes are difficult to make, especially when it comes to layering them. To avoid layering accidents, expert baker and Marks and Spencer product developer Helen Brennan reminds bakers to keep the rules of gravity and pressure in mind. “When assembling your cake, always put the fruit tier on the bottom as it is the heaviest and will support the rest of your tiers,” she said.

Another trendy flavor that’s been everywhere from Krispy Kreme’s doughnuts to the more dainty and sophisticated Laduree macaroons is indubitably the salted caramel. You can find them in brownies, puddings and plenty of other desserts as well. Along with those exquisite macaroons, the éclair is also a fine specimen where the best can be found in Fauchon Paris. There are also artisanal jellies, jams, doughnuts that are making some interesting flavor profiles this year. With all this is mind, we are sure that 2014 is going to be one sweet roller coaster for foodies out there!

Related Posts Plugin for WordPress, Blogger...

Posted in Sweets, Travel, Food and tagged with Marks & Spencer, Fauchon, Cupcake Wars, Three Tarts.

February 19, 2014 by Tanya Ponce.
  • February 19, 2014
  • Tanya Ponce
  • Marks & Spencer
  • Fauchon
  • Cupcake Wars
  • Three Tarts
  • Sweets
  • Travel
  • Food
  • Post a comment
Comment
VerticalChPBBars.jpg

Chocolate Peanut Butter Bars

VerticalChPBBars.jpg

So a while back I made these Chocolate Peanut Butter bars for a book swapping party here. Since then I've made them a few more times and am now getting to a place where I'm perfecting the recipe. Plus I had a good excuse this week as I was commissioned to create these for a photo style shoot my friend Deb was doing with VivaVantage paper towels.

Seriously Chocolate AND Peanut Butter, I think this probably goes down as my favorite flavor combo. It's like making sure you have two things that match, makes me think of this quote from the movie Friday when Chris Tucker is looking for something to eat, "No sugar? Y'all ain't never got two things that match. Either y'all got Kool-aid, no sugar. Peanut butter, no jelly. Ham, no burger." And now we can add "peanut butter no chocolate." Accept we have BOTH. Here's the recipe with a few of my notes on what I have found that works best and a note on what I 'll do the next time around. And don't be afraid that it's 3 layers, it's really not that hard to make.

ChocPeanutButterBars_Ingredients.jpg

Chocolate Peanut Butter Bars

Ingredients Bottom Layer

1/2 cup unsalted butter

1/4 cup sugar

5 tbsp unsweetened cocoa (I use Valhrona)

1 egg, beaten

1 1/4 cups graham cracker crumbs

3/4 cup coarsely crush pretzels (I find the thinner salted versions work better than the thick ones - I only had the thick ones for the shoot above, but that's my lesson learned)

Directions

If you have a double boiler use that to melt the butter, sugar and cocoa.  I use a metal bowl over a lightly simmering pot of water (water should not touch the bowl).

While bowl is still over the water, add the beaten egg a little at a time until the mixtures thickens.

Remove bowl from the heat and add the graham cracker crumbs and crushed pretzels. After they are well mixed press the crumbs into a flattened layer an 8x8 cake pan. I use square non-stick baking pan and line it with two pieces of parchment paper crisscross, this makes it easier to get the bars out of the pan for cutting the squares.  Set this aside while you start the middle layer.

Middle Layer Ingredients

1/2 cup unsalted butter, melted and slightly cooled.

2/3 cup powdered sugar, sifting this first is good to get any clumps out.

1 cup smooth, natural peanut butter (no salt added) I like Laura Scudder's.

1/2 tsp salt (only use if you bought unsalted PB, otherwise adjust to taste.

1 tsp vanilla

Directions

Add peanut butter and melted butter together in a small bowl, mix in sugar, salt and vanilla until it forms a thick paste. Now it's time to add the peanut butter over the bottom layer of chocolate pretzel goodness. I have thought about doubling the peanut butter layer as I'd like a bit more thickness, so I might try that next time. Now put all of this in the refrigerator while you make the final Top layer. This way the peanut butter has time to get a little stiff, otherwise it's hard to spread the final chocolate layer on top.

Top Layer Ingredients

5 oz. semi sweet chocolate chips (I love bittersweet or just straight dark chocolate bars for this layer, but use any fine chocolate you like)

1 tbsp unsalted butter

Pink Himalayan salt (or any fine sea salt)

Directions

Again if you have a double boiler use that to melt the chocolate and butter.  I use a metal bowl over a lightly simmering pot of water (water should not touch the bowl). Stir until smooth.

Now take the pan from the refrigerator and pour the chocolate mixture over the peanut butter layer and spread it evenly. Then return to the refrigerator about 10 minutes. (top should be a little soft still). Sprinkle light with the Himalayan salt and return the the fridge and let it completely cool until it becomes hard.

Take out the parchment papered bars and cut into squares or rectangles. I've done both and wrapped them in paper with twine for a special presentation, but it's faster to just cut in and eat it, sooooo good. I have a batch in my fridge now that I keep gnawing at, enjoy this perfect match of flavors.

Itss_ChocPeanutButterBars.jpg
Download Recipe PDF
Related Posts Plugin for WordPress, Blogger...

Posted in Bake, Baking, Food, Sweets, Things, Make and tagged with chocolate peanut butter bars, peanut butter, chocolate, sweets.

February 13, 2014 by Tanya Ponce.
  • February 13, 2014
  • Tanya Ponce
  • chocolate peanut butter bars
  • peanut butter
  • chocolate
  • sweets
  • Bake
  • Baking
  • Food
  • Sweets
  • Things
  • Make
  • 1 Comment
1 Comment
itss_Tuscan Vegetable Stew.jpg

Tuscan Vegetable Stew

itss_Tuscan Vegetable Stew.jpg

So I'm giving props to SB, because he's a great cook and made this amazing Tuscan Vegetable Stew last week. He may one day make a written appearance on this here space, though I doubt he'll commit to a fully in-focus image of himself, but one can always hope. For now we'll show his cooking creations.

Last week, while we actually HAD weather, drizzling rain and colder Cali temperatures he decided to make a stew. This recipe was from a March 2013 issue of Bon Appetit it's called Italian Vegetable Stew.  The only change we made is adding in Spicy Italian Chicken Sausages from Whole Foods (SB doesn't eat pork or beef, so this is a great alternative). We wanted a little more flavor and meat in our stew, however on it's own this stew would still be really flavorful. We removed the casing from the sausage, roughly chop them into bit size pieces, then brown them in the pot your using for the stew (one day that pot will be a Le Creuset or Staub, for now we use All-Clad). Remove the sausage and start in on the rest of veggies as specified in the recipe in the link above. Once all the ingredients are stewing we added the sausage back in and let them cook a little more and fully flavor the stew.

The Bon Appetit recipe is from Brandon Jew of Bar Agricole. Ironically I tried to go to Bar Agricole when I was last in San Francisco, but got there too early and it wasn't open. But if this recipe is any indication of his food there, I'm am going to make sure I stop in next time we visit San Francisco. Enjoy this stew on a cold afternoon.

Related Posts Plugin for WordPress, Blogger...

Posted in Food, Make and tagged with Tuscan Vegetable Stew, Vegetable Stew, Bon Appetit, spicy italian chicken sausage, stew, bar agricole, brandon jew.

February 11, 2014 by Tanya Ponce.
  • February 11, 2014
  • Tanya Ponce
  • Tuscan Vegetable Stew
  • Vegetable Stew
  • Bon Appetit
  • spicy italian chicken sausage
  • stew
  • bar agricole
  • brandon jew
  • Food
  • Make
  • Post a comment
Comment
Older

itsweet & savory itsweet & savory

Food+Travel+Life

Lifestyle blogger who loves coffee, architecture, local cultural interests, good food and travel stories.

  • Home
  • About Me
    • A Simply Raw Life
    • Donuts, Dresses, and Dirt
    • Oh Joy
    • david lebovitz
    • My Life at Playtime
    • Design Mom
    • Curbly
    • AltDesign
    • Peggy Wong
    • A Golden Afternoon
    • Eat, Drink + Be Merry
    • Dylan and Jeni Photography
    • Route 66
    • Cuba A Bittersweet Tale - Part I
    • Cuba A Bittersweet Tale - Part II
    • Cuba A Bittersweet Tale - Part III
    • Cuba A Bittersweet Tale - Part IV
    • Cuba A Bittersweet Tale - Part V
    • Cuba A Bittersweet Tale VI
    • Cuba A Bittersweet Tale - Part VII
    • Cuba A Bittersweet Tale - Part VIII
Mom It Forward: Contributor
Follow on Bloglovin
  • Bake
  • Baking
  • Coffee
  • Cuba
  • Food
  • LA Local
  • Life
  • Make
  • NY Local
  • Play
  • read
  • Sweets
  • Things
  • Travel
  • US City
NYSE for SMPW. Did you get that. New location for us, was a lovely day. Nice to be back down here doing our volunteer work. Always fulfulling.
This was my pre-meal to get me fed and courage to go network with people I don’t know but want to know. Finally got to @barpisellino for their classic Negroni. Did not disappoint.
Quick trip down to the city tonight to Network. So out of practice but was good to make some work connections. Chrysler Building and Grand Central Station pics never get old.
When the light hits your new coffee mug just perfectly. Pottery by @lark_potters
NYSE for SMPW. Did you get that. New location for us, was a lovely day. Nice to be back down here doing our volunteer work. Always fulfulling. This was my pre-meal to get me fed and courage to go network with people I don’t know but want to know. Finally got to @barpisellino for their classic Negroni. Did not disappoint. Quick trip down to the city tonight to Network. So out of practice but was good to make some work connections. Chrysler Building and Grand Central Station pics never get old. When the light hits your new coffee mug just perfectly. Pottery by @lark_potters
twitter
pinterest
facebook

Powered by Squarespace. Content is for demonstration purposes only.