• Home
  • About Me
    • A Simply Raw Life
    • Donuts, Dresses, and Dirt
    • Oh Joy
    • david lebovitz
    • My Life at Playtime
    • Design Mom
    • Curbly
    • AltDesign
    • Peggy Wong
    • A Golden Afternoon
    • Eat, Drink + Be Merry
    • Dylan and Jeni Photography
    • Route 66
    • Cuba A Bittersweet Tale - Part I
    • Cuba A Bittersweet Tale - Part II
    • Cuba A Bittersweet Tale - Part III
    • Cuba A Bittersweet Tale - Part IV
    • Cuba A Bittersweet Tale - Part V
    • Cuba A Bittersweet Tale VI
    • Cuba A Bittersweet Tale - Part VII
    • Cuba A Bittersweet Tale - Part VIII

itsweet & savory itsweet & savory

  • Home
  • About Me
  • Favorites Places
    • A Simply Raw Life
    • Donuts, Dresses, and Dirt
    • Oh Joy
    • david lebovitz
    • My Life at Playtime
    • Design Mom
    • Curbly
    • AltDesign
    • Peggy Wong
    • A Golden Afternoon
    • Eat, Drink + Be Merry
    • Dylan and Jeni Photography
  • Travel Stories
    • Route 66
    • Cuba A Bittersweet Tale - Part I
    • Cuba A Bittersweet Tale - Part II
    • Cuba A Bittersweet Tale - Part III
    • Cuba A Bittersweet Tale - Part IV
    • Cuba A Bittersweet Tale - Part V
    • Cuba A Bittersweet Tale VI
    • Cuba A Bittersweet Tale - Part VII
    • Cuba A Bittersweet Tale - Part VIII
DoubleChocolateCookieDoughTartelettes.jpeg

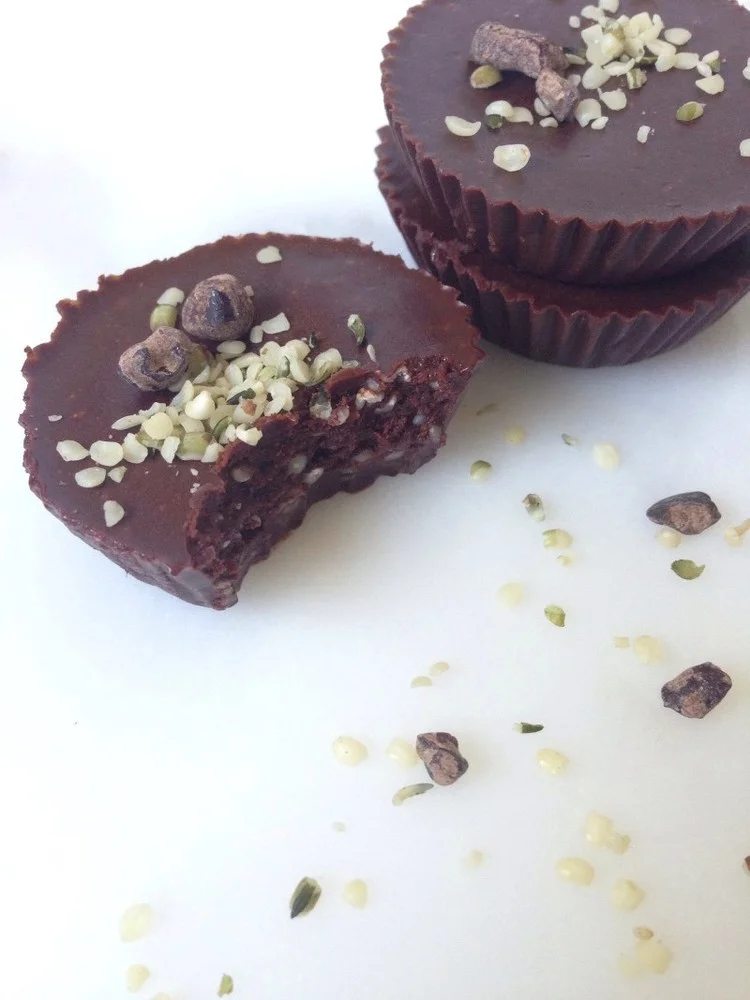
Dark Chocolate Cups + Double Chocolate Tartelettes

DoubleChocolateCookieDoughTartelettes.jpeg

We've got chocolate, chocolate and more chocolate. Go to A Simply Raw Life, she has two amazing recipes for these chocolate delicacies. I partook of both during our Fall tasting event. I am really craving these treats right now, they would be SOOOO good with a cup of coffee.

Above image is the Double Chocolate Cookie Dough Tartelettes with Chocolate Frosting. I know I had you at "Cookie Dough."  Felicia did an awesome demo at our event of how to make these, super easy and really, really good desserts.

Dark Choc1.JPG

Dark Chocolate Cups with Hemp Seeds  I think besides the chocolate I'm kind of addicted to the Hemp seeds, they are really good, nutty and filling. To me the taste like a cross between a sunflower seed and sesame seeds.

Both these amazing chocolate desserts were made possible by products from Artisana Foods, Manitoba Harvest and Navitas Naturals.  Thanks to them for providing the goods, we loved them all.

Enjoy these great recipes!  #mylifesimplysweet

Related Posts Plugin for WordPress, Blogger...

Posted in Food, Life, Make and tagged with mylifesimplysweet, a simply raw life, double chocolate tartelettes, dark chocolate cups, hemp seeds, navitas naturals, manitoba harvest, artisana foods.

November 7, 2013 by Tanya Ponce.
  • November 7, 2013
  • Tanya Ponce
  • mylifesimplysweet
  • a simply raw life
  • double chocolate tartelettes
  • dark chocolate cups
  • hemp seeds
  • navitas naturals
  • manitoba harvest
  • artisana foods
  • Food
  • Life
  • Make
  • Post a comment
Comment
ProscuittoManchegoCheese.jpg

Proscuitto + Goat Cheese Crostini's

ProscuittoManchegoCheese.jpg

What to make for the Fall tasting event? I had Proscuitto, figs and cheese on my mind, so that's what was up first. I had one request from Deborah "Goat Cheese and Honey things".  It's my fall back easy appetizer recipe that I make all the time. I might start doing a twist on it, I saw some good ideas the other day that I'll try to incorporate. 

ProscuittoManchego3.jpg

Image above courtesy of Deborah from My Life At Playtime


For these recipe's here's the start:

1. LaBrea Bakery baguette - this is the one I use, it's the perfect texture. If you happen to live in France I'm sure you can find some amazing baguettes. But here in L.A. I found this to be my favorite. Plus it's available in every major grocery store.

2. Slice these bad boys on the diagonal, layer slices on a cookie sheet, drizzle with olive oil and toast for about 10 minutes on 425 F. I like them crunchy, so I turn them over and toast for another 5 minutes.

Now you can layer just about anything you want on these toasted slices [Crostini]

Proscuitto, Fig Jam, Manchego Cheese Recipe

Ingredients in the order below:

Fig Jam [buy a high quality jam and schmear it on the crostini]

Manchego Cheese [slice thinly, layer over fig jam]

Proscuitto [good quality thinly sliced, tear the pieces into smaller bites. This makes it easier when you take a bite into the bread all the meat doesn't come off at once. ]

Super easy to do and then arrange on a nice serving platter. I choose a big ole slab of cut tree trunk, it just made it festive and Fall. 

GoatCheeseHoneyCrostata.jpg

Goat Cheese & Honey Crostini

Ingredients in the order below: 

Goat Cheese [Room temperature, schmear it on each crostini] 

Honey [drizzle over goat cheese]

Fresh Rosemary [finely chop]  

Toasted Pine Nuts [I buy raw and lightly toast them in a cast iron skillet on the oven top]

Serve on a pretty platter and your all done!! 


GoatCheeseHoneyCrostine_dh.jpg

Image above courtesy of Deborah from My Life At Playtime

Enjoy! #mylifesimplesweet


Related Posts Plugin for WordPress, Blogger...

Posted in Food, Life, Make and tagged with mylifesimplysweet, crostini, goat cheese honey crostini, proscuitto, proscuitto manchego cheese fig jam, fig jam, manchego cheese, appetizer.

November 6, 2013 by Tanya Ponce.
  • November 6, 2013
  • Tanya Ponce
  • mylifesimplysweet
  • crostini
  • goat cheese honey crostini
  • proscuitto
  • proscuitto manchego cheese fig jam
  • fig jam
  • manchego cheese
  • appetizer
  • Food
  • Life
  • Make
  • 3 Comments
3 Comments
CoconutVanillaBodyButter.jpg

Coconut Vanilla Body Butters

CoconutVanillaBodyButter.jpg

One of the lovely gifts we sent home with everyone at our event were these Coconut Vanilla Body Butters. Take a look at how easy they are to make on Deborah's blog at My Life at Playtime.  #mylifesimplysweet

Related Posts Plugin for WordPress, Blogger...

Posted in Life, Make and tagged with mylifesimplysweet, coconut vanilla body butter, my life at playtime.

November 6, 2013 by Tanya Ponce.
  • November 6, 2013
  • Tanya Ponce
  • mylifesimplysweet
  • coconut vanilla body butter
  • my life at playtime
  • Life
  • Make
  • Post a comment
Comment
GarbanzoBeansChocCookies2.jpg

Gluten-Free Peanut Butter Chocolate Chip Cookies

GarbanzoBeansChocCookies2.jpg

Garbanzo beans, really? I know your going to ask that, I did when my friend Karen shared this recipe with me.  These are pretty scrumptious cookies and they are gluten-free.

Recipe is here.  All you need are the following ingredients: 

Can of Garbanzo Beans

Vanilla Extract

Peanut Butter

Honey

Baking Powder

Salt

Chocolate Chips

Mine don't look as good as Spry's, but they tasted YUMMY. Even the dough before it was cooked was yummy. Go ahead, give it a try, I swear if you like peanut butter, honey and chocolate chips, you'll really like this one.

GarbanzoBeanChocCookies.jpg
Related Posts Plugin for WordPress, Blogger...

Posted in Bake, Baking, Food, Make, Sweets and tagged with gluten-free, garbanzo beans, chocolate chips, peanut butter, cookies.

October 9, 2013 by Tanya Ponce.
  • October 9, 2013
  • Tanya Ponce
  • gluten-free
  • garbanzo beans
  • chocolate chips
  • peanut butter
  • cookies
  • Bake
  • Baking
  • Food
  • Make
  • Sweets
  • Post a comment
Comment
Slice of almond choc gluten-free cake.jpg

Chocolate Gluten-Free Almond Cake

Slice of almond choc gluten-free cake.jpg

As you may already know I've been experimenting with gluten-free baking and my one foray into a vegan recipe, not so good.  In my gluten-free adventures I wanted to make something chocolate, go figure. Since visiting a local health store I've been stocking up on a few different flours. I really like Red Mill's choices. I decided to choose a Oat flour to go along with my Almond meal flour. Coconut flour is on my list to purchase, but it was a bit more expensive. Also, if you haven't already noticed, I almost always use some sort of bittersweet chocolate. I like the richness of it and can control the sugar myself. I am not a milk or white chocolate fan. Occasionally I use semi-sweet. I stock up on this around holiday times, since everyone bakes and bittersweet chocolate chips go on sale, mostly use Ghiradelli, but Trader Joes has a BIG bittersweet chocolate bar option.

Here's a cautionary note of WHAT NOT TO DO if your using a double broiler method to melt the chocolate and butter: #1 chop up the chocolate before putting it in the glass bowl with the butter and #2 NEVER use a knife in the bowl, while it's over the simmering water, that = exploding glass bowl. Yes I did this, and am fortunate enough to be spared glass in my eyes, or on my face, or taking out my jugular. Just a few shards of glass on my arm and ankle, with minor bleeding. Great way to start the day. An hour later, after I cleaned up both me and the kitchen, I started the recipe all over again, since there were shards of glass in my mixtures and pans, etc...

Despite my miss-adventures this recipe was a hit, and as usual I experimented on my friends who loved it too. 

Chocolate Gluten-free Almond Cake Recipe 

6 ounces bittersweet chocolate CHOPPED

1/2 cup unsalted butter, cubed

4 large eggs, separate the yolks from the whites and keep both

1/2 cup granulated sugar (half the sugar will go with the egg yolks and the other half with the egg whites)

1/3 cup plain whole-milk yogurt (I used non-fat Australian vanilla bean yogurt, because that is what I had on hand)

1 teaspoon vanilla extract

1/2 teaspoon salt

3/4 cup almond flour (you can use hazelnut flour as an alternative)

1/4 cup oat flour (you can use buckwheat flour as an alternative)

Almond Slivers

Preheat the oven to 350ºF.

Butter an 8-inch round cake pan and line the bottom with parchment paper.

In a large, heatproof bowl set over a pan of simmering water, don't let the bowl touch the water (SEE MY NOTE ABOVE FOR WHAT NOT TO DO). Melt the chocolate and butter until smooth, then remove from the heat and let cool slightly. You can also quickly melt this in the microwave.

In a medium bowl, whisk together the egg yolks, half of the sugar, yogurt, vanilla, and salt, then whisk them into the melted chocolate. Stir in the almond flour, and the oat flour.

In another bowl of a stand mixer, or hand mixer, whip the egg whites until they form soft peaks. Gradually whip in the other half of the sugar until the whites form firm peaks. Fold 1/3 of the whipped egg whites into the chocolate mixture to lighten it, then fold in the remaining chocolate mixture just until it’s completely combined.

Pour the batter into the pan, level the top and then sprinkle a generous amount of Almond slices over the top, the more the merrier. This gives it a beautiful finished look and adds in extra crunch.

Chocolate gluten-free almond cake.jpg
Wide View Chocoalte gluten-free almond cake.jpg

Bake for 25 to 30 minutes; cake should be set and the center slightly soft.

Let it cool for 10 minutes, then remove from the cake pan and serve.

Slice Chocolate Gluten-free almond cake 2.jpg

Enjoy! 

Related Posts Plugin for WordPress, Blogger...

Posted in Bake, Baking, Food, Make, Sweets and tagged with gluten-free, almond, chocolate, almond flour, oat flour.

September 19, 2013 by Tanya Ponce.
  • September 19, 2013
  • Tanya Ponce
  • gluten-free
  • almond
  • chocolate
  • almond flour
  • oat flour
  • Bake
  • Baking
  • Food
  • Make
  • Sweets
  • Post a comment
Comment
IMG_3454.JPG

Failure Schmailure

IMG_3454.JPG

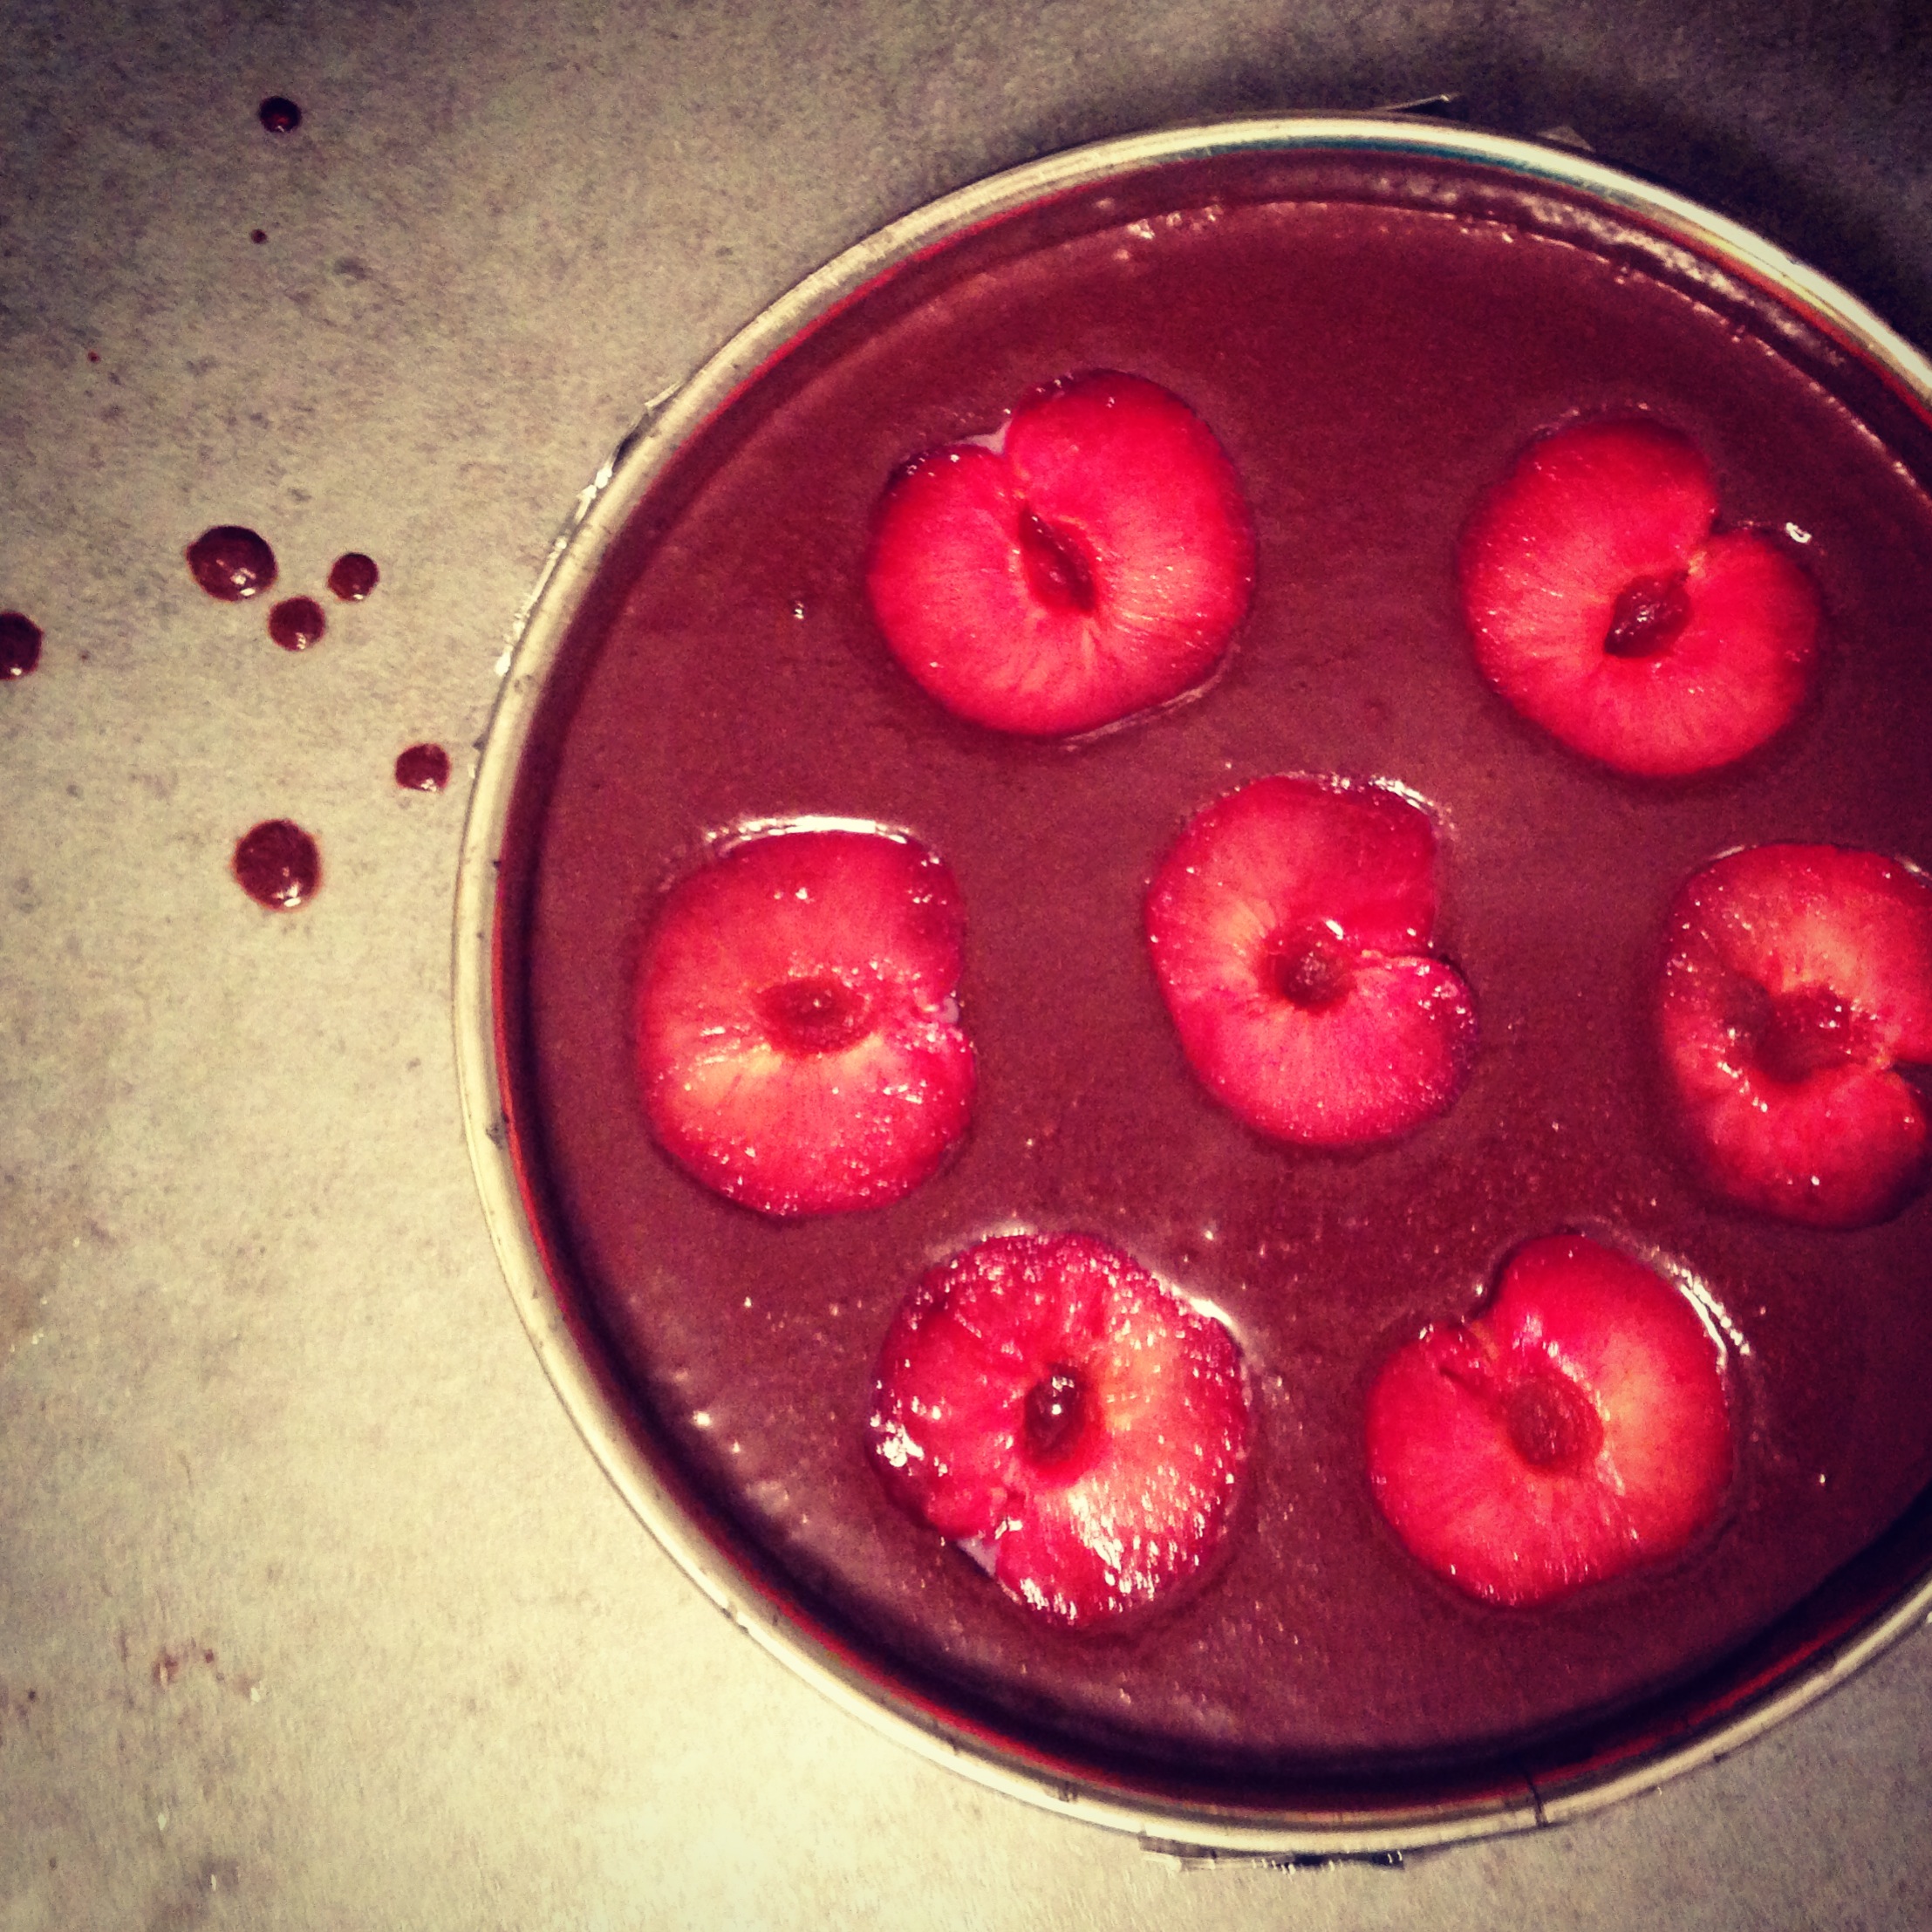
In the essence of true transparency, I decided to try making a vegan, gluten free dessert. Why you ask? Because quite a few of my friends are vegan or gluten-free and whatever else you can think of, oh raw food eaters (not going to touch that one yet). This is the first time I've tried to make a recipe fully from scratch, I mean developing the ingredients and measurements with no guide. I probably should have started with something simpler, like with BUTTER, and real sugar. 

So as beautiful as the batter and the pluots look, this cake didn't exactly turn out right. First off I could taste the earth balance butter and secondly it wasn't sweet enough and one more thing, I think I should have put the pluots in halfway thru the process. They were so juicy the cake really never fully baked. So what I got was a pudding cake. I do have to say the pluots helped the sweetness. However, I think I'll stick to tarts for pluots and stone fruits. Next try will involve canola oil, instead of earth balance butter, and a little more sweetener and probably some almonds on top for crunch and prettiness. 

So I call this Failure Schmailure....yes I'm still trying to eat it, and yes I'll try this again. 

Related Posts Plugin for WordPress, Blogger...

Posted in Food, Bake, Baking, Make, Life and tagged with failure schmailure, vegan.

August 30, 2013 by Tanya Ponce.
  • August 30, 2013
  • Tanya Ponce
  • failure schmailure
  • vegan
  • Food
  • Bake
  • Baking
  • Make
  • Life
  • Post a comment
Comment
Almond Lemon Slice of Cake.jpg

Almond Lemon Gluten Free Cake

Almond Lemon Slice of Cake.jpg

I get so inspired by all the great photo's and blog post and especially about making things gluten-free. I tolerate gluten, but feel better when I don't partake of it. I saw this recipe and knew I had to give it a try. I still haven't been brave enough to try the vegan route...i just can't give up butter. This cake is really moist and very yummy. Give it a try.

Almond Lemon Gluten Free Cake
(Adapted from Cakelets and Dollies Recipe which was adapted from Donna Hay's Recipe)

Almond Lemon Cake Overview.jpg

1/2 cup unsalted butter, softened
1 1/3 cups granulated sugar
1 tsp of vanilla extract

(NOTE: if you have a vanilla bean, use that, split and scrap out the seeds to put in the mix For my recipe I didn't have a vanilla bean on hand, so vanilla extract worked great.) 1/4 tsp almond extract (because why wouldn't you want more almonds)
Zest of 4 lemons, if you want in more lemony taste you can squeeze a little lemon juice, but this is already a very moist cake so be warned.  Original recipe called for 1/4 cup lemon zest which can be about 6 lemons.
4 eggs, separated, make sure you let them get to room temperature
2 1/2 cups almond meal (Surprisingly I found this at Trader Joes, but you should be able to find in a local health food store or Whole Foods)
10 1/2 oz ricotta
Flaked almonds, to decorated and add more crunchiness
Powdered sugar, for dusting

Preheat oven to 325. Butter 8-9 inch cake round, I use parchment paper on the bottom and also butter that, it makes it easier to get the cake out of the pan.

I used my KitchenAid stand mixer, but you can also use a regular beater. Mix softened butter, 1 cup of sugar, lemon zest, vanilla (either extract or vanilla seeds from the bean), until its pale yellow and creamy. I did this for about 6 minutes (thus why i like to use my KitchenAid stand mixer). Add in the separated egg yolks one at a time, that is if you didn't already blend them all together, in that case just drizzle egg yolks in a little bit at a time.  You'll need to scrape down the sides of the bowl through out the process.

Mix in the Almond Meal. Scrape down sides and take bowl from under mixer and fold in the Ricotta.

In a separate bowl mix the egg whites until white and fluffy, slowly pour in the 1/3 cup of remaining sugar until it makes glossy soft white peaks. Gently fold in 1/2 the egg whites, you want to make this a lite and airy cake, finally fold in the rest of the egg whites.

Pour mixture into cake pan. Sprinkle almond slices over the top, I covered mine as much as possible.  Put in the oven and bake for about 45 minutes. May need more time, I think I added about 8-10 more minutes to this, but test center with toothpick to make sure it comes out clean and the cake is fully baked. 

Almond Lemon Gluten Free Cake.jpg

When you pull it out it look like a fluffy cake, once it cools down it deflates a bit. After it cools down dust with powdered sugar and serve. With coffee is great.

Coffee & Almond Cake.jpg
Related Posts Plugin for WordPress, Blogger...

Posted in Bake, Baking, Food, Make, Sweets and tagged with cake, dessert, gluten-free, almond, lemon, ricotta.

August 23, 2013 by Tanya Ponce.
  • August 23, 2013
  • Tanya Ponce
  • cake
  • dessert
  • gluten-free
  • almond
  • lemon
  • ricotta
  • Bake
  • Baking
  • Food
  • Make
  • Sweets
  • 3 Comments
3 Comments
Peanut Butter Kisses Cookie.jpg

Peanut Butter Chocolate Kiss Cookies

Peanut Butter Kisses Cookie.jpg

A few years back I made the peanut butter chocolate kiss cookies above. I find this is still a go to recipe I use all the time.  In fact it was just over 4 years ago, July 15, 2009 last time I posted about it. We have an annual 3 day convention we go to every year and well I find a little treat and pick me up in the afternoon is just the thing to help me pay attention. I've adapted this recipe from a local small town Iowa cookbook. It's super easy and a great idea for something to do with kids. They can unwrap all the kisses and help put them on the warm cookies as you pull them out of the oven.

Peanut Butter Kisses Cookie Dough.jpg

After you mix all the ingredients start hand rolling the dough into small balls.

Dough Rolled Up.jpg

Roll the balls into sugar and lightly coat. 

Peanut Butter Kisses Cookie 1.jpg

Place the rolled cookie dough onto cookie sheets and cook at 375 for 8 minutes.

Chocolate Kisses.jpg

Start unwrapping all your chocolate kisses while you wait for the cookies to bake. 

Peanut Butter Kisses Cookie 2.jpg

After first 8 minutes, take out the cookies and gently smoosh one chocolate kiss in the middle of each cookie. Then return to the oven and finish baking for 5 more minutes, then let them cool on a rack. Then eat away, Enjoy!

Ingredients
1 c. Butter
1 c. Peanut Butter (I use Trader Joes or a Natural Peanut Butter, I've used Skippy before but i like a little more texture in this recipe).
1 c. Sugar
1 c. Brown Sugar, firmly packed
2 eggs, beaten
4 T. milk (in a pinch i used Rice Milk, we never have regular milk in our house)
2 tsp vanilla
3 1/2 c. flour
2 tsp baking soda
1 tsp salt
Additional granulated sugar
1 pkg of kisses

Directions: Cream butter, peanut butter, sugar and brown sugar; add eggs, milk and vanilla.  Sift together dry ingredients, except additional sugar and candies; add to butter mixture.   Shape into balls; roll in sugar and place on cookie sheet.  Bake at 375 degrees for 8 minutes.  Remove from oven and press and chocolate star or kiss on each cookie until the cookie cracks around the edge.  Return to oven for 5 minutes.

Final Peanut Butter Kisses Cookie.jpg
Related Posts Plugin for WordPress, Blogger...

Posted in Bake, Baking, Food, Sweets, Make and tagged with chocolate kiss cookies, peanut butter, peanut butter chocolate kiss cookies, chocolate kisses.

July 23, 2013 by Tanya Ponce.
  • July 23, 2013
  • Tanya Ponce
  • chocolate kiss cookies
  • peanut butter
  • peanut butter chocolate kiss cookies
  • chocolate kisses
  • Bake
  • Baking
  • Food
  • Sweets
  • Make
  • Post a comment
Comment
StoneFruitCrumble.jpg

Stone Fruit Crumble

StoneFruitCrumble.jpg

On one of my farmers market runs I went to get peaches and came back with not only those, but quite a few other stone fruits. This included nectarines and pluot's. The later I had never had, but wow were these sweet and juicy, bursting with flavor. I had to get a few.  I came home right away sliced and ate em. 

Sliced Stone Fruit.jpg

Every once in a while I find a new blog, to me, or a new food show, this time I found both. The Pioneer Woman. Ree Drummond is just so REAL, I would love to meet her in person. She has a great recipe for what she called a "Crisp." Only she made hers with peaches. I decided to combine my farmers market peaches, nectarines and pluot's that I still had on hand and put them in a baking dish below.

StoneFruitSliced.jpg

Zest 1/2 a lemon and squeeze the juice too over the stone fruit and if you want more sweetness add in 2 tbsp's of maple syrup (the good pure kind)

Have I ever mentioned that I someone how always pick the HOTTEST most HUMID day to bake and at the time of day that the sun is beaming into our little apartment. Well I do, at least the house always smells good, that's my excuse to SB. 

StoneFruitCrumbleonTop.jpg

To make the topping, in a separate blow mix 1 cup flour, 1/2 cup of sugar, 1/2 cup of light brown sugar, 1/2 tsp cinnamon, 1/2 tsp nutmeg, 1/4 tsp salt and cut in 1/2 cup cold butter. Either do this with a pastry blender or a good old fashioned fork. I've done both, but prefer my pastry blender I got from Sur La Table a while back, this one.

Fully cover the fruit and pack down lightly. Cover with tin foil and bake in a 350 degree oven for 15 minutes. Uncover and bake for another 20-30 minutes until crunchy on top. I have gone the full 30 minutes to make sure it's nice and crunchy.

StoneFruitCrumbleoutofoven.jpg

You can serve this with vanilla ice cream or vanilla Greek yogurt. I've done both and was happily content.  It's a great recipe, tested on myself and then on my friends three kids, it's a hit. Use whatever stone fruits you have on hand. Peaches are everywhere now, so take advantage of the deals and the amazing juicy fruits.  Enjoy!

Related Posts Plugin for WordPress, Blogger...

Posted in Food, Bake, Baking, Make, Sweets and tagged with stone fruit, peaches, pluots, nectarines, farmers market.

July 18, 2013 by Tanya Ponce.
  • July 18, 2013
  • Tanya Ponce
  • stone fruit
  • peaches
  • pluots
  • nectarines
  • farmers market
  • Food
  • Bake
  • Baking
  • Make
  • Sweets
  • Post a comment
Comment
Caprese Salad.jpg

Tomato Caprese Salad

Caprese Salad.jpg

A few years back there was a tomato scare in California.  For some reason this didn't stop us from buying tomatoes.  I believe there wasn't even any foundation on what the scare was.  It's a distant memory.

We love tomatoes.  Believe me this is not how it always was.  I use to HATE them, passionately.  But taste buds change and we make lots of Bruschetta with tomatoes these days.  I use to work right next to a farmers market and every Wednesday morning I would go down and buy what ever was in season.  This was how I got turned on to Heirloom Tomatoes.

SB loves heirloom tomatoes so we got the great idea of taking a big terracotta pot on our 3x9 balcony and growing our own tomatoes.  I of course like the romance of planting the seed and watching it grow.  Comes from my grandmother's green thumb and letting me plant my own radish garden in her vast yard as a child. Incidentally I don't really like radishes either but I loved this project with grandma.  So to make this long story longer, I bought two packets of Heirloom tomato seeds, Cherokee and Brandywines, and I planted them in the pot.

The packet said in 8 weeks we'd have some shoots, well more than 8 weeks went by and not a glimmer of anything.  So I put the seeds in a little bit of water and put them on the window seal.

Eventually these little roots grew and I planted these seeds.  Finally shoots appeared. Did I tell you we only have a 3x9 apartment patio. Well our friend gave us an Earthbox that you supposedly can grow anything in. SB nurtured this box and we had a Jack and the Giant Tomato Stalk...only NO tomatoes. When any appeared the bugs got to it. I think we eventually got ONE good tomato out of all that effort. We sliced, salted, olive oiled and ate it, all in one bite. That was the end of our tomato garden. I think we'll wait for that Farm we dream of, that way SB can get his chickens too.


In the meantime, I make weekly walks to the local farmers market and gather whatever is in season. I gathered these luscious heirloom tomatoes, in every color available.

Heirloom Tomatos.jpg

This is the easiest recipe for fresh tomatoes. All you need is basil, tomatoes, buffalo mozzarella, olive oil, salt, and balsamic vinegar.

Tomato Salad Ingredients.jpg

Ingredients & Directions:

Heirloom tomatoes (slice)

Salt

Olive Oil (make sure it's quality oil and drizzle it over the tomatoes) 

Buffalo Mozzarella (slice and intersperse with the tomatoes) 

Basil (rough chop and sprinkle on top) 

Balsamic Vinegar (drizzle)

Tomato Salad and Toast.jpg

Serve with toasted crusty bread drizzled with Olive Oil and rub with a garlic clove for extra flavor.  I prefer La Brea bakery bread, it just taste and toasts better.

Simple and flavorful. Enjoy!


Related Posts Plugin for WordPress, Blogger...

Posted in Food, Make and tagged with tomato, tomatoes, heirloom tomatoes, Caprese salad, farmers market.

July 17, 2013 by Tanya Ponce.
  • July 17, 2013
  • Tanya Ponce
  • tomato
  • tomatoes
  • heirloom tomatoes
  • Caprese salad
  • farmers market
  • Food
  • Make
  • Post a comment
Comment
SquashBlossoms.jpg

Stuffed Squash Blossom

SquashBlossoms.jpg

I love going to the Farmers Market, more in the summer than any other time.  It seems like the produce changes out every two weeks.  This day I ran down at the very end and saw these amazing squash blossoms and had to try them out.  The farmer gave me two full baskets for the price of one. Tip: go at the very end for good deals. Go at the beginning if you need the best and lots of it.

So I texted SB to look up a recipe for stuffed squash blossoms, I was bound and determined and knew I'd need more ingredients when I got home.  So I gathered the filling ingredients, cheeses, Ricotta and Parmesan were top on my list.  To be honest I had to look up a YouTube video to figure out how to put this together, especially taking out the innards.  YouTube it away or Bing it and you'll find the perfect tutorial.

SquashBlossomInside.jpg

Here's what the inside looks like of a squash blossom.

SquashBlossom_pullstems.jpg

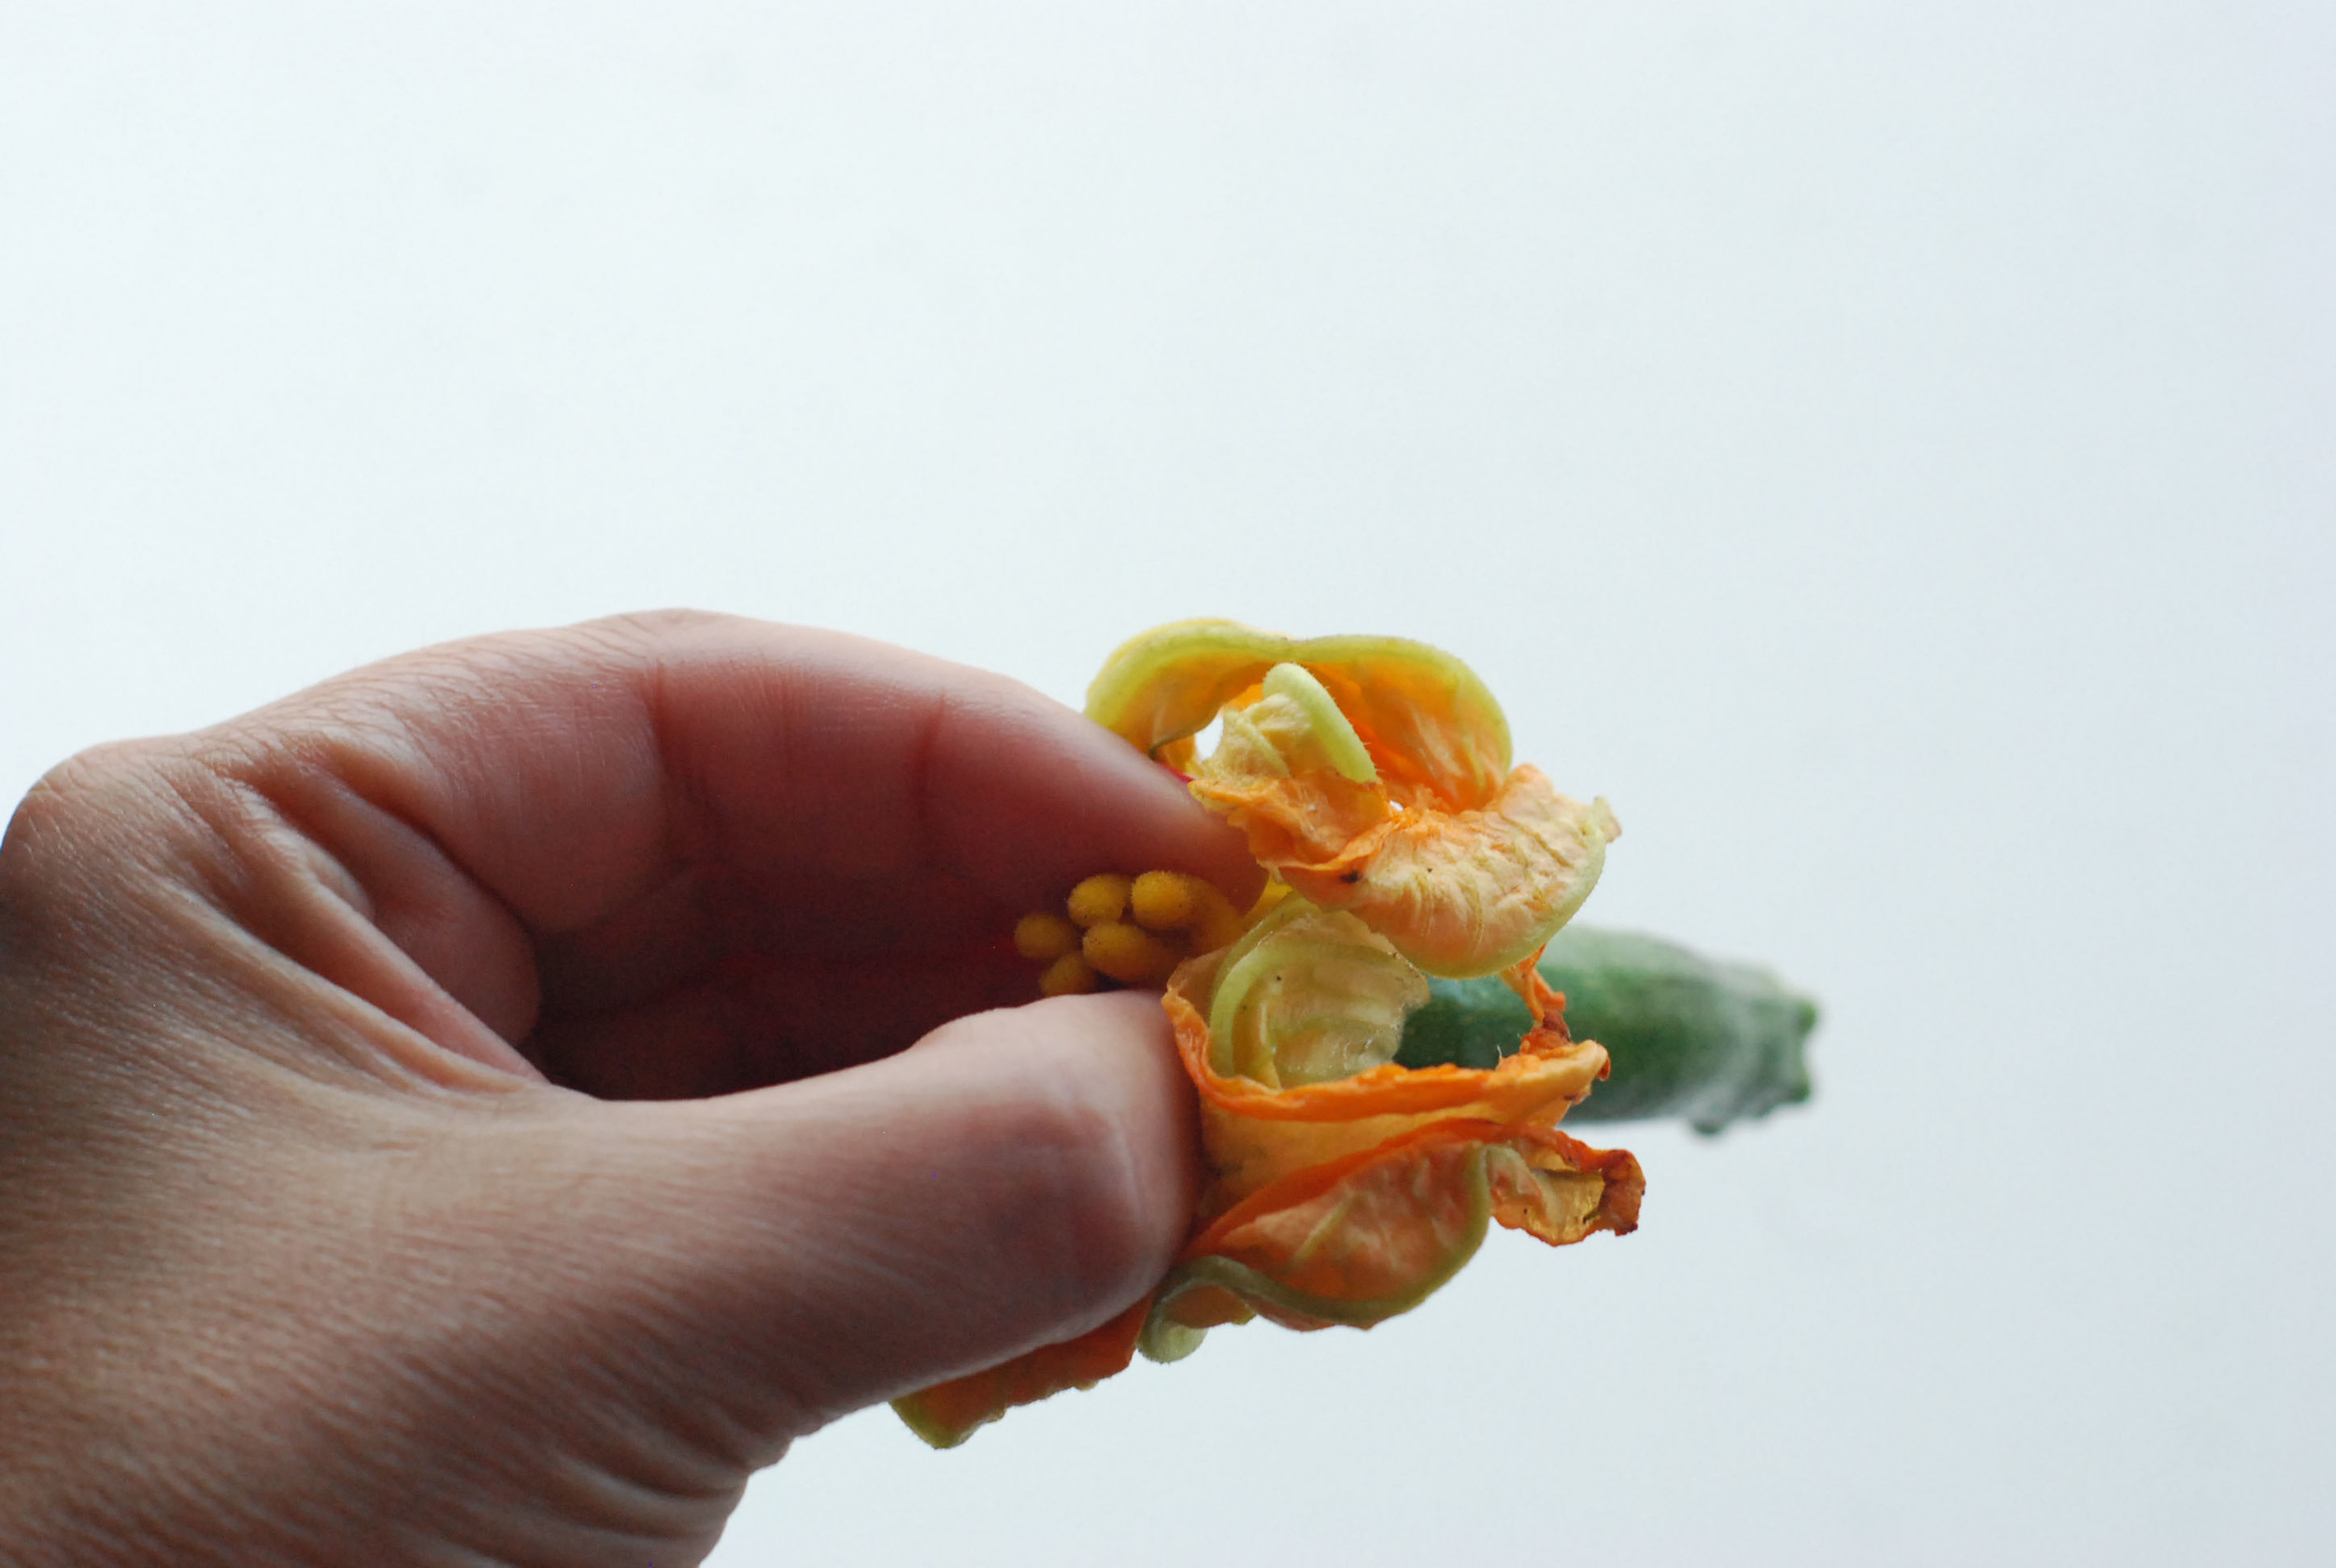
Gently pull out the stamen inside, you'll see it when you try to open the blossom.

SquashBlossom_stempulled.jpg

Here's what the empty squash blossoms looked like with out the stamen.

SquashBlossom_stems.jpg

Here's what the innard stamen's look like. No use for them, accept I thought they were pretty.

SquashBlossom_filling.jpg

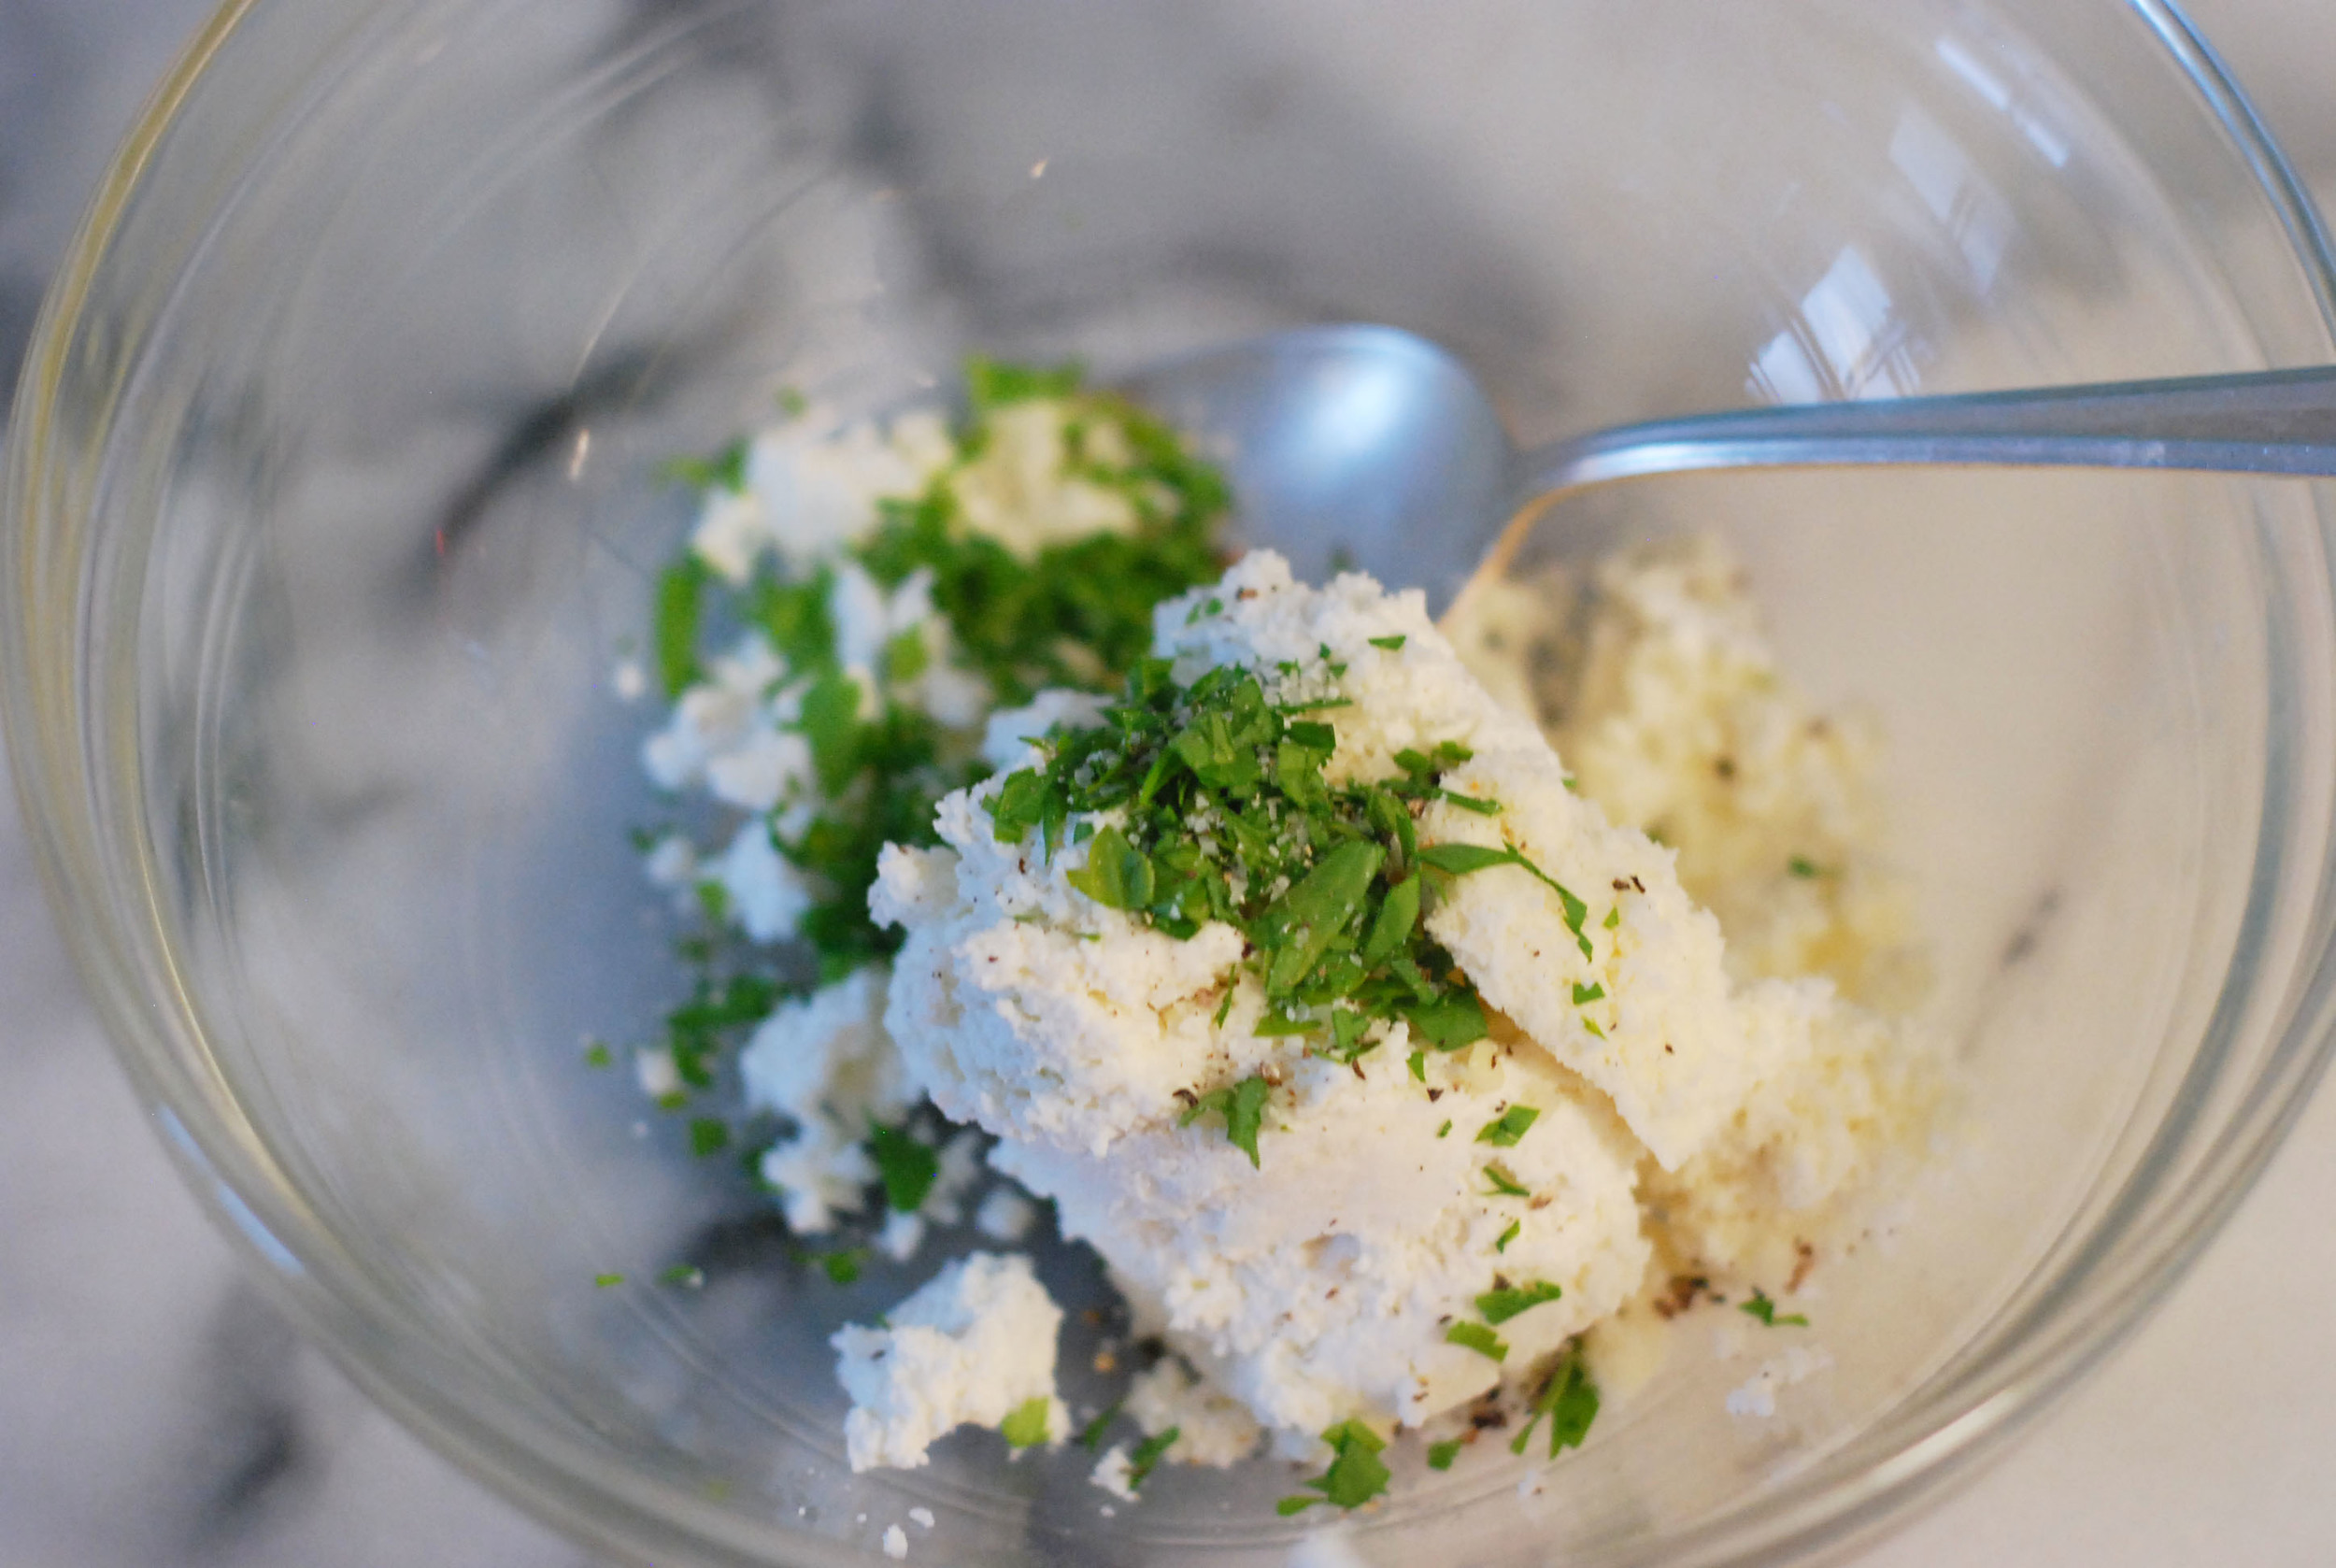
Filling had ricotta and Parmesan cheese, pinch of salt and chopped parsley.

SquashBlossom_batter.jpg

Fully dip or immerse them in the tempura batter.

SquashBlossom_fried.jpg

Quick fry em up. I would use grapeseed oil in the future, only thing I didn't like was the canola oil taste.

SquashBlossomsStuffed.jpg

These were delicious.  Rich and cheesy and I loved the green zuchini, I would definitely leave them on when you make this.

Here's the recipe: 

Stuffing:

1 cup Ricotta Cheese

1/2 cup parmessan

pinch of salt

chopped parsley

Tempura Batter: 

Canola Oil (I would use Grapeseed oil next time)

1 1/4 cups all-purpose flour

1  teaspoon kosher salt

1 cup Chilled Pilsner, lager-style beer, or club soda (I used Hanger 24 Orange Wheat Beer) - You may need more to get the right consistency.

Zucchini blossoms (stamens removed; about 16)                                            

Preparation:
Mix all the ingredients together for the tempura batter. Chill for a few minutes.

Mix all the ingredients for the stuffing and set aside. I like the flavors to meld.

Gently pull the stamens from the blossoms and you can either cut the green zuchini off or leave it on. I prefer the green it was delicious. 

Gently put in about 1 tablespoon of cheese per blossom. More if it fits and delicately twist the blossom so the ingredients stay in.

Heat oil in a deep pan about 1 inch deep, needs to be really hot about 350. Test with a bread crumb. If it fries quickly then your good to go.  

Take batter out of refrigerator and mix well, may need to add more beer or club soda to get a good consistency for coating. Dip each stuffed squash blossom and fully coat in the tempura batter and start frying them up. It's a quick fry.

Make sure you turn them over to get it all fried up.  Do this in batches to make sure the oil stays hot.

Drain on a paper towel, salt and serve. Enjoy!

Related Posts Plugin for WordPress, Blogger...

Posted in Food, Make and tagged with squash blossoms, stuffed squash blossoms, food, farmers market, vegetables, vegetable, vegetarian, ricotta.

July 9, 2013 by Tanya Ponce.
  • July 9, 2013
  • Tanya Ponce
  • squash blossoms
  • stuffed squash blossoms
  • food
  • farmers market
  • vegetables
  • vegetable
  • vegetarian
  • ricotta
  • Food
  • Make
  • Post a comment
Comment
Mango Chunks.jpg

Mango Madness

Mango Chunks.jpg

Last week when visiting our Ugandan family, they sent us off with a bag full of mango's and avocado's.  All of them were ripe so this past week I went to making anything I could with these mango's. Their in season this month. I think spring and summer fruit is my favorite, so excited about what's popping up at the farmers market these days.

Mango Salsa Ingredients.jpg

I had decided first thing to make was mango salsa.  So I started off with my favorite ingredients, mint, jalapenos, cucumbers, lime juice, shallots and of course olive oil and salt.​ I finely chopped the mint, shallots and jalapenos (take the seeds out).  Cucumbers and avocados I left in chunks.  Pinch of salt to taste, some lime juice and olive oil to finish it off.  This was delicious, spicy and juicy.

Mango Salsa.jpg

Mango and mint is a great combination.​ I like the cucumber for some extra crunch.

Quesadilla.jpg

Serve with Salmon, a cheese quesadilla, chips, or whatever you fancy.​

MangoSlice.jpg

Do you want to know the best way to slice a mango?  Slice the bottom of it so it sits securely on a cutting board.  Then with a sharp knife slice off the skin. Finally take big slices all around the seed. Then it's up to you how to chop it.  I made chunks for the salsa, but if you want something fancy you can do nice thin slices too serve for breakfast, with vanilla yogurt would be awesome.

MangoBlend.jpg

Next up was Mango sorbet.  I used mint in mine, but the recipe I found in my new David Lebovitz The Perfect Scoop: Ice Creams, Sorbets, Granitas, and Sweet Accompaniments">Perfect Scoop cookbook left the mint out.​

MangoSorbetBlend.jpg

I swear that blender is 18 years old and still working.  For this receipe I used 2/3 cup of sugar, 2/3 cup of water, mint, squeeze 2 limes, 1 Tbsp of dark rum, and pinch of salt. Blend ingredients and then chill for a couple of hours.

MangoIceMaker.jpg

Put chilled ingredients into your ice cream maker and follow instructions from the manual.​

MangoSorbet.jpg

Bits of mint and skin (probably better not to have the skin, but it still taste good.​

MangoSorbetIngredients.jpg

Refreshing mango mint sorbet, such a good spring dessert.​ Enjoy!

Related Posts Plugin for WordPress, Blogger...

Posted in Food, Make, Sweets and tagged with mango sorbet, sorbet, perfect scoop, mango salsa, mango, salsa.

May 7, 2013 by Tanya Ponce.
  • May 7, 2013
  • Tanya Ponce
  • mango sorbet
  • sorbet
  • perfect scoop
  • mango salsa
  • mango
  • salsa
  • Food
  • Make
  • Sweets
  • Post a comment
Comment
DSC_0619.JPG

Twins Baby Shower

DSC_0619.JPG

I am starting to be the minority among my friends. I have no kids, but dearly love them, just a personal decision not to have any. However, I embrace my friends with kids, and well embrace their kids. Plus SB is a serious kid magnet. They just gravitate to him. Watching my friends I see it's such a joy AND a lot of work, really they are truly SUPER MOMS, I have no idea how they work, blog, shower, or keep their sanity. 

Ok, so enough of that. My dear friend Darlene who already has a 2 year old little girl is pregnant with Twins!! Big surprise, she has twins on her side of the family, and she found out that they are identical girls. I wanted to throw her a nice little shower, so we invited a little over 40 people and a friend hosted it in her backyard.

To start of the creativity, the color palate was inspired by the invitation from Tiny Prints below.

Invitation.jpg

I have to say I went a bit crazy with the colors, but it was outside and beautiful and well I wanted it to be happy and colorful. You've already seen my tissue paper pompoms here, well they were for this occasion and there were lots of them.​

Hanging Tissue Pompoms.jpg

I also bought crepe paper and hung it as a back drop for pictures. Initially I wanted to take polaroids, but the film was way too expensive for 8 instant images, so I used my Nikon D80 and between myself and a 13 year old we managed to take photos of all the guests.

Backdrop.jpg
Backdrop2.jpg
Dar&Mom.jpg

Darlene with Twin Identical Baby Girls and her Mom. ​

Guess the babies names.jpg

I also made a tissue paper board and used the initials of the two baby girls. Darlene was brave to wait and reveal the names at the baby shower to all her friends. Her family already knew.  She texted me the week of the shower and asked if I wanted to to know, I said no, I've waited this long I wanted to guess with everyone else.  Also, I SO didn't want the pressure of knowing and accidentally revealing them. Everyone had to put the P guesses with their name on the back and the S guesses with their name on the back in the appropriate container.  At the end of the shower we read all the names off and let Darlene reveal the names. Names are at the bottom of the post.​

Wontons.jpg

Now for the food.  We had a Sweet and Savory table. Go figure. We made fried wontons, chicken satay with peanut sauce, bruschetta, bacon wrapped mushrooms and salmon herb butter open face sandwiches. We had MORE then enough food.​

Savory.jpg

For drinks we made a soda station with colorful vintage and new sodas along with water flavored with oranges. I love this table, it was my favorite.​

Soda's 2 copy.jpg

For Sweets we had colorful meringues, mini cookie dough cheesecakes with chocolate ganache, madeleines, cupcakes, cream puffs and candy.​

Sweets.jpg
Madelienes.jpg
cupcakes.jpg
Meringue.jpg
Napkins_sweets.jpg

One of many things I loved about this shower was the range of guests from very young to much older, its a testament to Darlene's friends and made the day enjoyable.​

Amara.jpg
Dar and Carolyn.jpg
Guest Mingling.jpg

For each guest I packaged up the Chocolate Bark I had made here. My friends girls all made the boxes in colorful paper for each guest to take home and enjoy.​

ChocBark.jpg

And finally the Twin identical baby girl names.  Their first girl's name is Charlotte and she revealed that they named their girls after cities.  So P = Paige (as in Texas) and S = Sydney (as in Australia).  So there you have it Paige and Sydney. What did you guess?​

Flowers Close-up.jpg
Related Posts Plugin for WordPress, Blogger...

Posted in Baking, Food, Life, Make, Play, Sweets and tagged with baby shower, soda shop, tissue pompoms, crepe backdrop, twins.

April 24, 2013 by Tanya Ponce.
  • April 24, 2013
  • Tanya Ponce
  • baby shower
  • soda shop
  • tissue pompoms
  • crepe backdrop
  • twins
  • Baking
  • Food
  • Life
  • Make
  • Play
  • Sweets
  • Post a comment
Comment
GoatCheeseHoneyCrostata2.jpg

Quick Appetizer

GoatCheeseHoneyCrostata2.jpg

The other day I literally had 1 hour to whip some type of appetizer together.  So with 5 ingredients I made this happen. Baguette, goat cheese, fresh rosemary, honey, pine nuts (olive oil and salt) is that 7 ingredients now, do we count condiments?

Anyway, I sliced the baguette on an angle, drizzled them with olive oil and toasted them on a cookie sheet in a 425 degree oven, toast both sides. I like them slightly brown and crispy.  Pull them out of the oven and let them cool.

Crostini_AssemblyLine.jpg

Mince the rosemary and toast the pine nuts. Smear goat cheese on each crostini (toasted bread), then drizzle the honey over each one. Finally sprinkle the rosemary and pine nuts over them all.  Serve on a simple platter and decorate with fresh rosemary sprigs.  All done.

Rosemary.jpg

I was complimented on this quite a few times, even the little ones like it.  It's a nice sweet and savory dish.  Enjoy! 


GoatCheeseRosemaryCrostini.jpg
Related Posts Plugin for WordPress, Blogger...
Posted in Bake, Baking, Food, Make and tagged with appetizer, food, rosemary, crostini, goat cheese.

April 2, 2013 by Tanya Ponce.
  • April 2, 2013
  • Tanya Ponce
  • appetizer
  • food
  • rosemary
  • crostini
  • goat cheese
  • Bake
  • Baking
  • Food
  • Make
  • 2 Comments
2 Comments
ChocBark Finale.jpg

Chocolate Bark

ChocBark Finale.jpg

I'm in the process of creating all kinds of treats and decor for an upcoming event. Most anything special involves chocolate for me. Once during the hottest day of summer I decided to make my own chocolate truffles, what a mess, they were delicious, but my white kitchen had chocolate in places I didn't think were possible.  The weather is still nice here in L.A. so I think I'm safe to try my hand at this chocolate creation.

A reader once asked me whether I tempered my chocolate while making one of my recipes. I never have done this and wasn't sure why I needed to. So I went to doing my research on why and how. The best explanation and easiest recipe was found here, David Lebovitz is the blogosphere master of chocolate in my humble opinion.

Follow his recipe and use a proper thermometer, David suggest this one at Amazon, Chocolate Tempering Thermometer, ​if only I had this, it would have been much easier. But I made due with the one I had and well eyeballed it and tasted along the way. So far the chocolate has held up.

ChocBark chips.jpg

Use dark chocolate bittersweet chips no more than 70% cacao is suggested.  I bought these at Surfas, in Culver City, California. But you can find decent chocolate in your local grocery store.

ChocBark melted.jpg

Melting and temperature checking. So hard not to take spoonfuls of this along the way. That is so not the right thermometer, try the one that David recommended on the link above.

ChocBark fixings.jpg

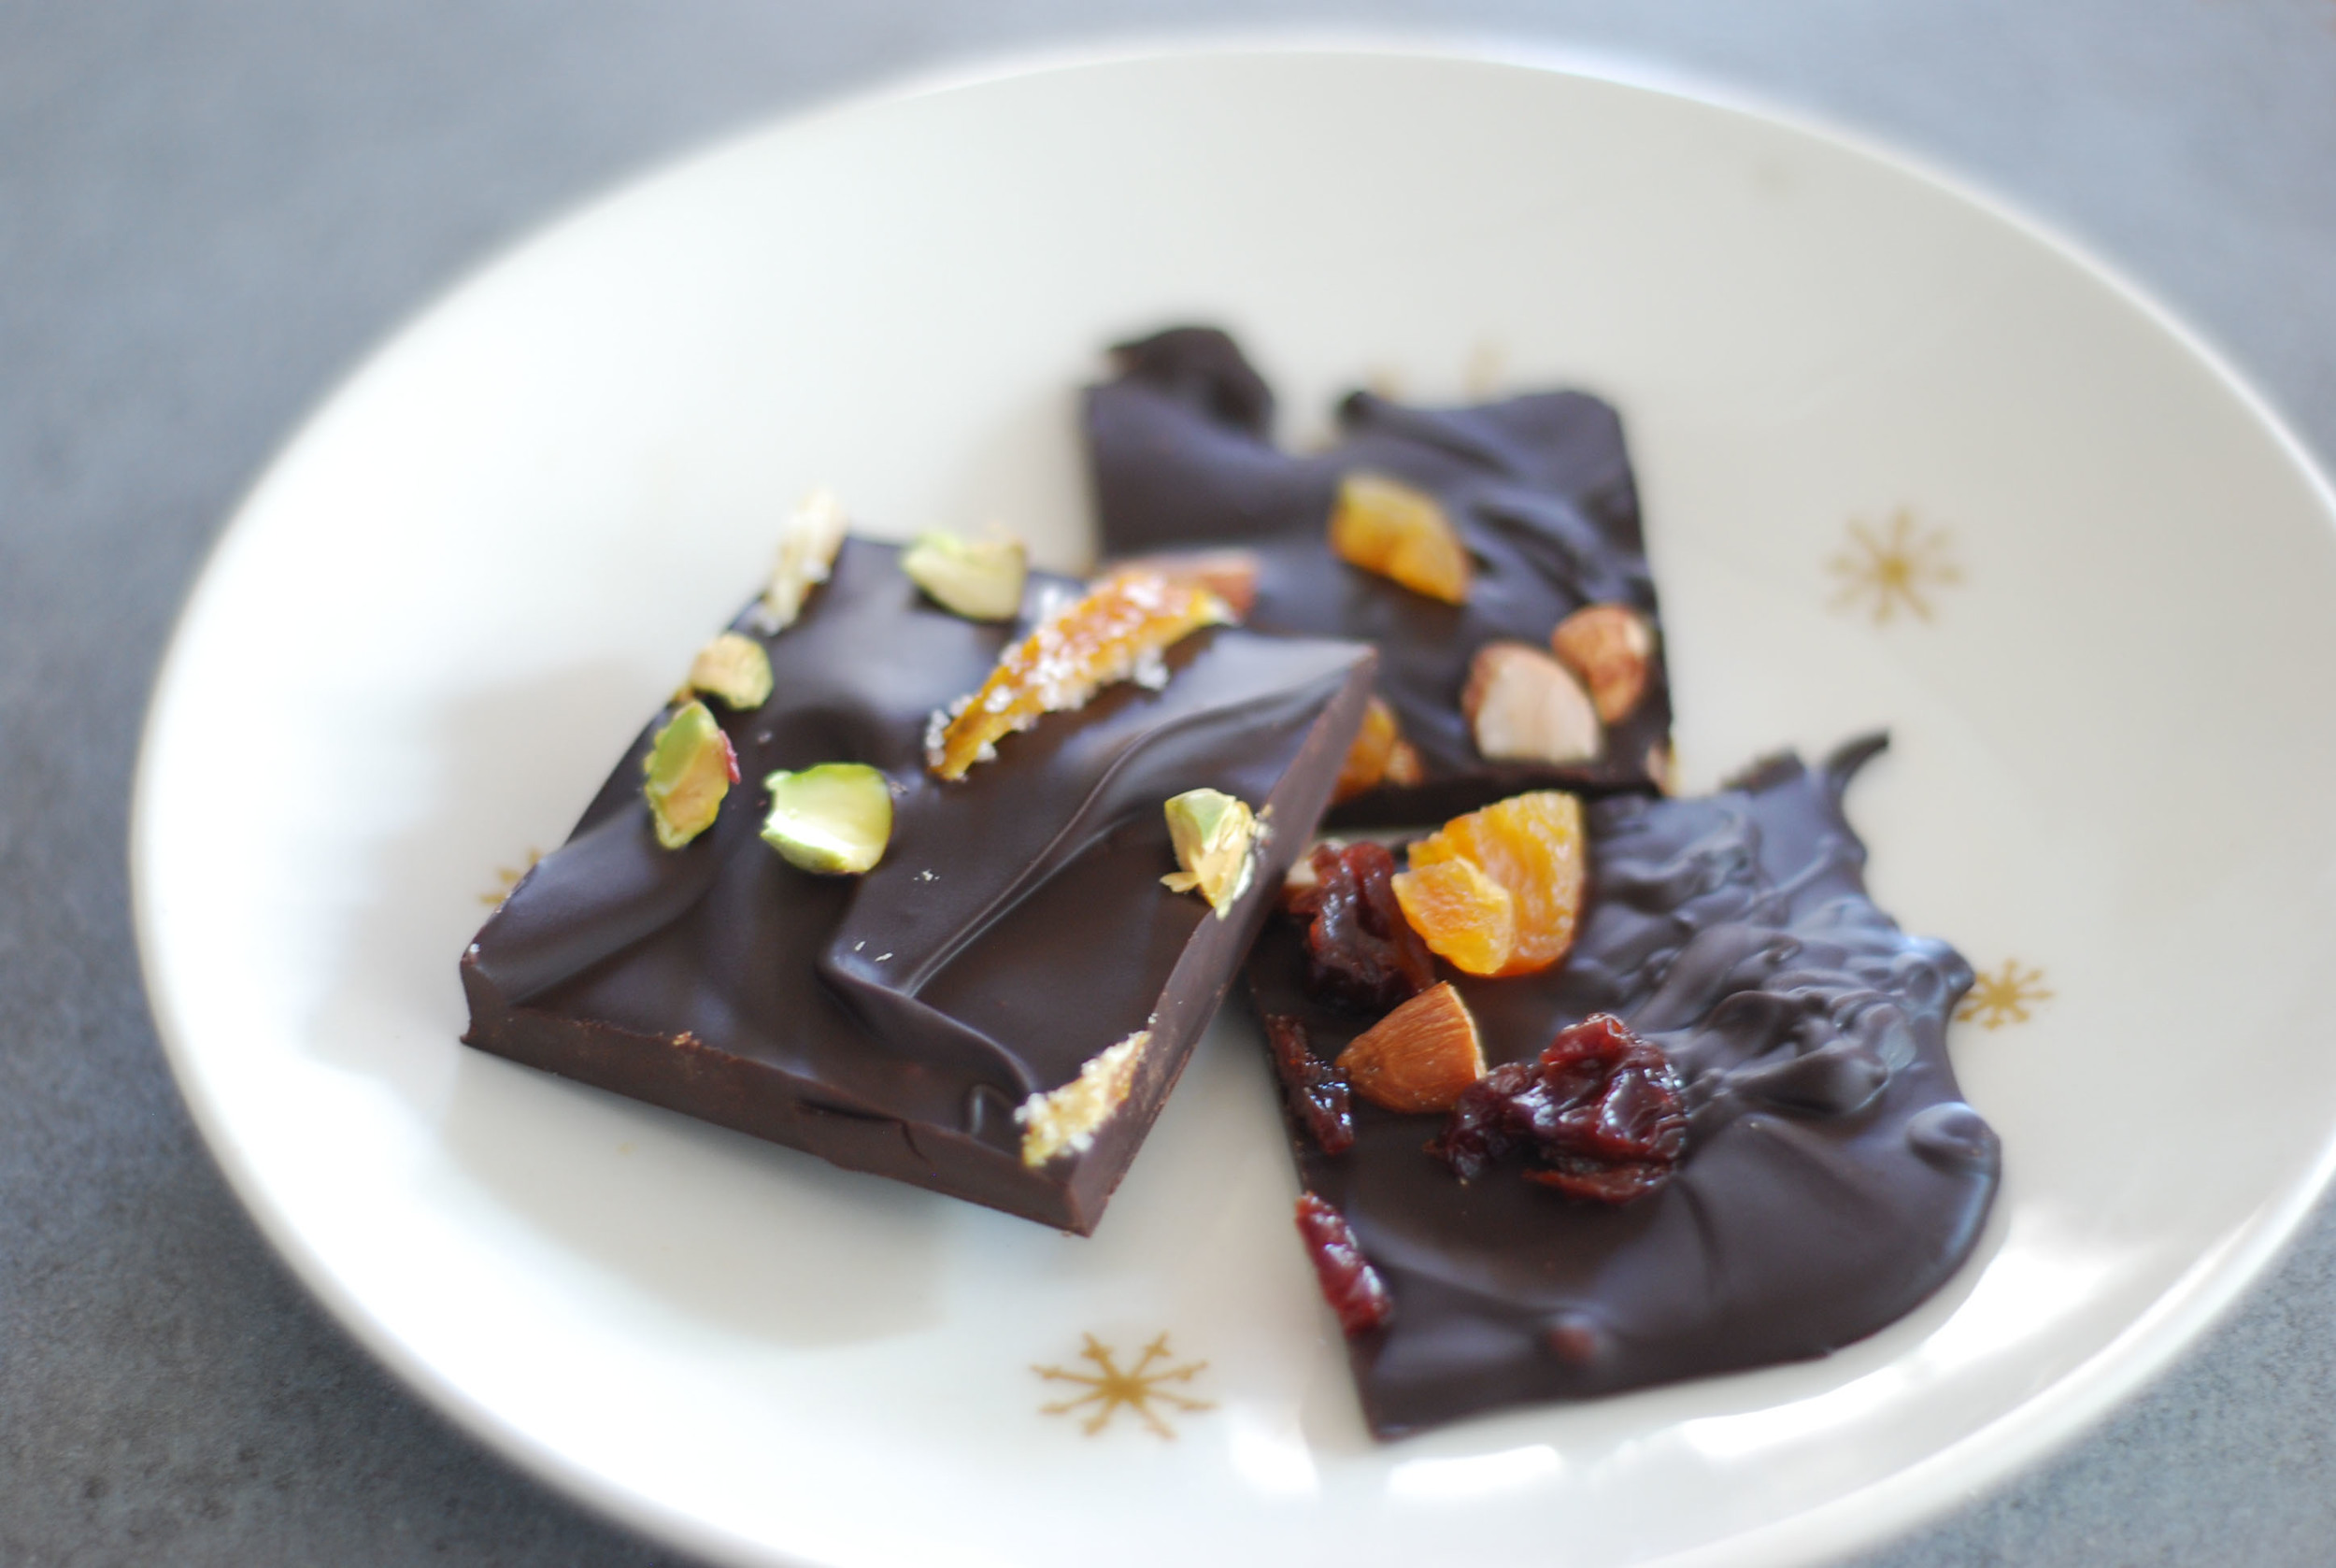
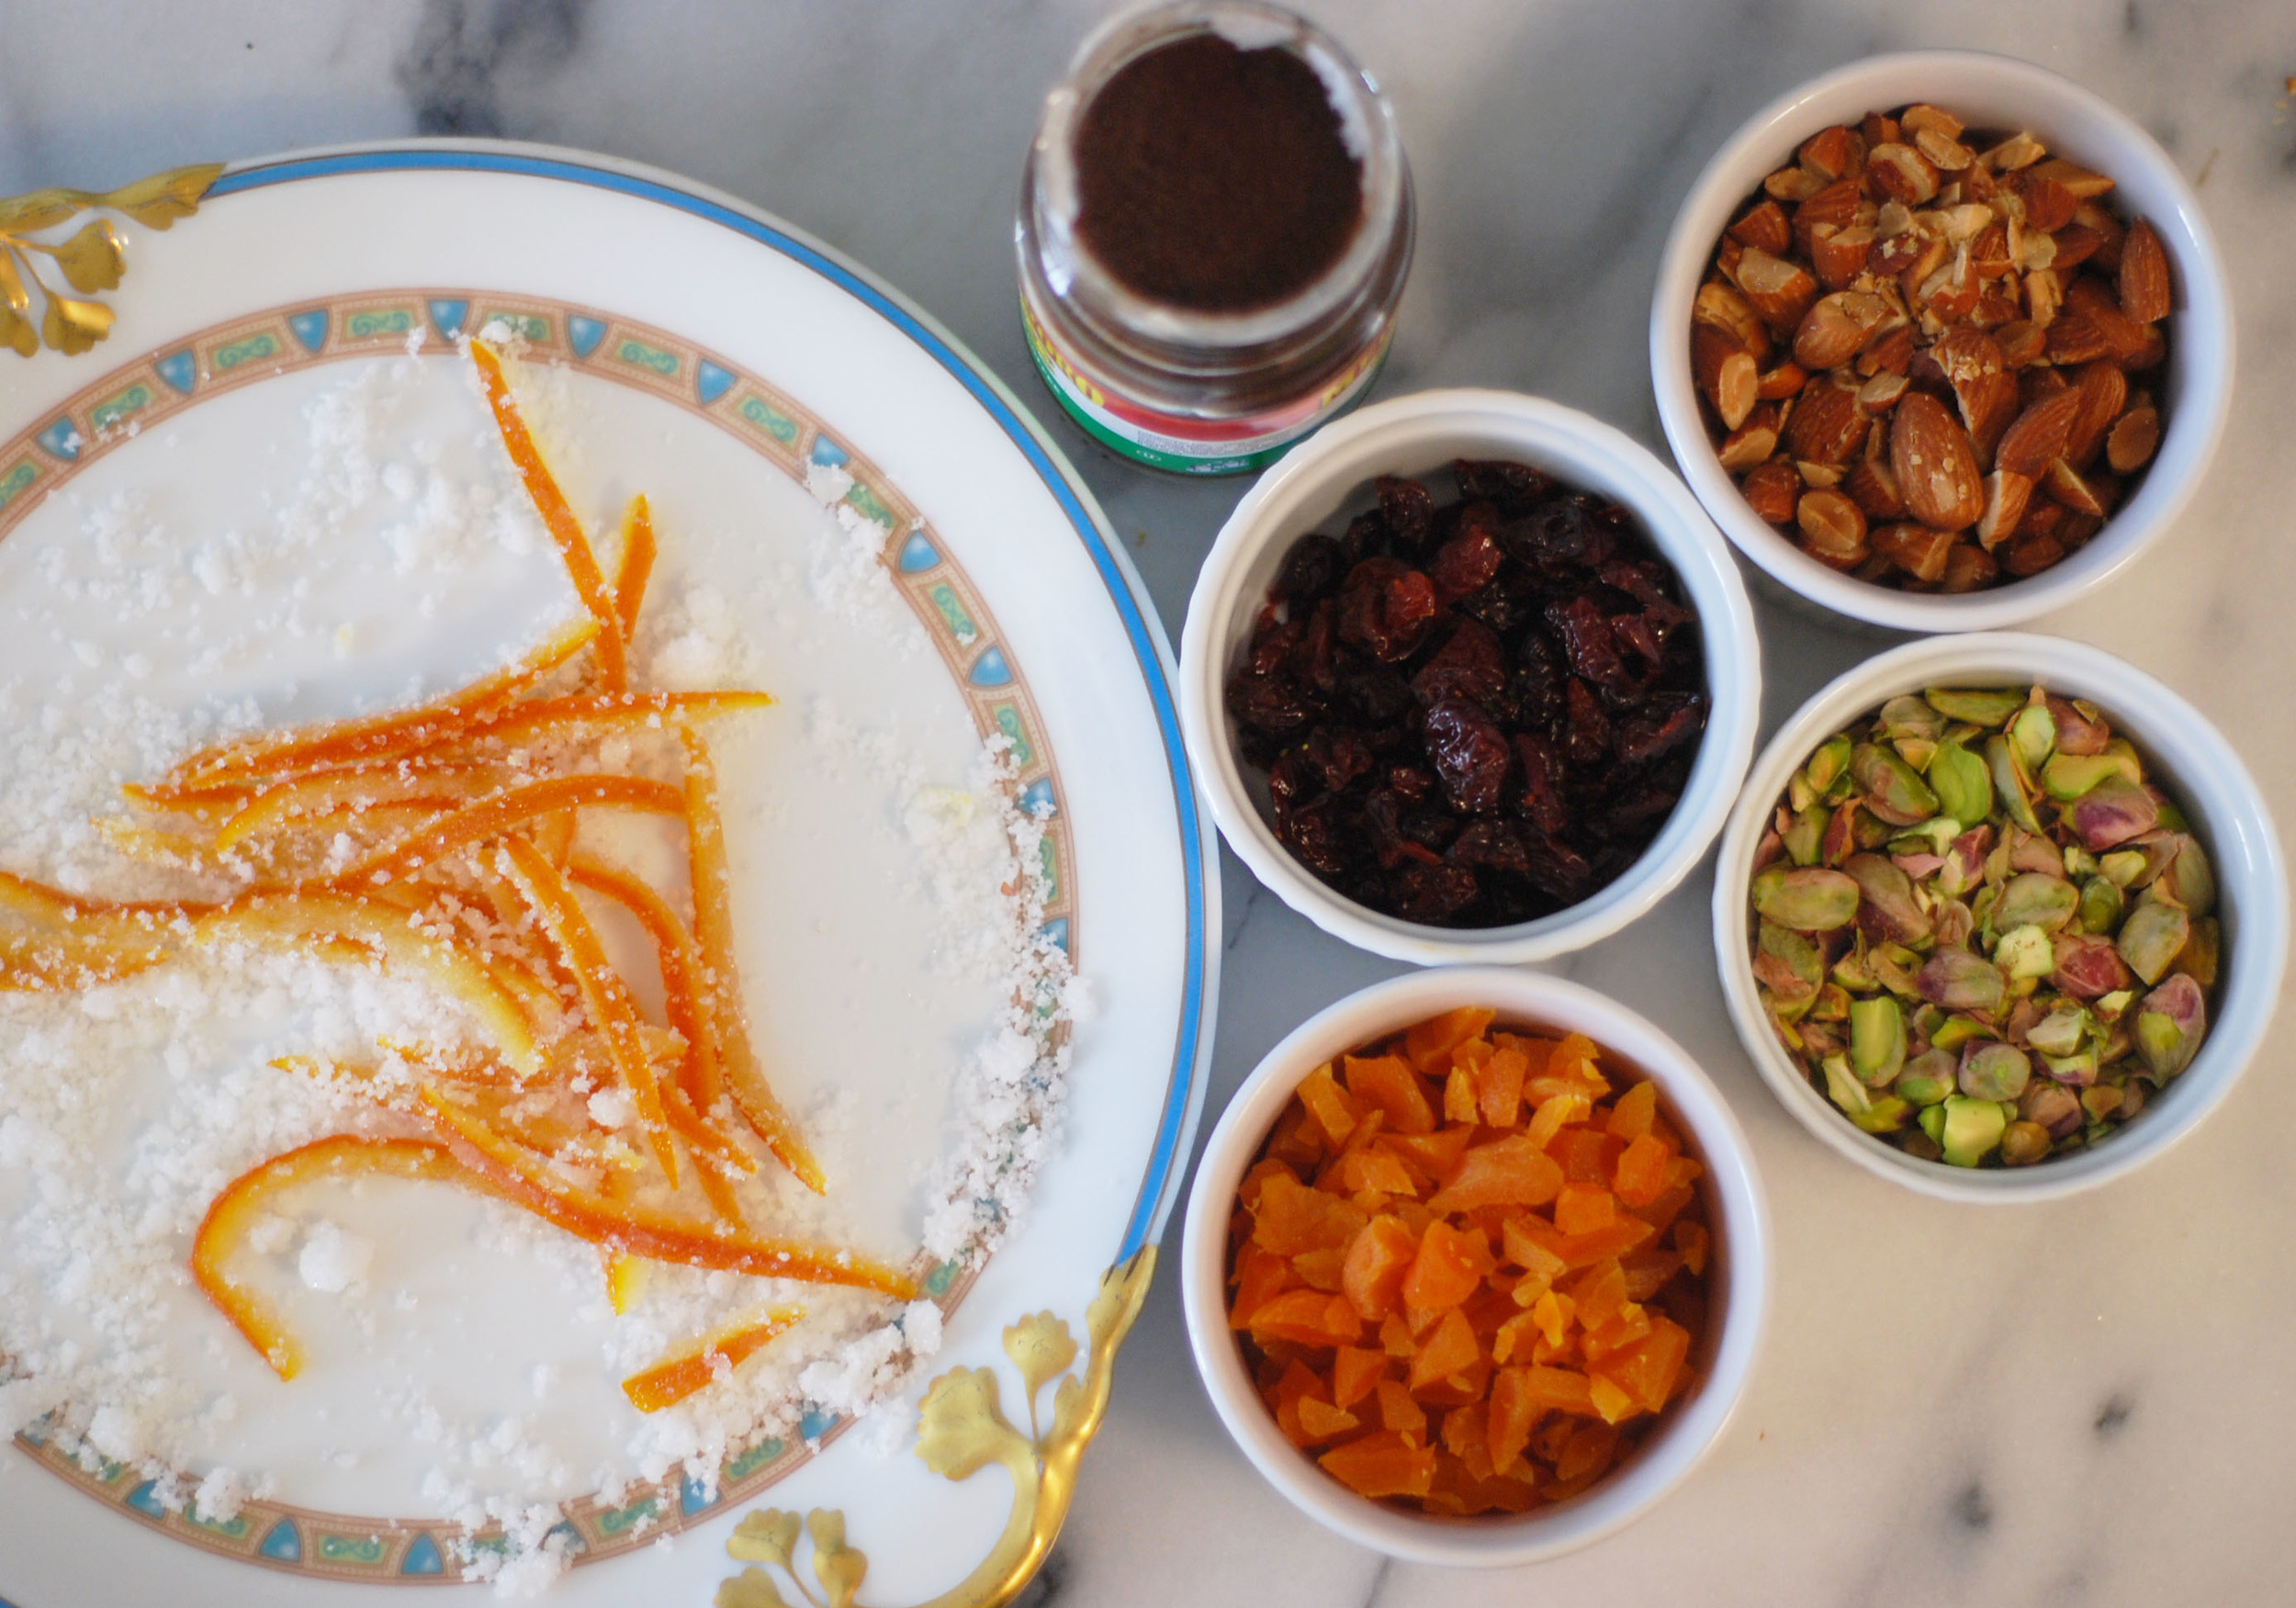
​Here are the ingredients for my chocolate bark. I did a few batches of chocolate. One where I stirred in a tablespoon of instant espresso coffee and then added in the toasted almonds and a few dried cherries.  Of course I used my candied orange peels and pistachio for another version and finally added in apricots, cherries and almonds for a final version. Use whatever ingredients you like, pick your favorites I like to make sure to add some color so I tried to use a variety.

ChocBark layout.jpg

Here's where you get to smear the chocolate. I used a small 1/4 cooked sheet with parchment paper on the bottom. I smeared the chocolate out and started laying in my fixings, you need to work quickly before the chocolate starts to harden. Candied orange peels and pistachios for this batch.​

ChocBark finished1.jpg
ChocBark finished2.jpg

Let it cool in the refrigerator for about 15 minutes and then it's ready for breaking into pieces and eating right away, in my case i saved these for an event and will package them up the day before.

ChocBark plate.jpg

Voila, all done, delicious and beautiful. I can't wait to share these with my friends. Enjoy!

Related Posts Plugin for WordPress, Blogger...

Posted in Baking, Bake, Food, Make, Sweets and tagged with chocolate, sweets, chocolate bark.

March 27, 2013 by Tanya Ponce.
  • March 27, 2013
  • Tanya Ponce
  • chocolate
  • sweets
  • chocolate bark
  • Baking
  • Bake
  • Food
  • Make
  • Sweets
  • Post a comment
Comment
Tissue Pom Pom FINAL.jpg

Tissue Paper Pom Poms

Tissue Pom Pom FINAL.jpg

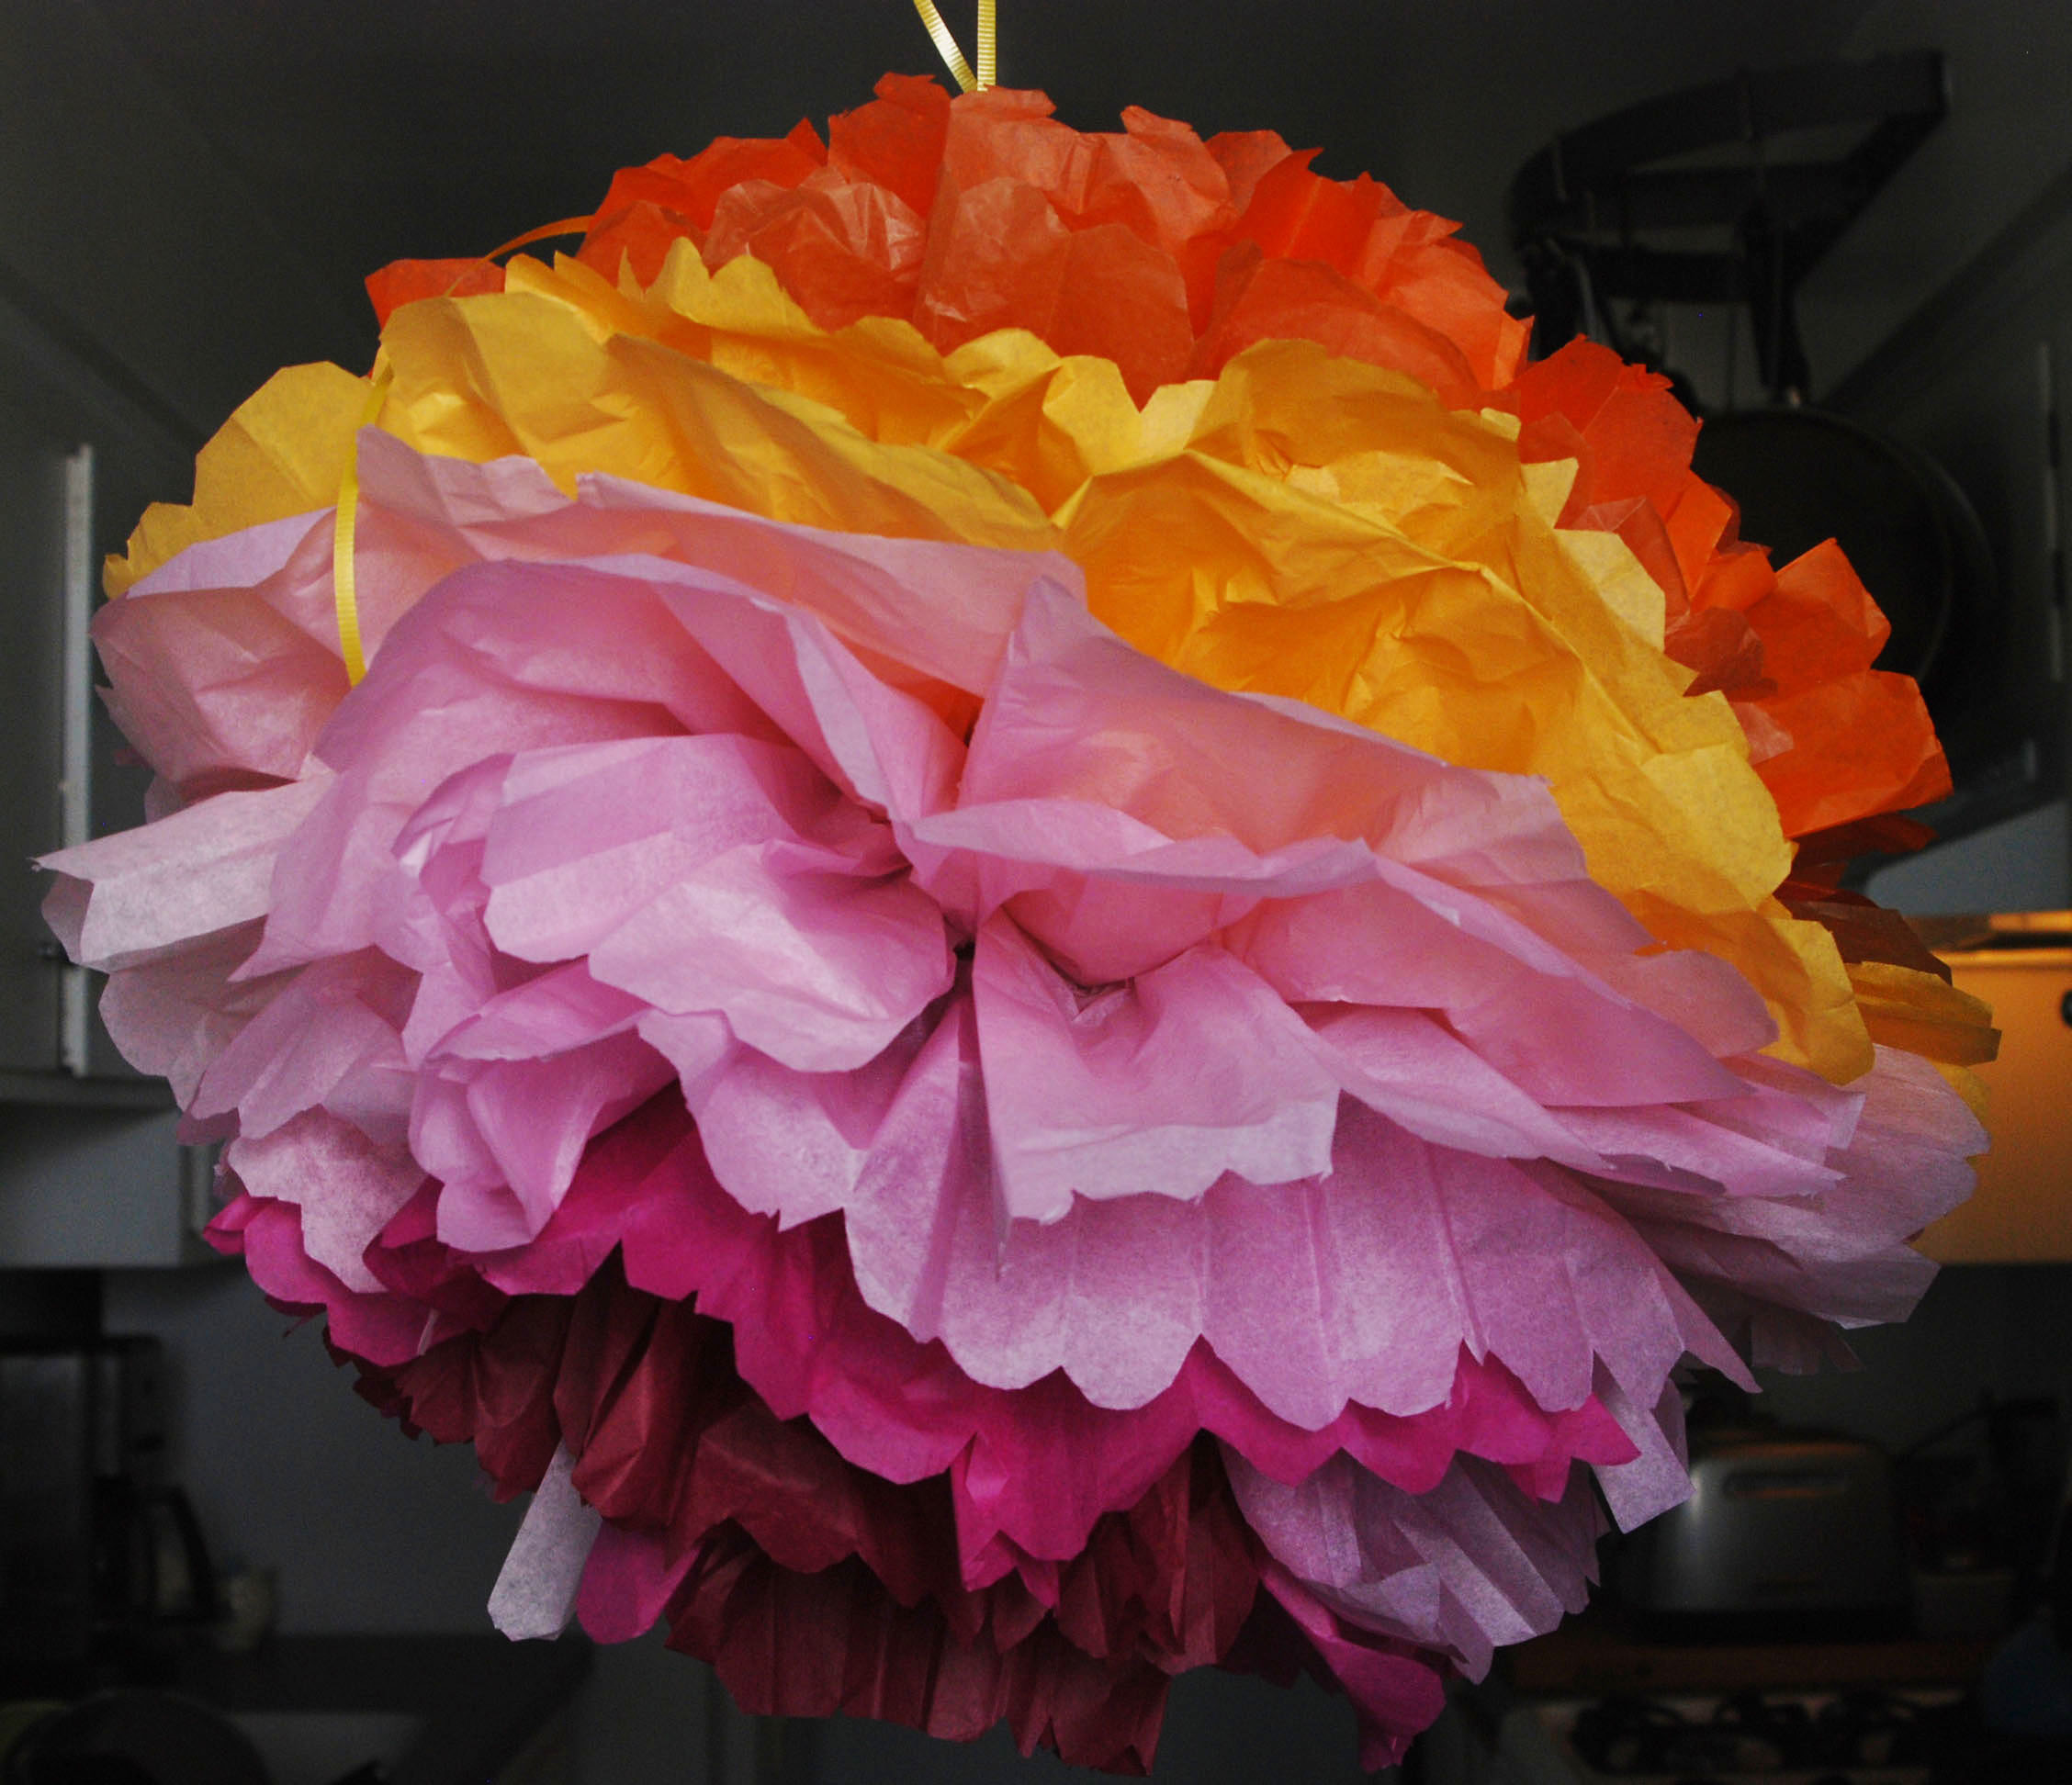
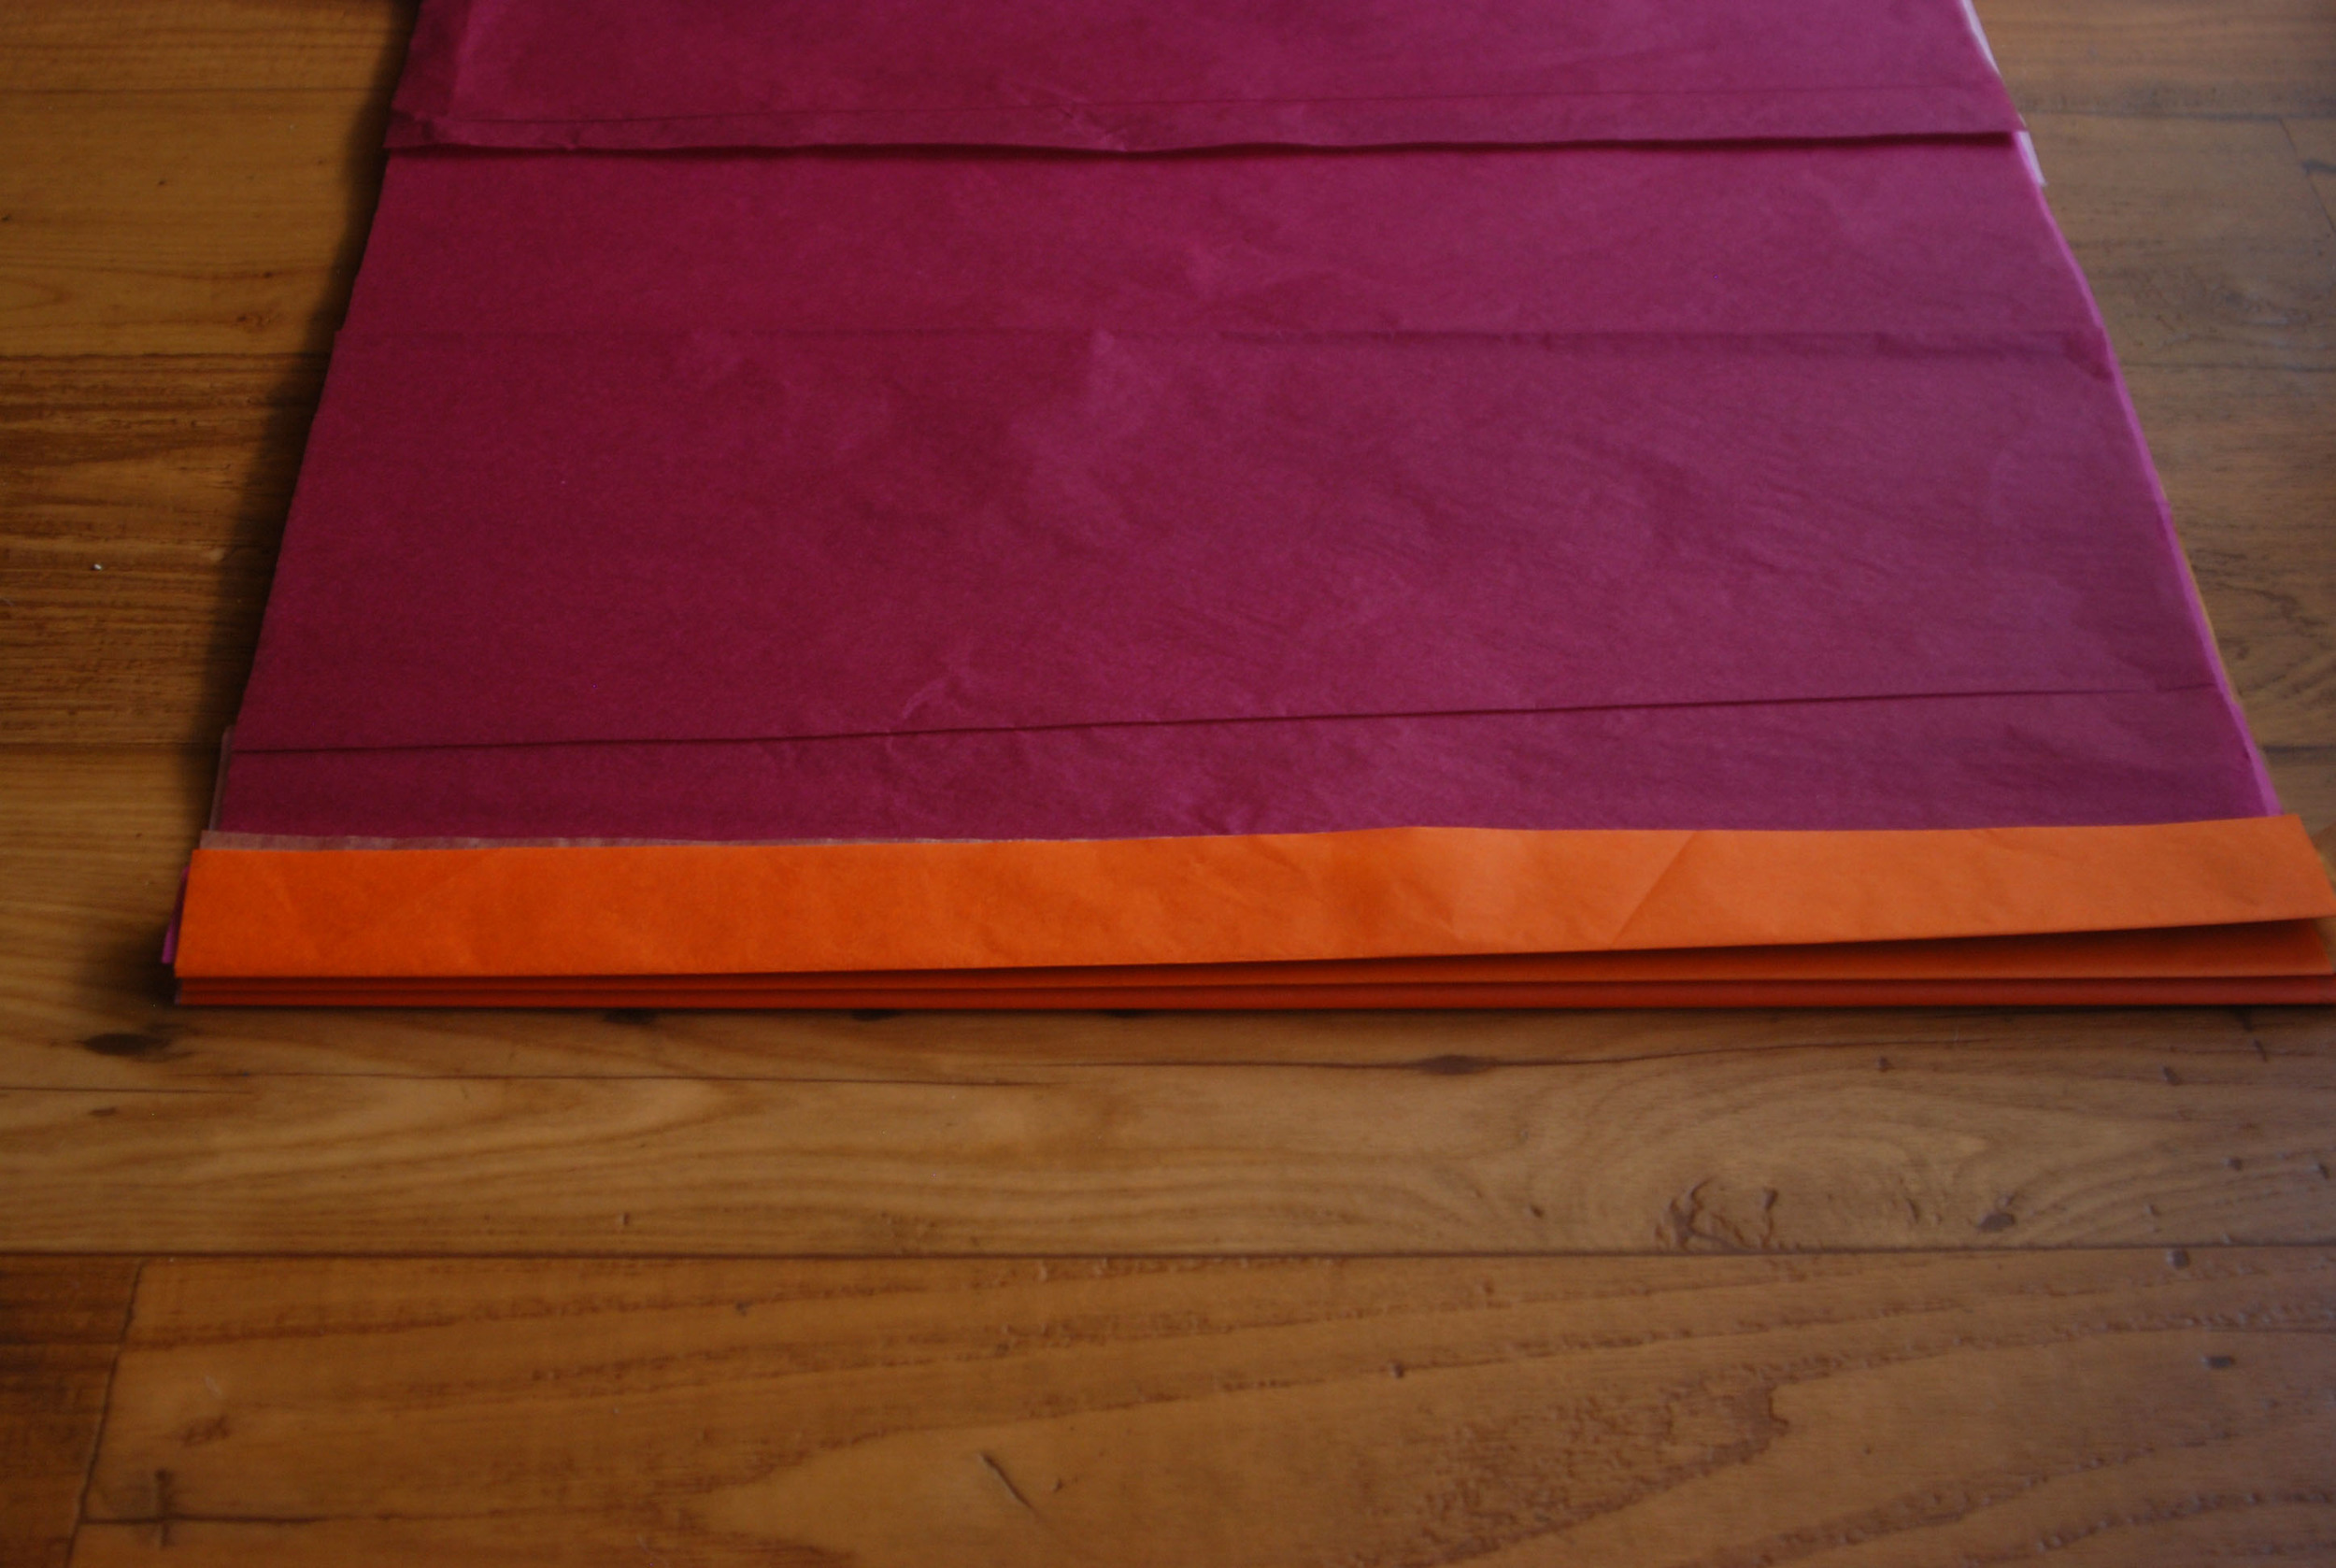
Next up are how to make Pom Poms.  You take 10-12 pieces of tissue paper.  In any combo of colors you want.  Please note that you need rectangle sheets of paper to make these work. I tried with perfect squares and it didn't fluff up correctly.  The 99cent store sold perfect squares, so I had to cut some in half to add on to the squares to make them rectangle.  Seems complicated but it worked.  If you get them already rectangle then bonus, no extra work.​

Here's how I made mine:

Tissue PomPom Rectangle.jpg

Lay 10 - 12 sheets out.  Need a rectangle.  Notice I had one square and added 1/2 a sheet to complete my rectangle.  Nice to have them line up evening, if you have a long tissue just trim to match the shape.​

Tissue PomPom Colors.jpg

My color choice for this one was orange, marigold, soft pink, hot pink and burgundy.​

Tissue PomPom Accordian.jpg

Just like we did with the tissue paper flowers you start folding the paper accordian style about 1 inch wide.  Goal is to end up with same color on both sides (i.e. first fold has the orange top, last fold should have the orange on top)

Tissue PomPom Tie.jpg

In order to have these hang down you'll need to tie them in the middle.  I use colorful curling ribbon, but if you want to have them look like their floating use fishing line or jewelry line.​

Tissue PomPom Cut.jpg
Tissue PomPom Cut both sides.jpg

Next up, cut both ends in desired shape, I'm partial to the rounded corners.​

Tissue PomPom PullApart.jpg

Start pulling apart the tissue carefully, alternating sides.​

Tissue PomPom Half Done.jpg

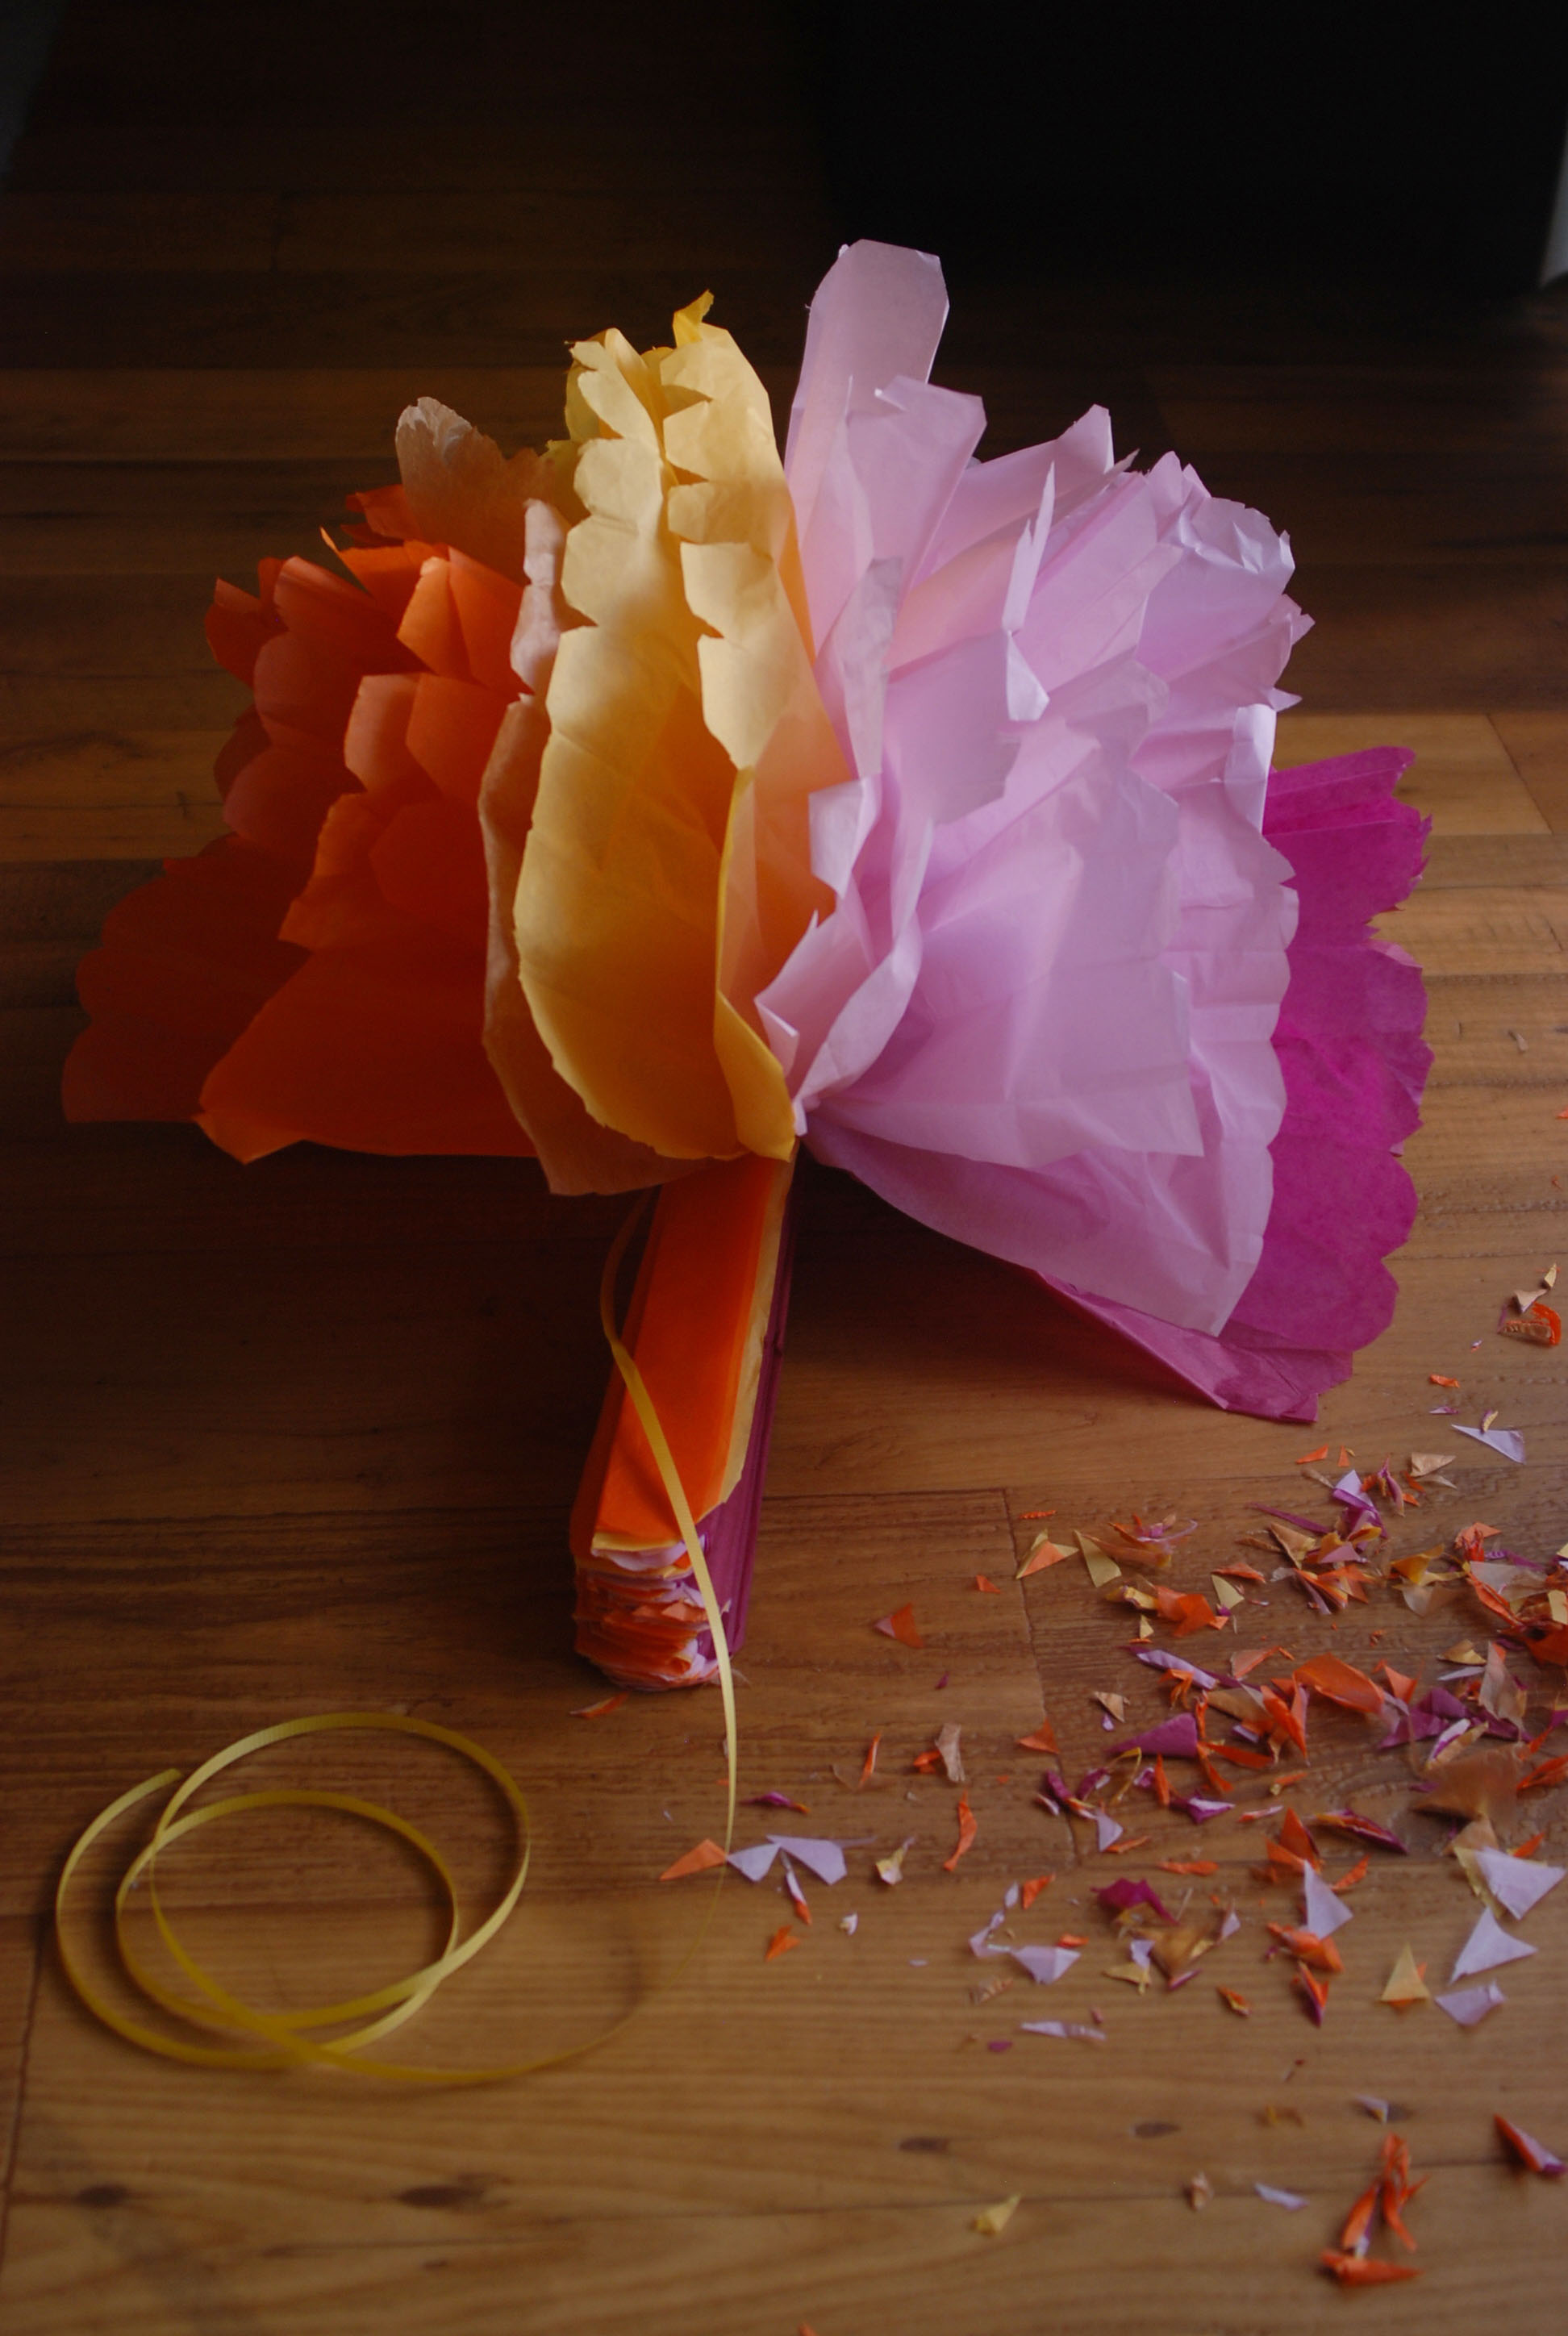
Here's half the Pom Pom done.  Finish up the other side and you get what's at the top of the page.​

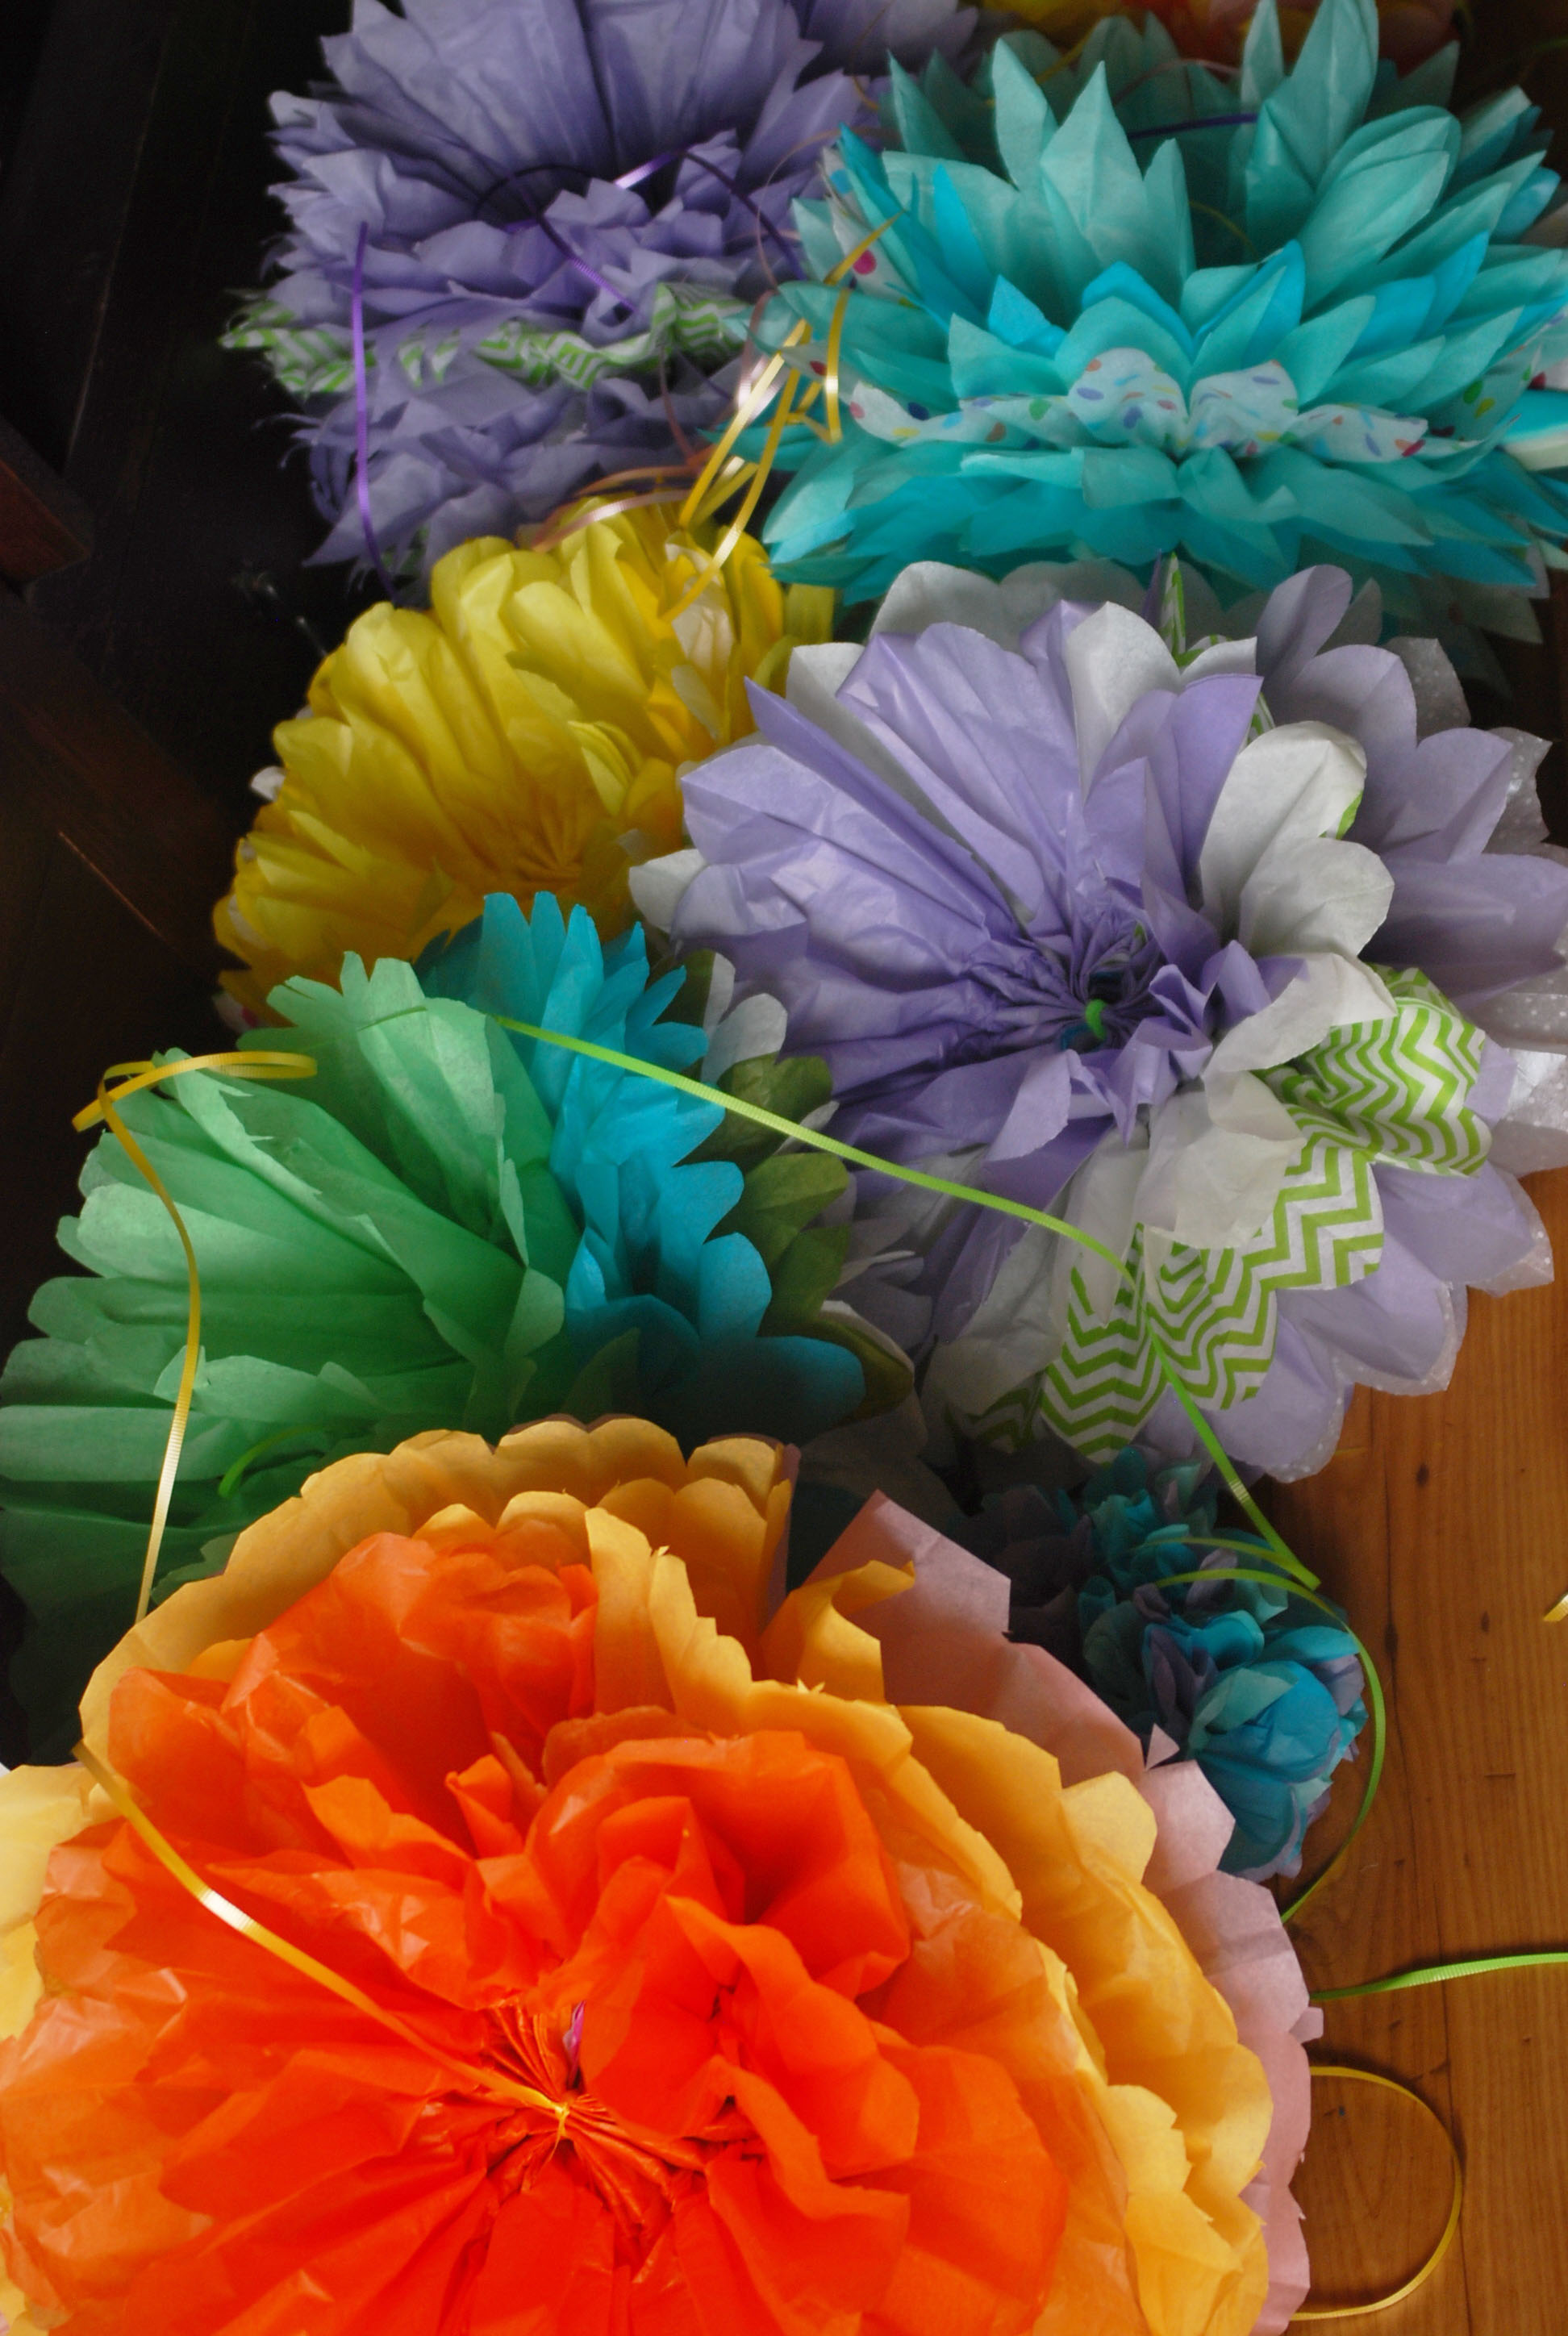
Tissue PomPom Coral Reef.jpg

Here is my coral reef of Pom Poms.  In April you'll see some images of them hanging in their environment.​  Use your creativity and enjoy the process, it's fun and messy, but the outcome is always nice.

​

Related Posts Plugin for WordPress, Blogger...

Posted in Play, Things, Make and tagged with tissue paper, tissue paper pompoms, pompoms, pom poms.

March 21, 2013 by Tanya Ponce.
  • March 21, 2013
  • Tanya Ponce
  • tissue paper
  • tissue paper pompoms
  • pompoms
  • pom poms
  • Play
  • Things
  • Make
  • Post a comment
Comment
Newer

itsweet & savory itsweet & savory

Food+Travel+Life

Lifestyle blogger who loves coffee, architecture, local cultural interests, good food and travel stories.

  • Home
  • About Me
    • A Simply Raw Life
    • Donuts, Dresses, and Dirt
    • Oh Joy
    • david lebovitz
    • My Life at Playtime
    • Design Mom
    • Curbly
    • AltDesign
    • Peggy Wong
    • A Golden Afternoon
    • Eat, Drink + Be Merry
    • Dylan and Jeni Photography
    • Route 66
    • Cuba A Bittersweet Tale - Part I
    • Cuba A Bittersweet Tale - Part II
    • Cuba A Bittersweet Tale - Part III
    • Cuba A Bittersweet Tale - Part IV
    • Cuba A Bittersweet Tale - Part V
    • Cuba A Bittersweet Tale VI
    • Cuba A Bittersweet Tale - Part VII
    • Cuba A Bittersweet Tale - Part VIII
Mom It Forward: Contributor
Follow on Bloglovin
  • Bake
  • Baking
  • Coffee
  • Cuba
  • Food
  • LA Local
  • Life
  • Make
  • NY Local
  • Play
  • read
  • Sweets
  • Things
  • Travel
  • US City
NYSE for SMPW. Did you get that. New location for us, was a lovely day. Nice to be back down here doing our volunteer work. Always fulfulling.
This was my pre-meal to get me fed and courage to go network with people I don’t know but want to know. Finally got to @barpisellino for their classic Negroni. Did not disappoint.
Quick trip down to the city tonight to Network. So out of practice but was good to make some work connections. Chrysler Building and Grand Central Station pics never get old.
When the light hits your new coffee mug just perfectly. Pottery by @lark_potters
NYSE for SMPW. Did you get that. New location for us, was a lovely day. Nice to be back down here doing our volunteer work. Always fulfulling. This was my pre-meal to get me fed and courage to go network with people I don’t know but want to know. Finally got to @barpisellino for their classic Negroni. Did not disappoint. Quick trip down to the city tonight to Network. So out of practice but was good to make some work connections. Chrysler Building and Grand Central Station pics never get old. When the light hits your new coffee mug just perfectly. Pottery by @lark_potters
twitter
pinterest
facebook

Powered by Squarespace. Content is for demonstration purposes only.