• Home
  • About Me
    • A Simply Raw Life
    • Donuts, Dresses, and Dirt
    • Oh Joy
    • david lebovitz
    • My Life at Playtime
    • Design Mom
    • Curbly
    • AltDesign
    • Peggy Wong
    • A Golden Afternoon
    • Eat, Drink + Be Merry
    • Dylan and Jeni Photography
    • Route 66
    • Cuba A Bittersweet Tale - Part I
    • Cuba A Bittersweet Tale - Part II
    • Cuba A Bittersweet Tale - Part III
    • Cuba A Bittersweet Tale - Part IV
    • Cuba A Bittersweet Tale - Part V
    • Cuba A Bittersweet Tale VI
    • Cuba A Bittersweet Tale - Part VII
    • Cuba A Bittersweet Tale - Part VIII

itsweet & savory itsweet & savory

  • Home
  • About Me
  • Favorites Places
    • A Simply Raw Life
    • Donuts, Dresses, and Dirt
    • Oh Joy
    • david lebovitz
    • My Life at Playtime
    • Design Mom
    • Curbly
    • AltDesign
    • Peggy Wong
    • A Golden Afternoon
    • Eat, Drink + Be Merry
    • Dylan and Jeni Photography
  • Travel Stories
    • Route 66
    • Cuba A Bittersweet Tale - Part I
    • Cuba A Bittersweet Tale - Part II
    • Cuba A Bittersweet Tale - Part III
    • Cuba A Bittersweet Tale - Part IV
    • Cuba A Bittersweet Tale - Part V
    • Cuba A Bittersweet Tale VI
    • Cuba A Bittersweet Tale - Part VII
    • Cuba A Bittersweet Tale - Part VIII
Tissue Paper Flower Board.jpg

Tissue Papers Flowers

Tissue Paper Flower Board.jpg

I never thought I'd get this crafty. But I've done a few small parties and wanted to not have to buy premade decorations, so I had my friend Mia come over and show me how to make the Hanging Pom Poms.  Then I got inspired by this Pinterest post, which led me to this blog post at Rust & Sunshine.  I pretty much followed her directions, but modified the colors to match a baby shower invitation.  Here are a few of my steps, but please check out Michelle DuPuis blog post above on Rust & Sunshine for all the lovely flower shapes and color choices. 

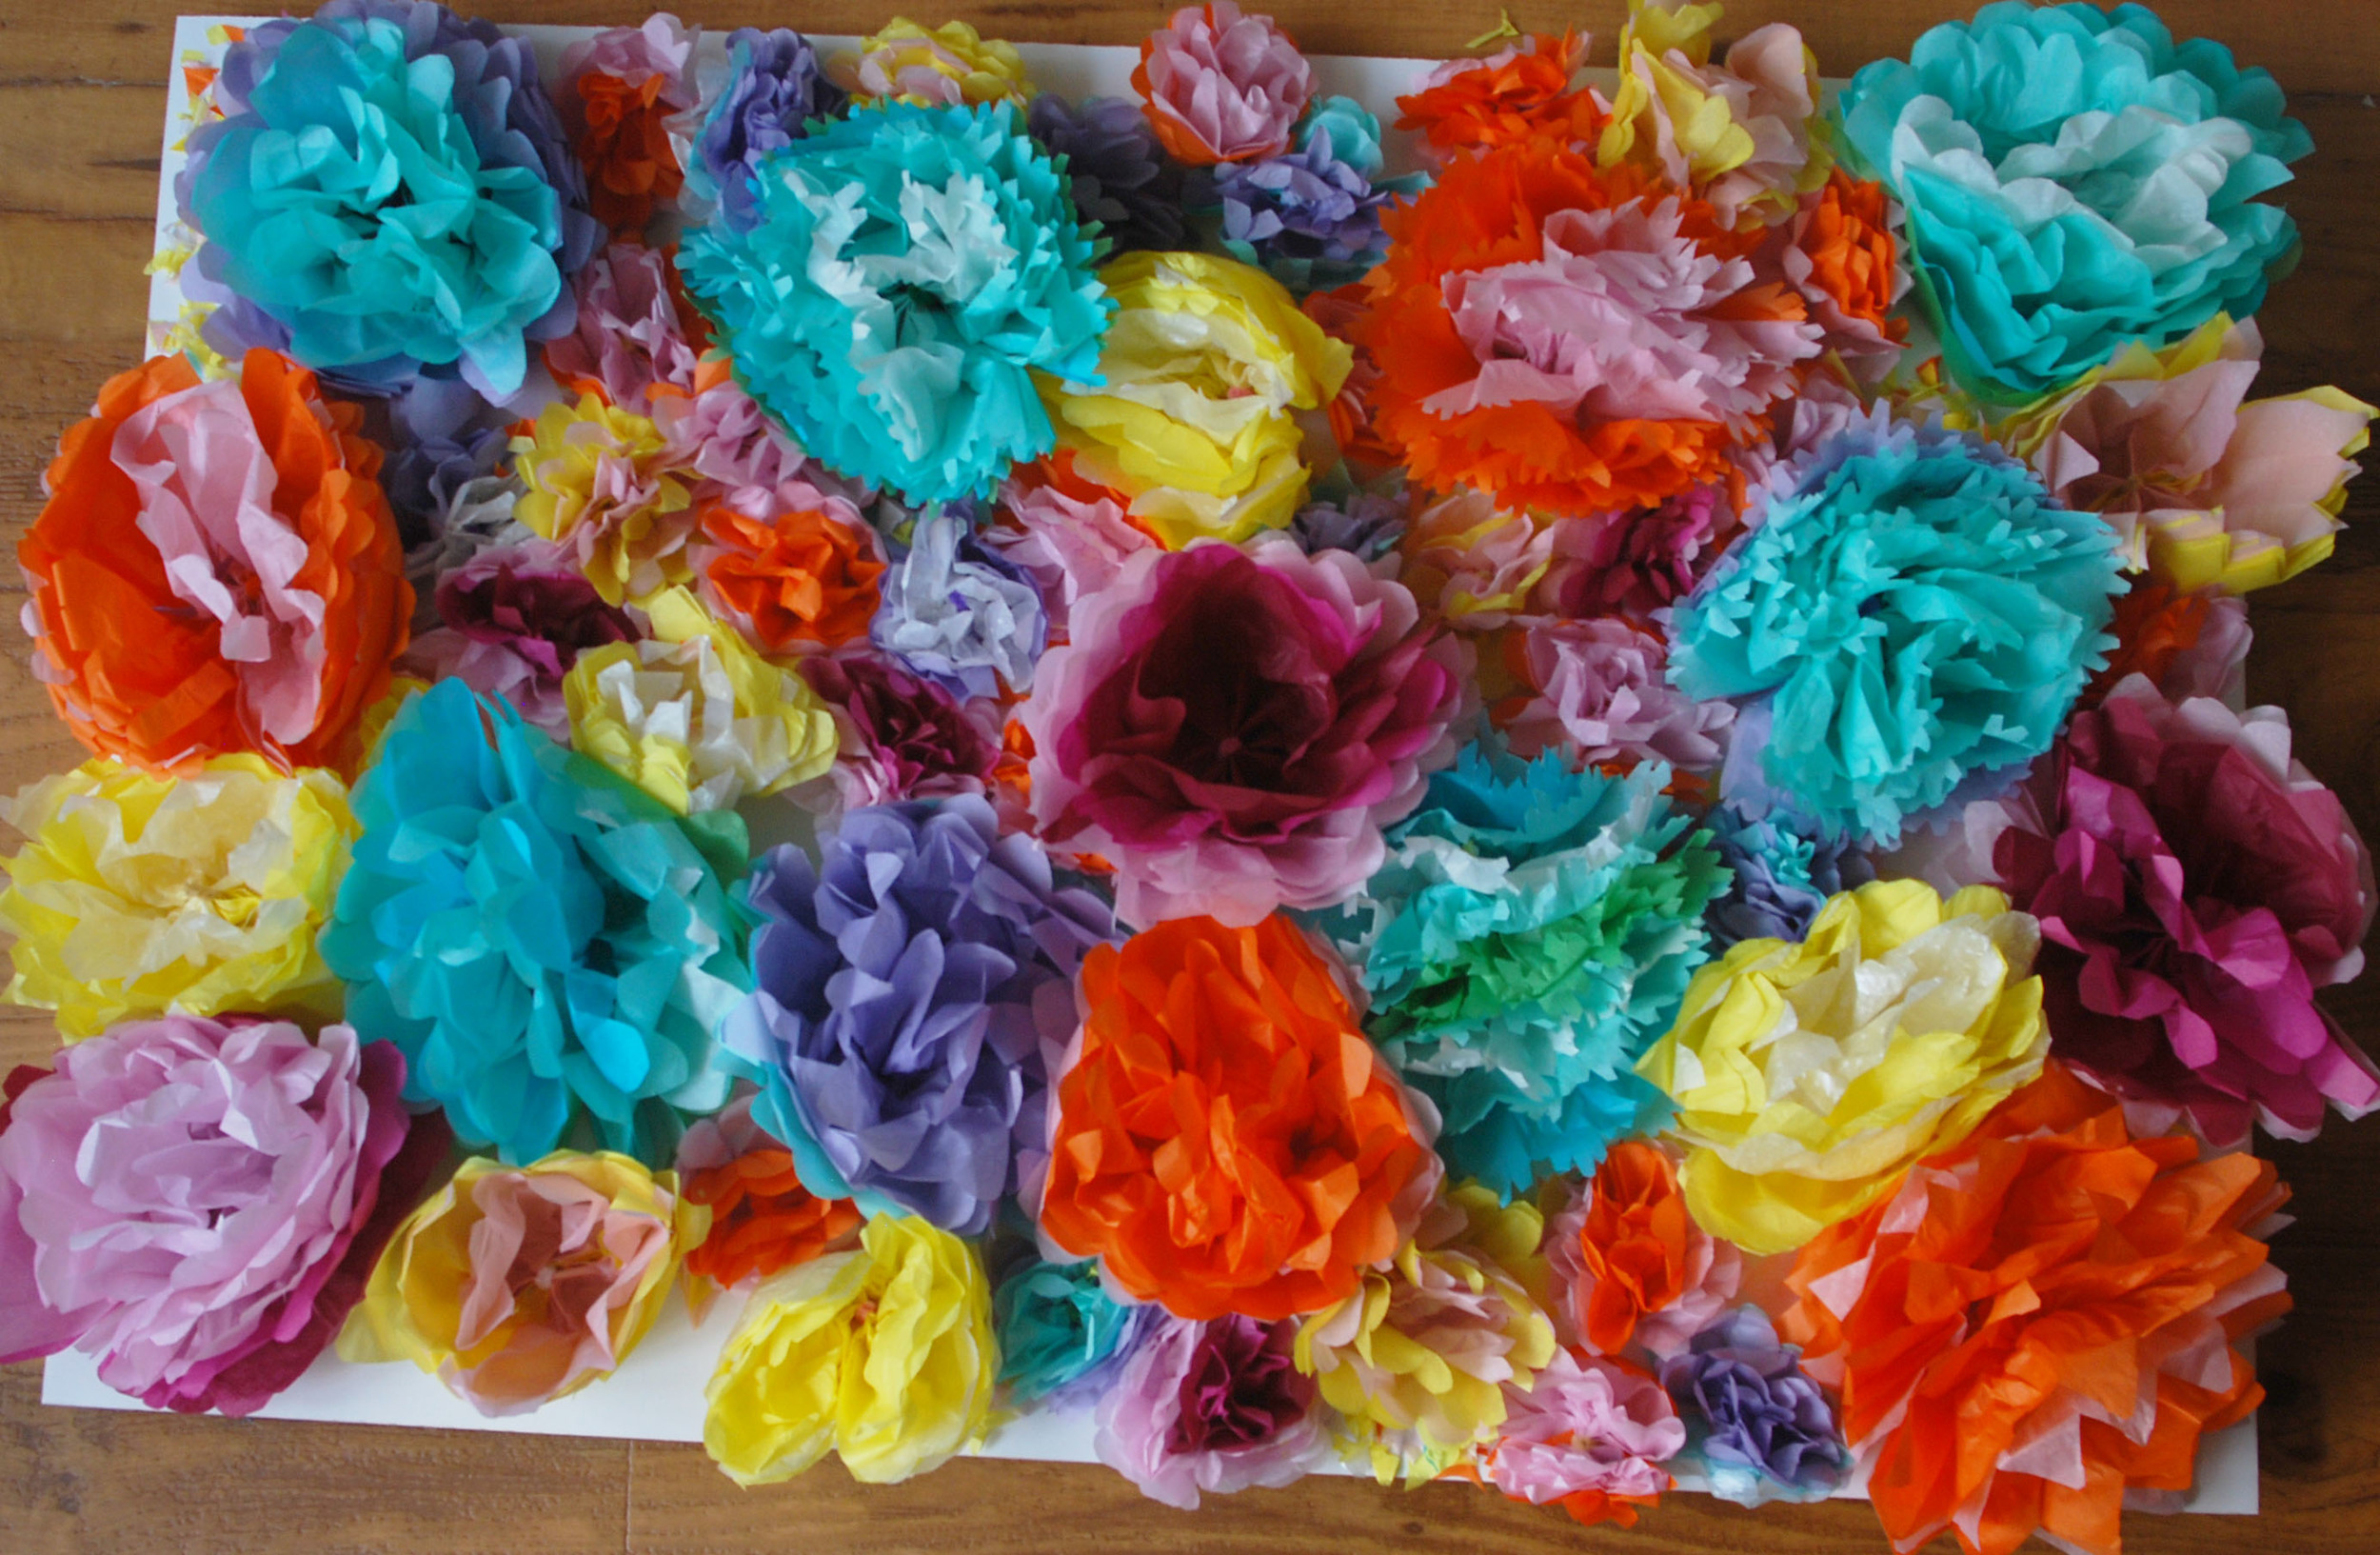
The great thing about tissue paper is it's cheap, try the 99cents store. I was able to afford a nice bundle from there along with the pipe cleaners, so much cheaper then the craft stores and tissue paper and pipe cleaners are all the same.  I cut the stems off my flowers as I glued them to a foam core board above to use as a backdrop.  Seriously I love this these flowers and all the colors.​

Tissue Paper Supplies.jpg

Supplies: Tissue paper.  Fuzzy pipe cleaners and scissors.

Tissue Paper Folding.jpg

Cut Medium size flowers into 10x10 squares.  Generally 6 tissue papers work fine.  Use any combination of colors.  I found that I liked 4 lighter color tissues on the bottom and 2 dark colors on top to be my favorite.  I also made smaller flowers so I cut the paper down to 5x5 squares and only used 5 pieces of tissue paper and this worked out well.​

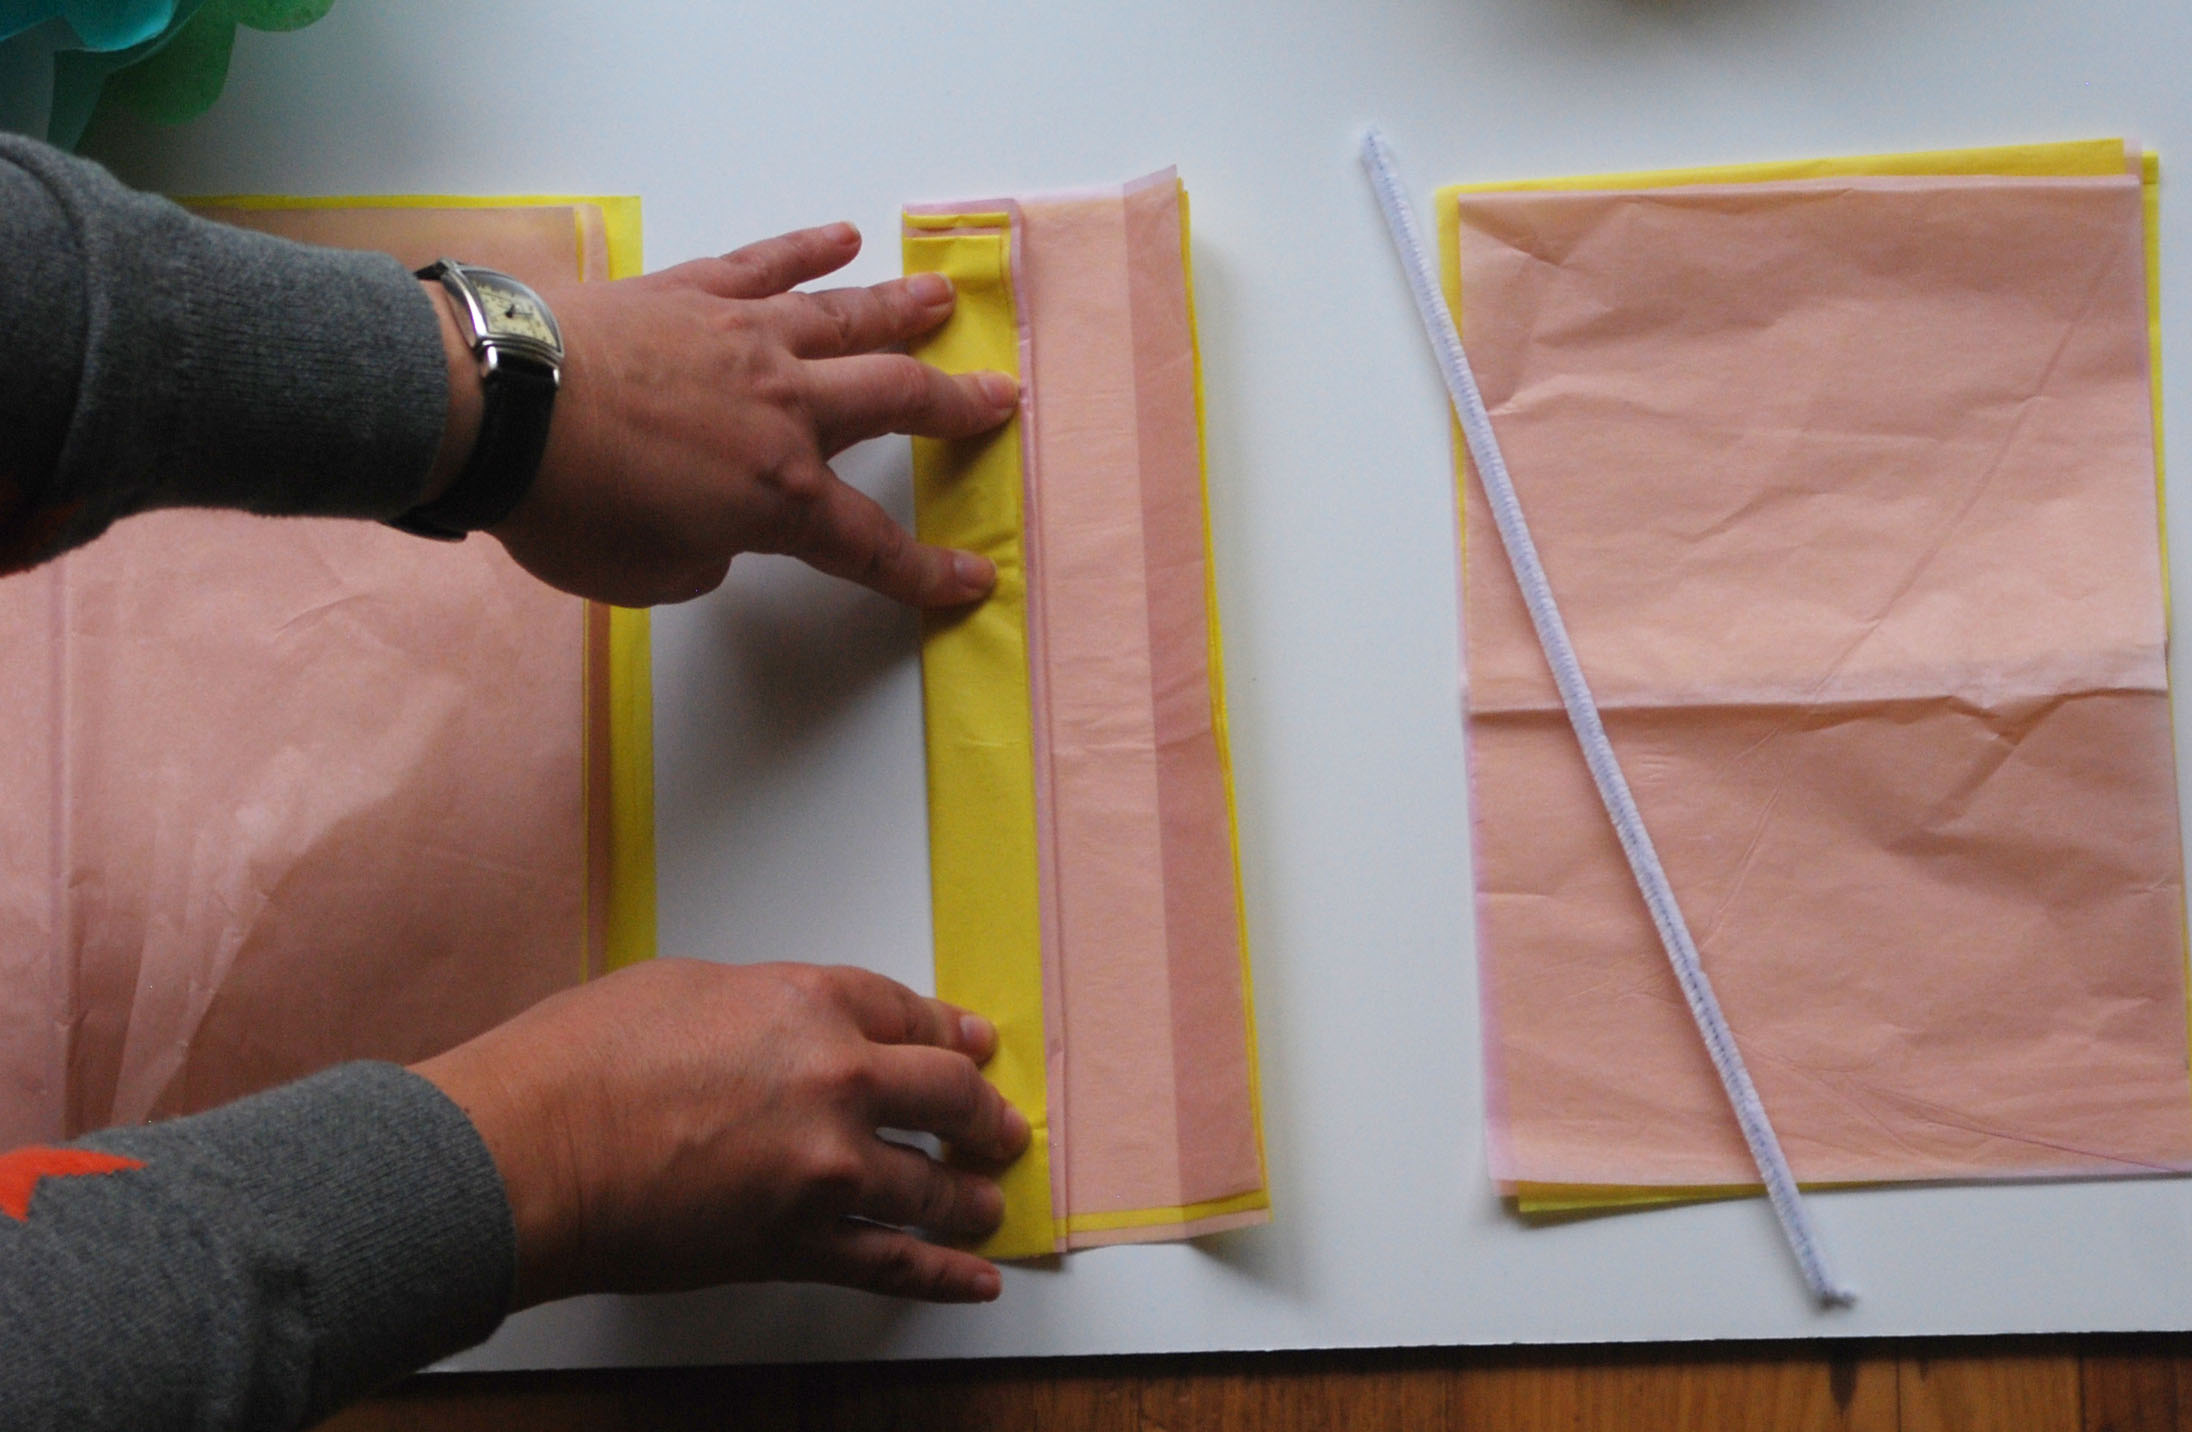
Once you've stacked up your piles start folding the paper accordion style.  About 1 inch for each fold.​

Tissue Paper Folding 2.jpg
Tissue Paper Piping.jpg

Next take your piping and wrap it around the middle of the folded paper, as shown above.​

Tissue Paper Cuts.jpg
Tissue Paper Cutting 2.jpg

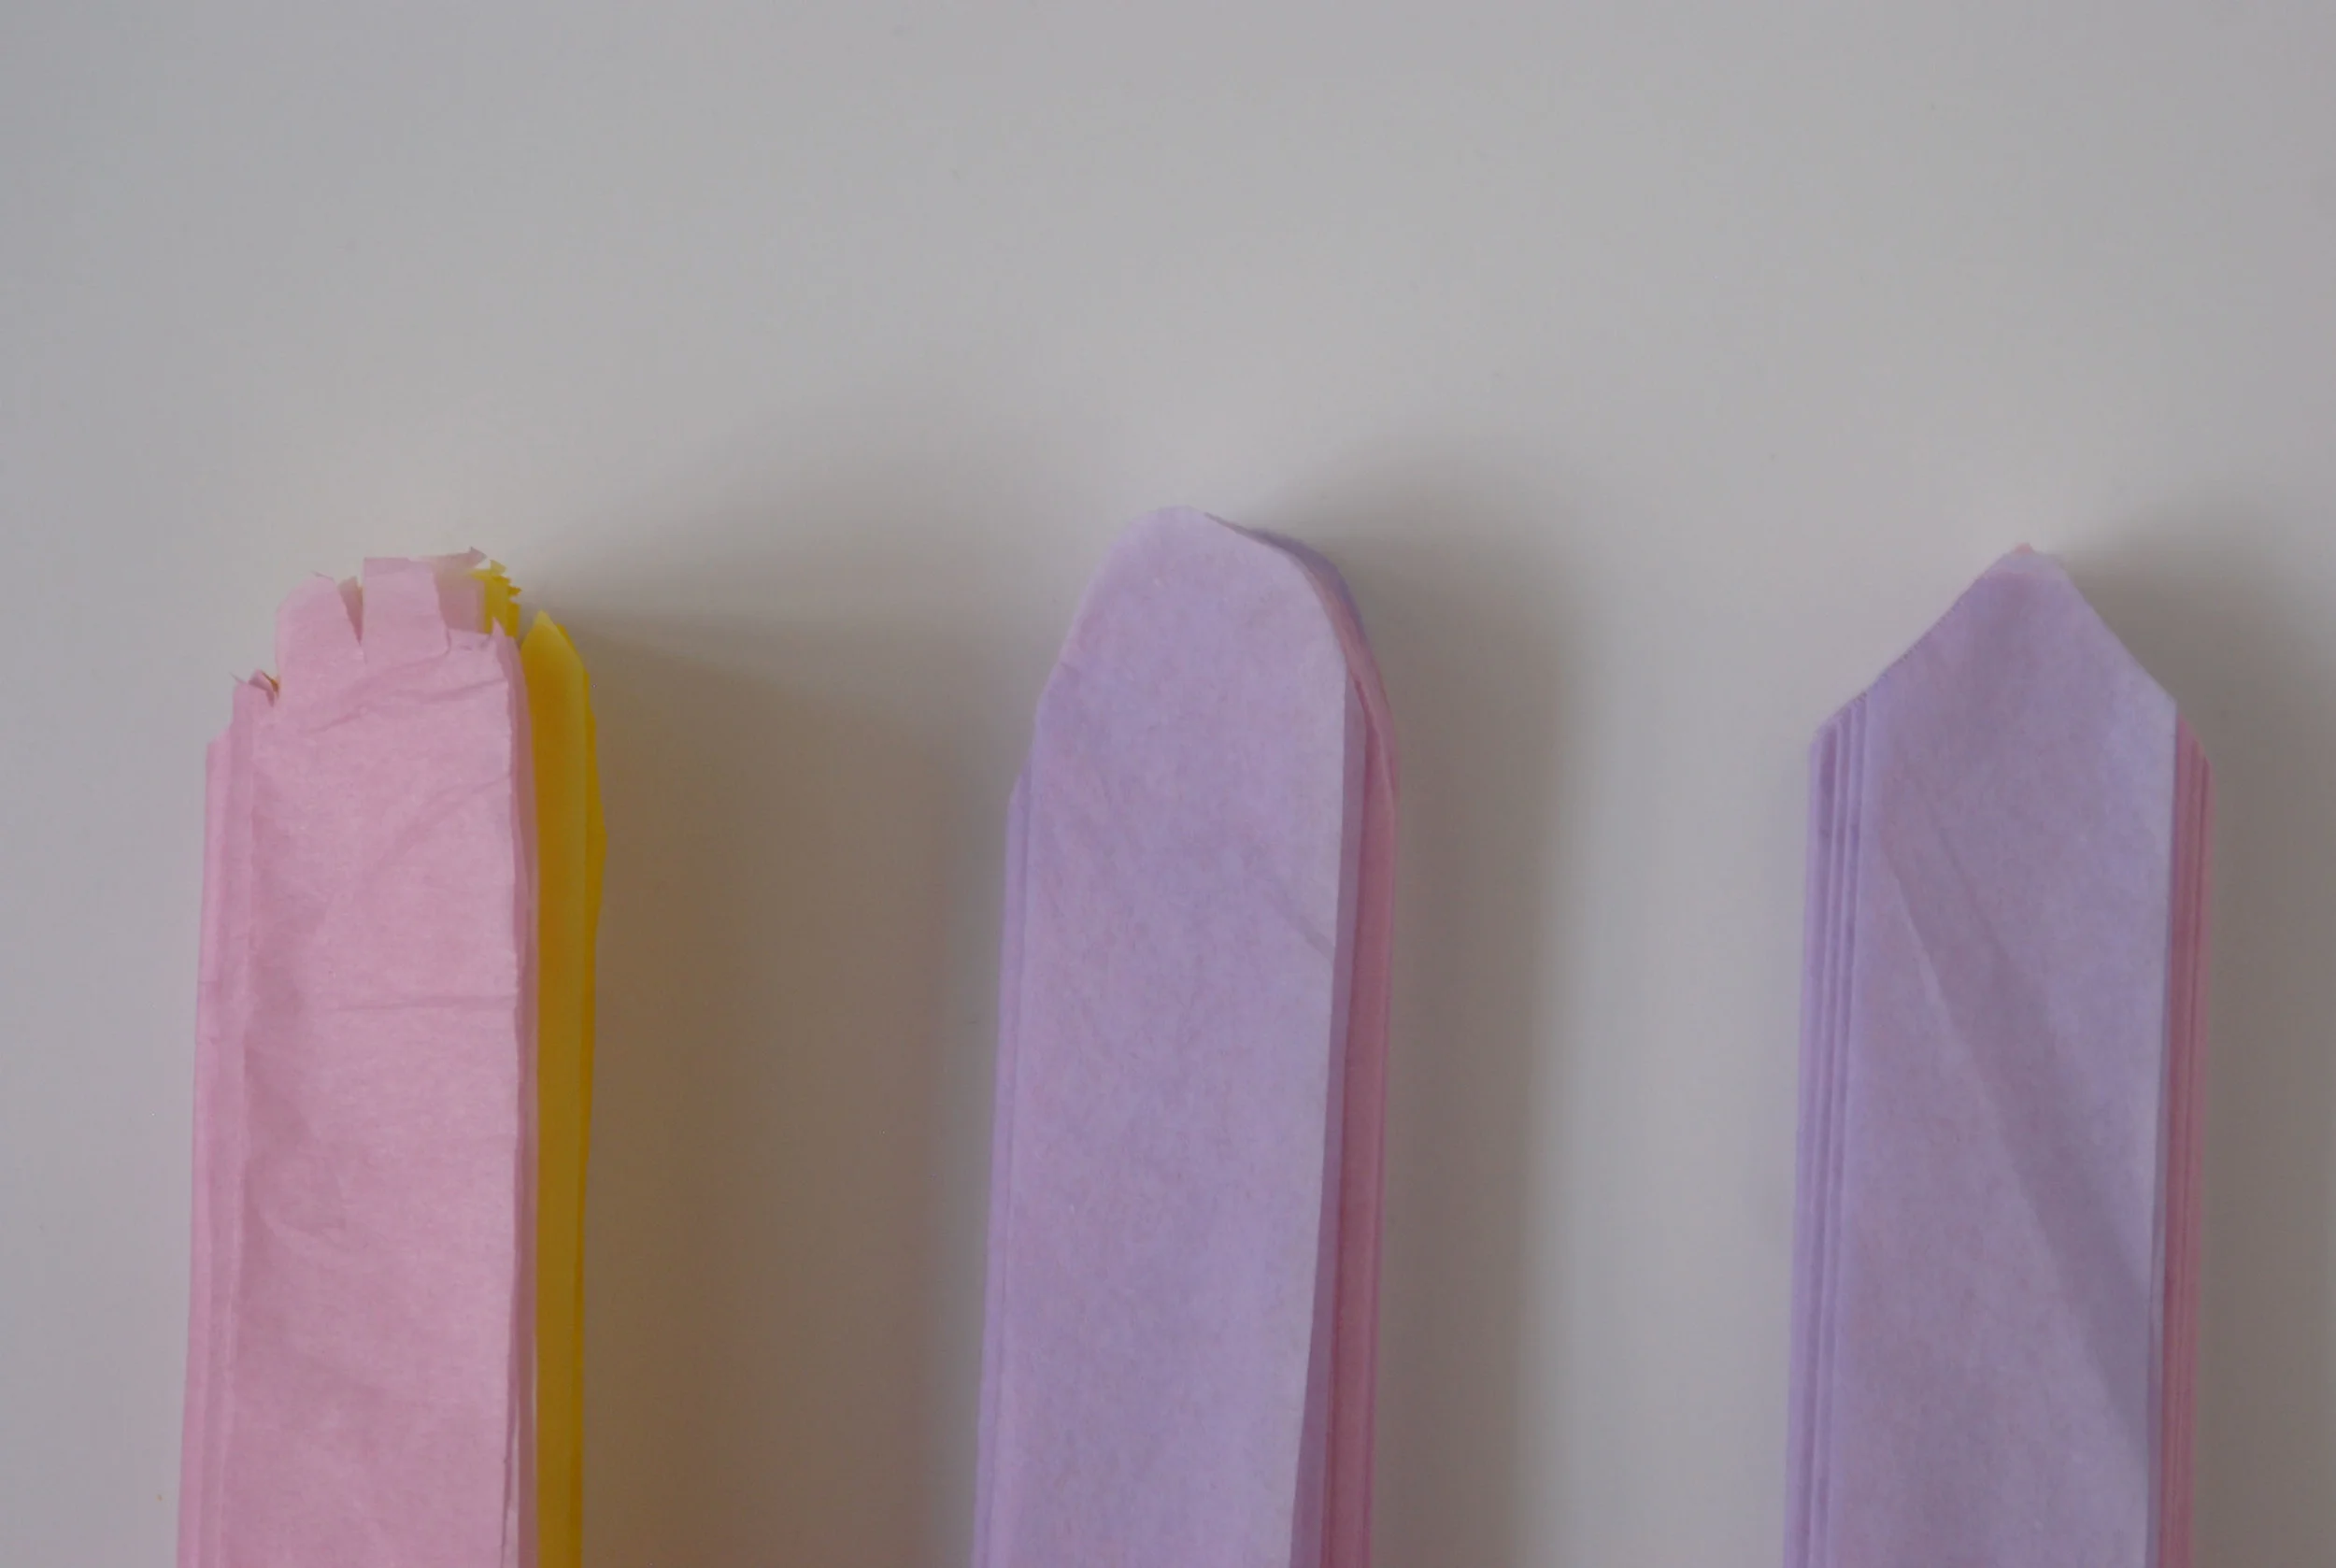
Next comes the cutting of the edges.  This is where you decide what kind of flower you want.  Rose, Dahlia, Daisy, Chrysathemum, etc... cut the edges accordingly.  I like rounded edges best, but it was fun to play with a few different cuts.  ​

Tissue Paper Fanning.jpg

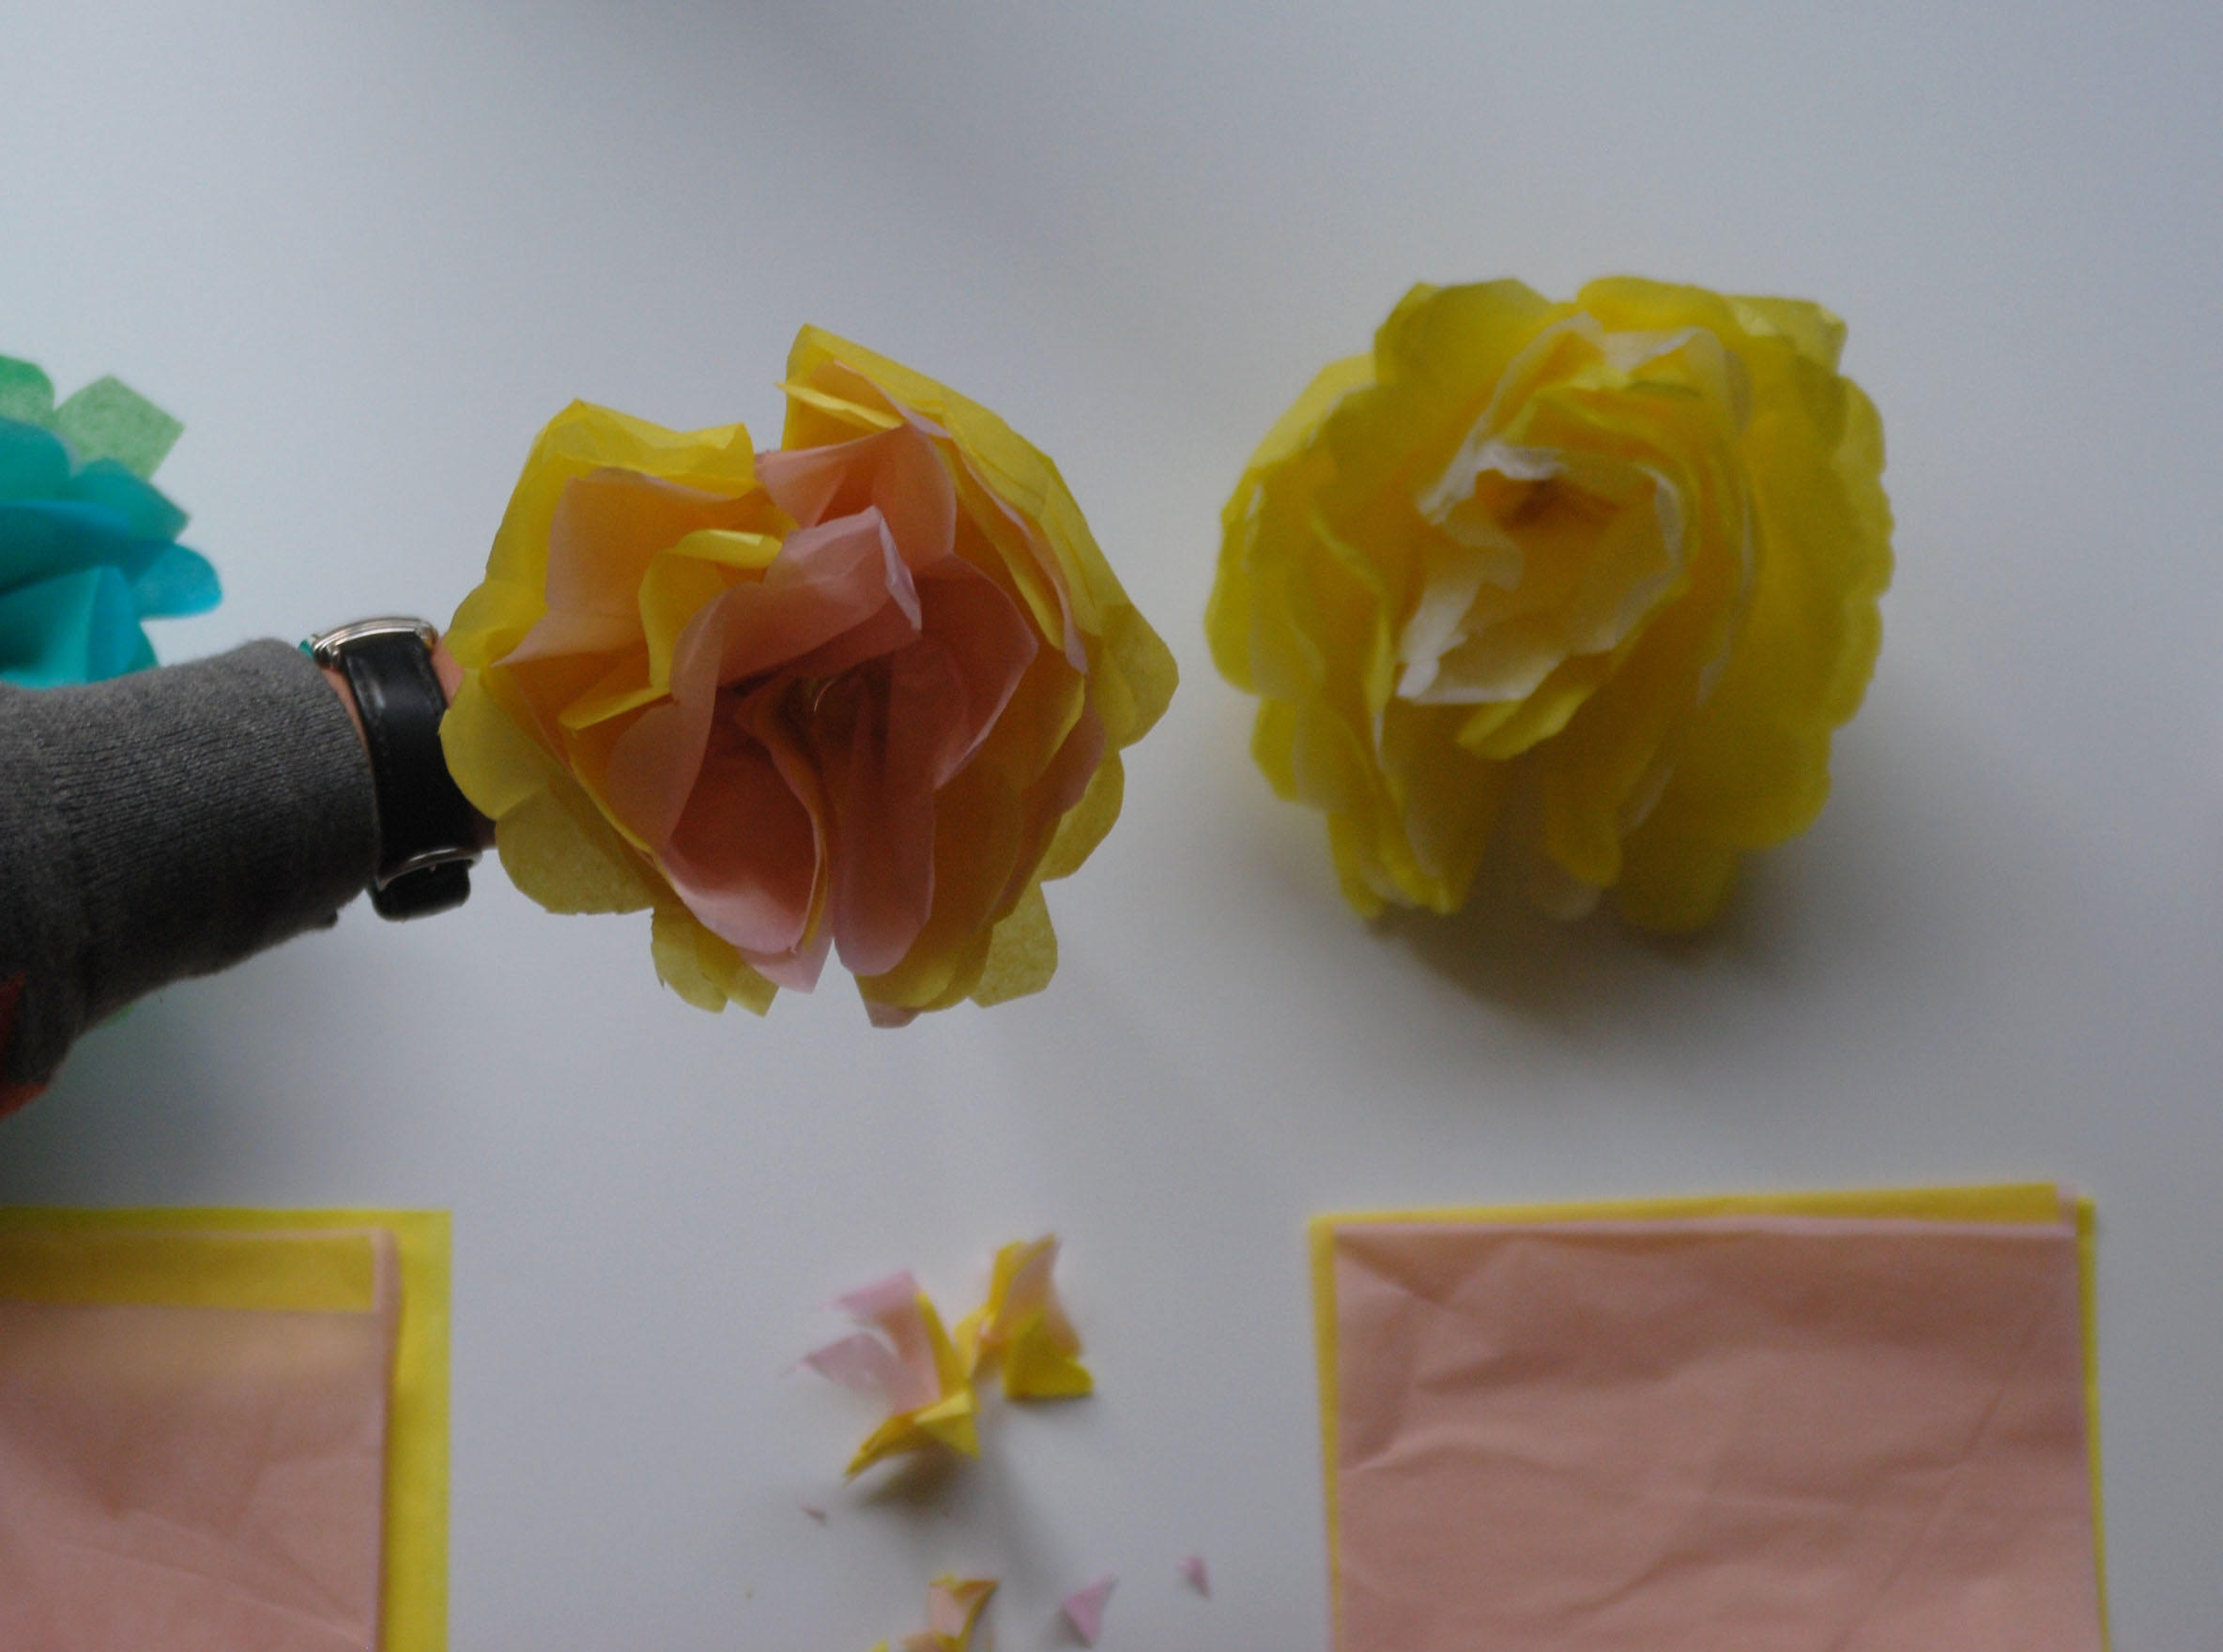
Fan out the paper and then start slowing pulling it towards the middle.  Remember it's tissue paper so be gentle, it tears easily.​ I have to say this is my favorite part.

Tissue Paper Pull Apart.jpg
Tissue Paper Flower Form.jpg
Tissue Paper Flower.jpg
Tissue Paper Piping Cut.jpg

Final Flower.  It's up to you how you want to display them.  Some people put them in vases and display them like real flowers. I chose to lop of the piping as I was gluing all the flowers to a foam core board for a special project above.​  My color inspiration was based on a baby shower invitation, which has lots of coral reef colors in it.  Also the Madewell board below spurred on this whole idea.

Madewell Inspiration.png

What to do with all the scraps, I saved them and glued them to the foam core to fill in the holes where I didn't have enough flowers.  Whatever you do, enjoy the process and the creativity.

Posted in Life, Play, Things and tagged with tissue paper flowers, tissue paper, flowers, crafts.

March 20, 2013 by Tanya Ponce.
  • March 20, 2013
  • Tanya Ponce
  • tissue paper flowers
  • tissue paper
  • flowers
  • crafts
  • Life
  • Play
  • Things
  • Post a comment
Comment

itsweet & savory itsweet & savory

Food+Travel+Life

Lifestyle blogger who loves coffee, architecture, local cultural interests, good food and travel stories.

  • Home
  • About Me
    • A Simply Raw Life
    • Donuts, Dresses, and Dirt
    • Oh Joy
    • david lebovitz
    • My Life at Playtime
    • Design Mom
    • Curbly
    • AltDesign
    • Peggy Wong
    • A Golden Afternoon
    • Eat, Drink + Be Merry
    • Dylan and Jeni Photography
    • Route 66
    • Cuba A Bittersweet Tale - Part I
    • Cuba A Bittersweet Tale - Part II
    • Cuba A Bittersweet Tale - Part III
    • Cuba A Bittersweet Tale - Part IV
    • Cuba A Bittersweet Tale - Part V
    • Cuba A Bittersweet Tale VI
    • Cuba A Bittersweet Tale - Part VII
    • Cuba A Bittersweet Tale - Part VIII
Mom It Forward: Contributor
Follow on Bloglovin
  • Bake
  • Baking
  • Coffee
  • Cuba
  • Food
  • LA Local
  • Life
  • Make
  • NY Local
  • Play
  • read
  • Sweets
  • Things
  • Travel
  • US City
Gallery Block
This is an example. To display your Instagram posts, double-click here to add an account or select an existing connected account. Learn more
Pellentesque Risus Ridiculus
<p>Vivamus pellentesque vitae neque at vestibulum. Donec efficitur mollis dui vel pharetra.</p>
Porta
Porta
<p>Praesent id libero id metus varius consectetur ac eget diam. Nulla felis nunc, consequat laoreet lacus id.</p>
Etiam Ultricies
Etiam Ultricies
<p>Donec id justo non metus auctor commodo ut quis enim. Mauris fringilla dolor vel condimentum imperdiet.</p>
Vulputate Commodo Ligula
<p>Commodo cursus magna, vel scelerisque nisl consectetur et. Donec id elit non mi porta gravida at eget metus.</p>
Elit Condimentum
Elit Condimentum
<p>Lorem ipsum dolor sit amet, consectetur adipiscing elit. Vestibulum id ligula porta felis euismod semper.</p>
Aenean eu leo Quam
Aenean eu leo Quam
<p>Quisque iaculis facilisis lacinia. Mauris euismod pellentesque tellus sit amet mollis.</p>
Cursus Amet
Cursus Amet
<p>Sed purus sem, scelerisque ac rhoncus eget, porttitor nec odio. Lorem ipsum dolor sit amet.</p>
Pellentesque Risus Ridiculus
<p>Vivamus pellentesque vitae neque at vestibulum. Donec efficitur mollis dui vel pharetra.</p>
Porta
Porta
<p>Praesent id libero id metus varius consectetur ac eget diam. Nulla felis nunc, consequat laoreet lacus id.</p>
Etiam Ultricies
Etiam Ultricies
<p>Donec id justo non metus auctor commodo ut quis enim. Mauris fringilla dolor vel condimentum imperdiet.</p>
Vulputate Commodo Ligula
<p>Commodo cursus magna, vel scelerisque nisl consectetur et. Donec id elit non mi porta gravida at eget metus.</p>
Elit Condimentum
Elit Condimentum
<p>Lorem ipsum dolor sit amet, consectetur adipiscing elit. Vestibulum id ligula porta felis euismod semper.</p>
Pellentesque Risus Ridiculus Porta Etiam Ultricies Vulputate Commodo Ligula Elit Condimentum Aenean eu leo Quam Cursus Amet Pellentesque Risus Ridiculus Porta Etiam Ultricies Vulputate Commodo Ligula Elit Condimentum
facebook

Powered by Squarespace. Content is for demonstration purposes only.